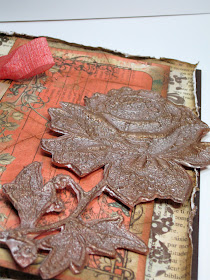
 I love old needlework and lace- but sometimes have a tendency to hoard the really pretty pieces, because I don't want to use them. I've found a way though, that I can use these antique pieces to make my own acrylic versions using Amazing Mold Putty and Amazing Casting Resin.
I have had this lovely needle lace flower for years - and just never had the project that I thought was worthy of using it. To make the lace ready to mold - I stiffened it using Helmar's Fabric Stiffener and Draping Liquid. I let it dry completely, and then started my mold. Although this is a very shallow mold, it still was a rather big one.

I rolled the putty flat, and pressed the flower into the putty, being careful to press all of the areas evenly.

You can see that the mold is very shallow. I poured the Amazing Casting Resin carefully. I still had some areas that "spilled" over into areas that I didn't want the resin, but I just let it dry, and trimmed the over-fill away with scissors.
 I painted my "lace" with Creative Inspirations Paint in beige, to give it an antique textile look. Now I can make the piece over and over again, and never have to worry about running out. Don't you love how much of the stitch detail you can see from the mold? It really is amazing!
No comments:
Post a Comment