If you are ready for a ton of inspiring ideas and fun new techniques to try, then you are going to want to check out all of the projects from the talented
Crafty Secrets DT! We are introducing 15 new sets for CHA - and they are all must haves! If you would like to find out how I made this card, please see my tutorial below.

Step 1: Cut four squares of cardboard 2.25 x 2.25

Step 2: Paint the board with black paint. Try to leave texture in the paint.

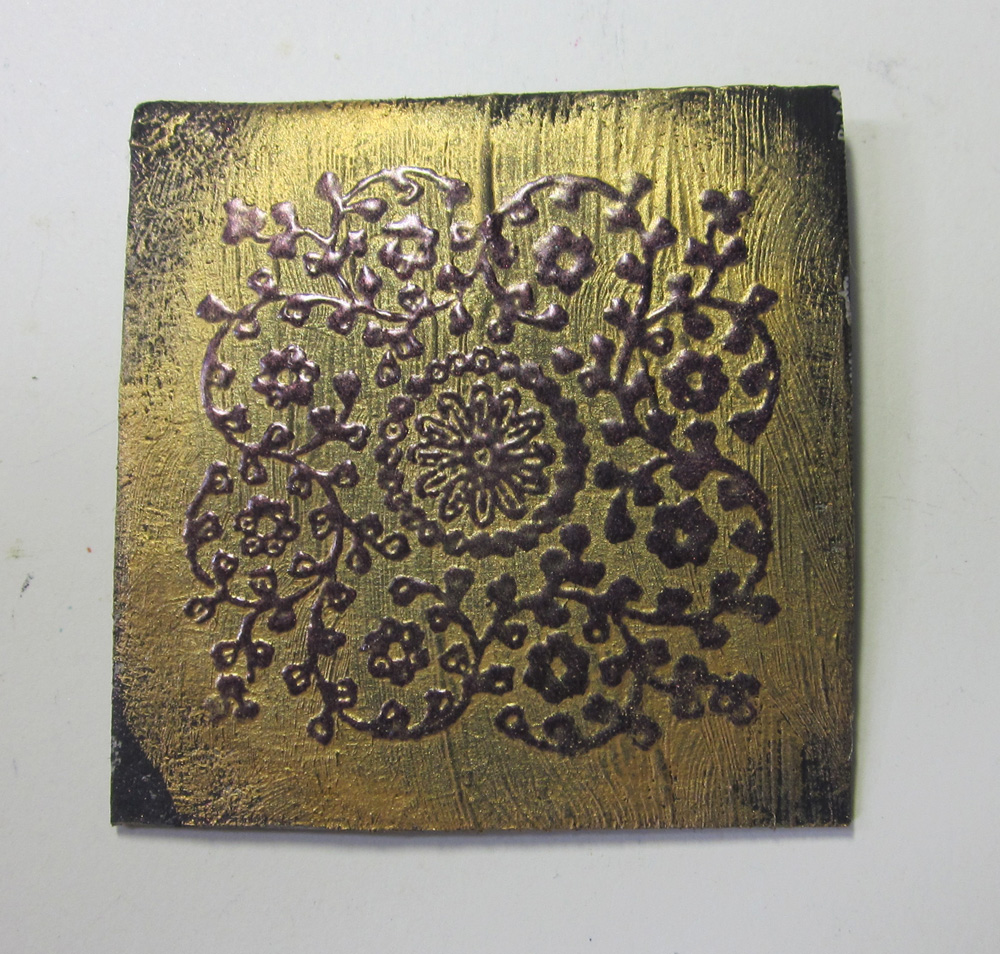
Step 3: Stamp each block with a different image from
SM42 Lacey Patterns using Versamark ink. It's really easy to line the stamps up in the center of the square since the stamps are clear.

Step 4: Emboss with amethyst embossing powder and heat set.

Step 5: Rub over the image using Viva Decor Inka Gold. Take a damp paper towel and rub off the gold from the embossed area.

Step 6: Add some thick tacky glue to your non-stick mat and water it down.

Step 7: Add a little around the edge of each tile, and sprinkle with glitter.

Step 8: For my patterned paper, I print one of the PNG files from our new CD,
Creating with Vintage Patterns, at 5.75 x 5.75 inches onto Bazzill cardstock.
For the rest of the card, I colored and cut out the fairy from
SL41 Born To Fly . I used Viva Decor Inka Gold to color the
Embossed Frame. The small
epoxy squares were made using the
Mini Vintage Creative Scraps. Those scraps are so pretty, I had to force myself to cut into them! I also trimmed out the edges of the card using the
Metallic Peel Off Stickers Gold Scallop and Dot Mini Trim. A few pearls, some seam binding and a vintage button, and this card was completed.

I know you are going to want to see what the rest of the design team came up with, so here's a list of everyone, so you can check it out! Keep your notepad handy, cause I'm sure you are going to want to start your shopping list! So when you finish, you can head to the
Crafty Secrets website and get some Crafty Secrets goodies delivered to you! And to make sure you don't miss anything, why not subscribe to the
Heartwarming Vintage Blog? There's always lots of inspiration, announcements and giveaways.
Challenges:
Simon Says: Anything Goes
Creatalicious: 1920's
Simon Says Stamp and Show: embossing
Simply Scrapping Crafts: Embossing