Wednesday, February 28, 2018

Taking Time


Hello my bloggy friends! Yes, I've been MIA! While I've been chasing a toddler around the house, I've realized how much I miss and need to be creative (at least some time!). So I'm back to share the latest piece I've been working on. I've incorporated some techniques I learned from a workshop from Tonja Sell along with some fabulous StencilGirl stencils. I'm learning to use pastel pencils as well - and all I can say, is this is really fun.
I began the background not knowing what focal image I might find hidden in the patterns, and was excited to spot the hint of a face and hair.

I'm really looking forward to exploring these ideas further!

Friday, March 31, 2017

Heartfelt Creations Alumni DT Hop March


Welcome, to the March Edition of the Heartfelt Creations Alumni Blog hop! The hop runs now through Monday, April 3rd at 11:59 pm.  And one lucky commenter, chosen from one of the stops on the blog hop, will win a $25 gift certificate to HC.  How great is that?  You get to hop around and see some wonderful projects, plus have the chance to win some goodies of your own! 


Here is the lineup for the hop!

Directions:
1. Cut a card base 6 x6" from pale pink cardstock.
2.  Cut the patterned paper panels from the Enchanted Mum Paper Collection.  Ink the edges of all of the panels. Adhere to the card base.  For the "Hope" panel, adhere it with foam dots to add dimension.
3. Cut the decorative border for the top of the card combing dies from the Regal Borders and Pockets die set and the Delicate Borders Basics Die set. Adhere to the top of the card.  Add ribbon and bow at the top fold of the card.
4. Stamp and cut the flowers using the Classic Rose Stamp and coordinating die. Ink the flower to color and shape with the Deluxe Flower Shaping kit. Add highlights on the flower with ultra fine glitter.
5.  Arrange the flowers and leaves on the card to finish.

Friday, February 24, 2017

Heartfelt Creations Alumni Blog Hop - February


Welcome, to the February Edition of the Heartfelt Creations Alumni Blog hop! The hop runs now through Monday, February 27th at 11:59 pm.  And one lucky commenter, chosen from one of the stops on the blog hop, will win a $25 gift certificate to HC.  How great is that?  You get to hop around and see some wonderful projects, plus have the chance to win some goodies of your own! 

Here's the lineup:


Directions:
1. Cut a card base for a 6 x6" card from white cardstock.
2.  Cut patterned paper panels for the card front, from the All Glammed Up Paper Collection. Trace areas of the patterned paper using the Art Institute Dries Clear Glue with the metal tip and sprinkle with ultra fine glitter. Add ribbon before adhering to the base.
3. Use the Every Day Heroes die set to cut the design for the sentiment to be stamped. Stamp the sentiment from Soar on Eagle's Wings set.  Adhere to the card with foam dots.
4. Stamp and cut the Sunrise Lily with the matching die set, using the Sunrise Lily paper pad. Add color highlights to the flowers using Pan Pastels.  Shape using the Deluxe Flower Shaping Kit.
5. Add ultra fine glitter highlights to the flower centers. Glue prills to the tips of the flower stamens.
6.  Arrange flowers on card and glue in place. Tie a bow with matching ribbon and glue below sentiment to finish.

Thanks for stopping by!

Wednesday, February 15, 2017

My Heart Is Full


Hello, hello Creative Peeps! You may have noticed I've been a bit MIA on my blog, but as you can see in my layout, I've been busy with my precious little bundle! So, I'm back and happy to share this layout with you! 
 

Since I hadn't made any flowers in awhile, I figured I need a bunch of them (plus, I'm really ready for spring).


Directions:
1. Cut patterned paper 11 x 11.  Distress and ink the edges. Adhere to 12 x 12 patterned paper, whose edges have been inked and distressed.
2.  Layer a piece of corrugate behind where the photo will go.  Spray with mist to color before it is glued down.
3.  Use texture paste and argyle stencil over Dusty Attic Chip. While the paste is still wet, sprinkle with embossing powder.  Allow to dry, then heat emboss. Spray with color mist while the embossing powder is still hot. Mist the chipboard title.
4.  Arrange chipboard, paper panels, photo  and ribbons on the layout as shown.
5.  Stamp Heartfelt Creations Wildwood Florals on white cardstock. Cut with the matching die. Use a sponge dauber to apply color to the images. Shape with the Deluxe Flower Shaping Tool.  Glue prills to the centers of the flowers and arrange on layout.

Thanks for coming back to my blog!

I played along with the Dusty Attic sketch/inspiration this month. You can check it out here, if you would like to play along.

Tuesday, June 28, 2016

Heartfelt Creations Alumni DT Blog Hop June

Welcome, to the June Edition of the Heartfelt Creations Alumni Blog hop! The hop runs now through Friday night - at midnight.  And one lucky commenter, chosen from one of the stops on the blog hop, will win a $25 gift certificate to HC.  How great is that?  You get to hop around and see some wonderful projects, plus have the chance to win some goodies of your own!  The winner will be announced on Saturday, July 2nd, and will have 72 hours to claim their prize.


I'm not an expert with watercolors, but they are so fun to play with - I decided to try them using the large Fuchsia Bouquet stamp. I paired it up with some paper from the Enchanted Mum collection to pull in the purples that I used for the flowers. Easy- peasy!

Thursday, June 23, 2016

Verity Rose - Arriving at Crafter's Companion Soon!


How adorable is this? The Verity Rose collection is quirky and fun with a vintage flair.  You will be seeing these next week on the Crafter's Companion website.  There is a great range including stamps, dies, embossing folders, papers, embellishments, and even a Verity Rose Coloring Pad (That's where my image is from - eeeek!)


Supplies:
Verity Rose Coloring Pad;
Verity Rose 6 x 6 Luxury Paper Pad;
Verity Rose metal dies: Doily, Official Frame, Lace Edge;
Verity Rose Lace Ribbon Pack;

Tuesday, June 14, 2016

World's Best Dad


This weekend is Father's Day, here in the States - so I thought it was the perfect time to share this cool card for the occasion, using Sara Davies' new signature collection, Just for Men.  After I die cut the gears, I used embossing powder to create the look of rusty metal.  (It's an easy thing to do to add a ton of texture!)

Supplies:
Sara Davies Just for Men Collection: 6x6 Paper Pad Urban Collection; Embossing Folder- Time Piece; Decorative Metal Dies: Male Sentiments; Cogs and Gears

Monday, June 6, 2016

Just for Men Collection Launch From Crafter's Companion!


Just in time for Father's Day! Sara Davies has released her newest signature collection, Just For Men! It's a fun collection for the guys in your life that includes stamps, dies, embossing folders  and paper collections.  I really enjoy adding distressed layers to masculine projects - I think it adds that needed edge.

Supplies:
Sara Davies Just for Men Collection:
 Decorative Metal Dies: Superstars; Rock On
 Photopolymer Stamp Sets: Rock Star; Street Wise

Tuesday, May 31, 2016

Heartfelt Creations Alumni Blog Hop for May

 Welcome, to the May Edition of the Heartfelt Creations Alumni Blog hop! The hop runs now through Friday night - at midnight.  And one lucky commenter, chosen from one of the stops on the blog hop, will win a $25 gift certificate to HC.  How great is that?  You get to hop around and see some wonderful projects, plus have the chance to win some goodies of your own!  The winner will be announced on Saturday, June 4th, and will have 72 hours to claim their prize.
 I combined elements from several different collections for this bright and beautiful card.  The flowers were created with the Sunrise Lilly collection, the paper is from the Under the Sea collection and the focal die is an oldie but goodie from Raindrops on Roses.
 Hop Order

Thursday, May 26, 2016

New Collection from Sheena is Beauty Bursting Through


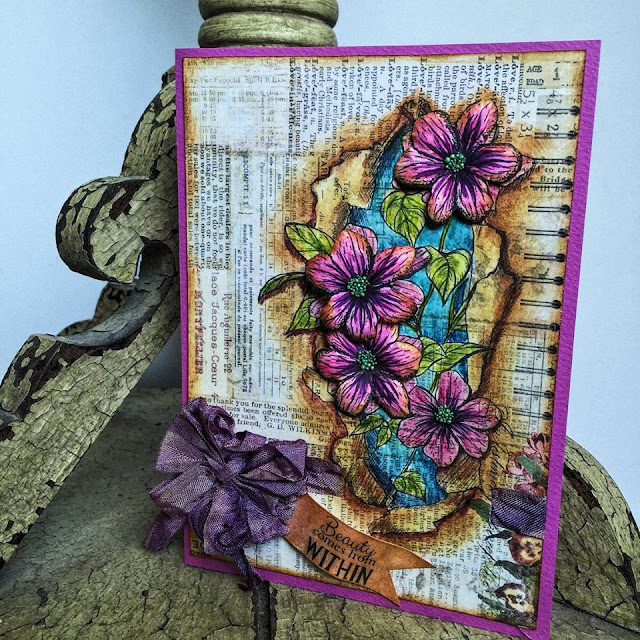
Sheena has been at it again and had designed these fun stamps that will be bursting through your projects! They are available now at Crafters Companion US.  I added extra dimension to my Clematis flowers by stamping extra images, cutting them, shaping them and adding to the base image with foam adhesives.

Supplies:
          Sheena A Little Bit Sketchy Clematis, Cherry Blossom
                                    Spectrum Noir AquaBlend Watercolour Pencils: Grapefruit, Carmine,
                  Deep Blue, Aegean Blue, Oregano, Kiwi, Sorrel, Brunette
           Spectrum Noir Sparkle - Fig