Saturday, June 2, 2012

Using Ribbons In Mixed Media Pieces


I love using ribbons - in fact, most of my projects are going to have ribbon somewhere on them. But, today, I've got a fun new way to add ribbons to your mixed media projects.

I found this paper mache box at a local craft store and loved the shape of it.  I spray painted it a pretty turqouise blue, but it was way too shiny, and just not the right base for what I had in mind. So, I decided it was time to pull out all of my mixed media goodies and go to work.

I went through my ribbon stash and found some very textured ribbons.  It doesn't matter that they clash with each other, because they are going to be covered over. I used May Arts Leaves, May Arts Sheer Woven Rosettes, and May Arts Metallic Crochet.


I used Modeling Paste and stencils, and added the first layer of texture.  After this, I added some die cuts as well. I spritzed the whole box with Smooch Spray, to give my color depth and added my ribbons.


Looks pretty scary right now, huh?


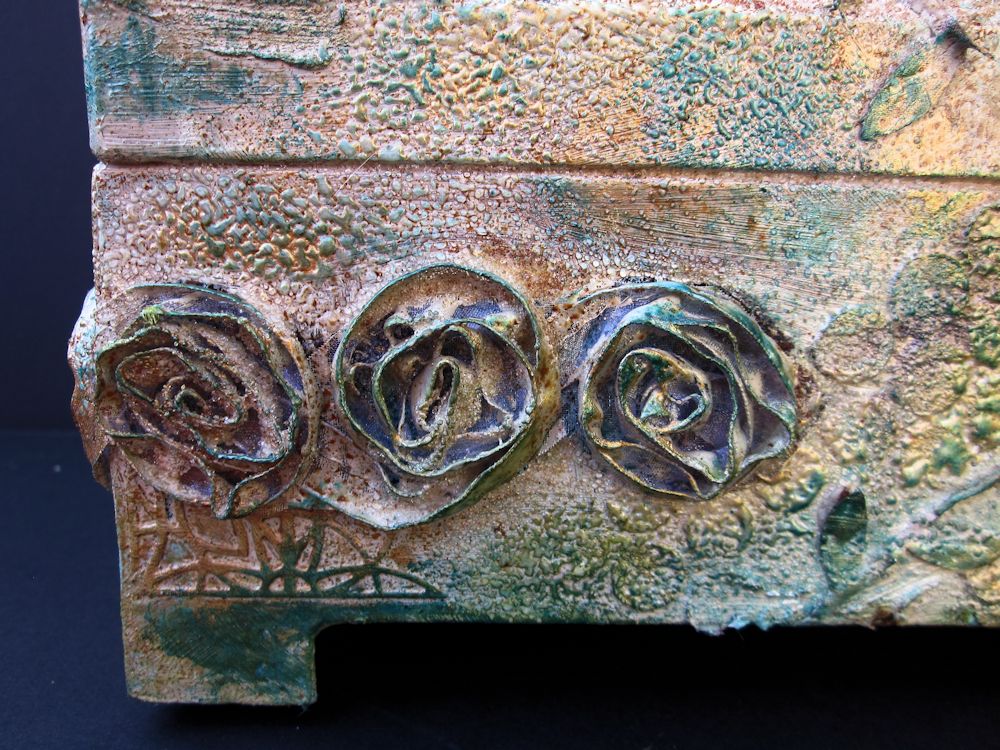
I painted over the entire thing with some inexpensive acrylic paint, letting little bits of my colors show through.  While the paint was wet, I sprinkled Wow Clear Gloss Ultra High embossing powder over it, and heat embossed. It added so much wonderful texture! Some of the ribbons (especially the organza flowers), reacted to the heat gun.  This just added more interest to the piece.


I rubbed Viva Decor Gold over some of the raised areas, sponged on more Smooch Spritz, and ended up with a very layered piece.


Challenges:
Simon Says: Anything Goes

Tuesday, May 29, 2012

Tropical Travelogue Card with Hampton Art


Did Memorial Day Weekend get you in the mood for summer? I know I am - so my card that I have to share with you today has a perfect tropical mood too! Hampton Art makes the most wonderful stamps that coordinate with Graphic 45 papers - and this is one of the latest...Tropical Travelogue.  Now, I just need to find my tropical getaway!


Hampton Art Stamps:  Graphic 45 Tropical Travelogue 2  IC0134

Clearsnap:

Donna Salazar Mix’d Media Ink: Honey, Jasmine

Colorbox Pigment Ink: Aqua

Colorbox Archival Dye: Pinkolicious, Tree Frog

Smooch: Pearlized Top Coat
Graphic 45 papers: Tropical Travelogue

Worldwin Cardstock

Spellbinders Dies: Creative Book Pages 2

Robin’s Nest Dew Drops

Tools: Spellbinder’s Grand Calibur

Adhesives: GlueArts Glue Glider Pro – Perma Tac; U Cut It Dimensional Adhesive


Designer Notes:

1.      Stamp the Flamingo image using the Pinkolicious and heat set.

2.      Shade the background with a sponge dauber using Aqua. Tone it down by adding a bit of Honey and Jasmine.

3.      Color the bird with Copic markers and then add the Smooch Pearlized Top Coat to highlight.

4.      Ink the edges with Tree Frog.

5.      Stamp the Postmark image using the Pinkolicious and cut it out.

6.      Use the Pinkolicious to ink the edges of lighter colored patterned papers.

7.      Ink all pieces of patterned paper using the Dark Brown.


Monday, May 28, 2012

Felt Flowers Tutorial with Cheery Lynn Designs Dies


You know making flowers is one of my favorite techniques - but they don't always have to be made from paper.  Today I have a tutorial to share with you to use your Cheery Lynn Designs Dies and felt to create gorgeous blooms.  And, these flowers don't have to stay just on your paper projects.  Imagine these on your favorite sweater, a cute summer straw hat or purse.  The ideas are endless!

So, let's get started!

Grab some felt (I used  wool felt, but feel free to use the acrylic felt found at any craft store). In order to get a nice clean cut, place a piece of cardstock, then your fabric, then your die.  Having the paper under the felt gives the die a little more "tooth" to cut.  I used the Large, Medium and Miniature Rose dies for my flower.  I also placed my die to the far left of my cutting plates, because I've found on my machine, this is the area with the most pressure.


Cut 2 Large, 2 Medium, and 1 Miniature Rose for each flower.


Instead of stitching through the whole flower stack at a time, add one layer at a time, and stitch with a cross stitch, to secure the petals adjacent to each other.


Continue adding layers, one at a time, until the stack is complete.  I sewed seed beads, one at a time for my center, but you could also add French knots, or other decorative embroidery stitches. 


For the bud, I just took one of the large roses, and stitched the petals together, and then added a green felt calyx around the petals.

I'd love to see your projects that you create using these techniques!  The new challenge is also up - For the Grad - so get those projects in for your chance to win a $20 gift certificate!

Cheery Lynn Designs Dies
Patterned Paper, Crate
Cardstock, Worldwin Papers
Ink, Ranger - Distress

Challenges:
Catered Crop: Felt