Showing posts with label altered. Show all posts

Monday, October 20, 2014

A Thing of Beauty...Core'Dinations, Xyron and Petaloo Week

AThingOfBeauty
Hello again, fellow Core lovers! It's Gini, and today I have an upcycling project to share with you, using some of my favorite products. With a little help from Core'dinations, Xyron and Petaloo, I was able to transform a lowly Pringles Chip container into a dispenser for cosmetic cotton rounds.

 A Thing of Beauty Supply List

product

Step 1. Measure around your container and cut paper to fit.  
Step 2. Draw a template for your opening on scrap cardstock. Cut in the center of the paper as well as the canister.

Cut Outs
   
Step 3. Stamp decorative border at the top and bottom of the paper with watermark ink. Heat emboss with gold powder. Tip: Sometimes metallic embossing powders leave a residue. Use the Dust Buddy after embossing to remove this powder.
DustBuddy
CreativeStation
  Step 4. Run the paper through the Creative Station machine to apply adhesive. Carefully adhere to the canister, lining up the openings.
 Step 5. Ink the back of the vellum quote with metallic gold. Die cut a frame using the Glitter Silk cardstock.

Label
  Step 6. Use the small tape runner to apply adhesive to the back of the frame. Center quote and trim the excess.
vellum
  Step 7. Cut a circle to match the top of the canister. Add trim around the top and bottom of the canister and lid to hide the raw edges.
 Step 8. Spritz the flowers with gold and let dry.
 Step 9. Add the embellishments to the canister to finish as shown.
sentiment
top
So remember, look at your empty containers with a creative eye, before you take out your trash! See you soon.
~Gini
Thursday, October 4, 2012

May Arts and Stampendous Week

This week the May Arts Ribbonistas have teamed up with the design team from Stampendous, to share with you tons of fun projects.  My project is up on the blog today - it's a fun birdhouse giftbox. All of the details are at the May Arts Blog.While you are there, take a look at all of the other projects for the week (and be sure to leave plenty of comments for your chance to win a fantastic prize package!)

Monday, July 9, 2012

Build-A-Box with Scor-Pal and Really Reasonable Ribbon

Today I will be sharing my project that was featured on the Scor-pal blog as part of this week's Scor-pal and Really Reasonable Ribbon blog week. Of course, if you missed this project or any of the other great projects from the Scor-pal team you'll want to hop on over there and see what's been going on this week. Be sure to leave comments on each post from this week for a chance to win some great prizes. Entry deadline in 8am Monday, July 16, so there's still time.


This week Scor-pal has teamed up with the DT from Really Reasonable Ribbons - so I hope you will enjoy all of the inspiration we have to share! I love all of the Printer's Tray type boxes that are so popular right now, and thought I would show you how to build your own using your Scor-pal and Scor-tape.


The trick that I found for creating my Build-A-Box is to use an existing box as your template.  As you make each mini box, you will line it up using the template as your guide to keep everything squared.  This box had an inside measurement of 12.5" x 12.5" x 2".  I decided to keep the 2" depth for my boxes.


Just like working a puzzle, I planned how big I wanted each of my boxes, and arranged them in a pleasing manner.  In the example shown above, my patterned paper was 8" x 5".  I added 2" to each side of the cardstock - so it was 12" x 9".  I scored the cardstock with a 2" border all around (In other words, with the long side along the top gate, score at 2" and 10".  Turn a quarter turn and score at 2" and 7").  Cut tabs by cutting each of the horizontal folds, just even with the vertical fold.

Add patterned paper for the inside of each box, then use Score-Tape to glue the tabs and form your box.

Continue building boxes, and lining them up in the template box.  As you build the puzzle, secure the pieces together with Scor-tape. After all sections are built and connected, remove from the base box.  You are now ready to embellish.


I bought a child's flip flop and covered it with patterned paper.  I cut a circle from a Scor-Tape sheet and used that to form a rosette using May Arts Ribbon - Sheer Box Pleats (Parrot Green). I removed the paper backing and attached the ribbon in a circular pattern to form my flower.


I used the Sheer Organza Satin Center (Turquoise) to add some little banners to my Relax square.


To cover the seams of my boxes, I lined them with ribbons.  The Satin/Grosgrain Double Band Coral worked very well. because it was easy to tell where to fold the ribbon in half. The Scor-tape made it super easy to attach.


I hope you will give this a try - and have fun collecting all of your trinkets!

Thursday, July 5, 2012

Popcorn! Popcorn!


I saw the cutest popcorn popper on Pinterest, and was inspired to make this gift container.  This popcorn cart turned out pretty big ( 11" h x 8"w x 7"d) - so, I was popping corn all afternoon!


I made paper rosettes for my wheels as well as my central decoration.  I used JustRite Stampers Cling Classic Lace Edges Two to stamp and emboss my scalloped border.


There are so many fun things arriving at Scrap-Mart everyday, so get your shopping list ready!


DCWV - Carnival Stack
WorldWin Papers  Cardstock
May Arts Ribbon
Wow Embossing Powder - Suzy West Bubblegum
Scor-pal
Scor-tape

Challenges;
JustRite Friday Challenges: Stars and Stripes


Monday, July 2, 2012

It's a Party!

This weekend was my sister's birthday, and I just wanted to invite you to join me for a little peek into the party decor I created.


This is a collage photo to give you a better feel for the whole party atmosphere. I used DCWV's Lemon Flower Stack, and repeating elements (Judy's Blooms) to create continuity throughout my decor.


Every party has to start with an invitation.  I used flowers created with Cheery Lynn Designs Judy's Blooms. My sentiment layer is framed with the French Lattice Large. Behind that layer is the Oval Doliy Stacker One.  A scalloped border was added along the bottom patterned paper panel using the Tiffany Border.


For my cupcake tower, I created pennant flags for the toppers, and one showy rosette for the top cupcake.  I bought  lollipop sticks from the baking section of a craft store, and used those to glue the toppers.  On the pennants, I used the Cheery Lynn Designs Pennant Die and cut it apart, leaving pairs of triangles.  Then, I folded the pair in half, over the lollipop stick, and glued the two sides together.  This made my decoration cute from either side.  I used the Miniature rose and a pearl to finish each one off. The top rosette was embellished with a flower and greenery from Judy's Blooms and the Mini Fanciful Flourish.

My chalkboard was so easy to make! I took a wooden frame, and covered it with my patterned paper, and then used the DCWV All Chalked Up paper, and just glued it into the opening.  I added more Judy's Blooms flowers, and the Pair of Ferns for my greenery.


A couple of years ago, I bought a party centerpiece from Target, that coordinated with their current line of paper plates.  It was so easy to transform this "vase" to match my new decor, by just covering the pieces with my patterned paper, adding some May Arts ribbon, and more Judy's Blooms flowers and leaves.


My placesetting was finished off with a placemat from the Mega Tea Party Die and napkin rings made with the Judy's Blooms.


I hope I have given you some inspiration on new ways to use some of your favorite dies! If you throw a party, don't forget to invite me!

The new challenge this week in Christmas in July - be sure to play along for your chance to win a $20 gift certificate to Cheery Lynn Designs!

Saturday, June 16, 2012

Wow! Powder Puff Girls Blog Hop

Hi! and welcome to the Powder Puff Girls Blog Hop for Wow! Embossing Powders.  This month it is our team's turn to host the hop, and we have lots of fun things for you to see along the way.  You should have arrived from Birgit's blog - if not, you will want to start at the Wow Blog, so you don't miss anything.  Be sure to leave comments along the way for your chance to win some of our awesome embossing powders and more.

Since everyone is getting into the full swing of summer, here in the United States, I thought I would share this altered frame, with one of my favorite beach pictures of my husband and me.

The chipboard chair, umbrella and sentiment are from Twiddleybitz, and I embossed them using some of my favorite Suzy West colors - Cotton Candy,  Bubblegum and Earthtone Pepper.


To make the polka dots on the umbrella, I added mini glue dots over the already heated blue base, then sprinkled pink over the glue dots and embossed.  It's really a quick and easy was to create dots on your projects.

It's time to hop on  to Jan's blog and see what she has cooked up for you!  You've got a week to get your comments in . Have a great weekend!


WOW blog http://www.wowembossingpowders.blogspot.com/
Gina http://canoncreativegirl.blogspot.com/
Birgit http://birgitkoopsen.typepad.com/
Gini http://www.ginicagle.blogspot.com/ You are here
Jan http://papercraftpleasures.blogspot.com/
Jennifer http://tennisgirl27.blogspot.com/
Katarina http://krumeluran.wordpress.com/
Patti http://www.mypiecesoftime.blogspot.com/
WOW blog http://www.wowembossingpowders.blogspot.com/

Thursday, June 7, 2012

Wow! What a Cute Gift


Recently, I saw the cutest altered mason jars on Pinterest.  Someone had glued real doilys on the outside of them.  This got me thinking of a way to create something similar, without having the bulk of a real doily. 


So, I die cut a doily using my Cheery Lynn Nautical Wheeler Doily die and adhesive vinyl.  I stuck this to my jar, to use as a mask.  Next, I took my Versamark pad, and inked over the doily.  I sprinkled Wow Opaque Bright White Embossing Powder liberally over this, and heat set it. 

Now, there are a couple of things to be aware of when trying this technique...First - the glass will get very hot. So make sure, you have it sitting on a surface - don't try to hold it.  Also, areas if the vinyl will curl up. Don't worry, your embossing powder will stay stay exactly where you want it to.


After all of the embossing powder is melted, just peel off the stencil, and decorate with ribbons and flowers. 

Saturday, June 2, 2012

Using Ribbons In Mixed Media Pieces


I love using ribbons - in fact, most of my projects are going to have ribbon somewhere on them. But, today, I've got a fun new way to add ribbons to your mixed media projects.

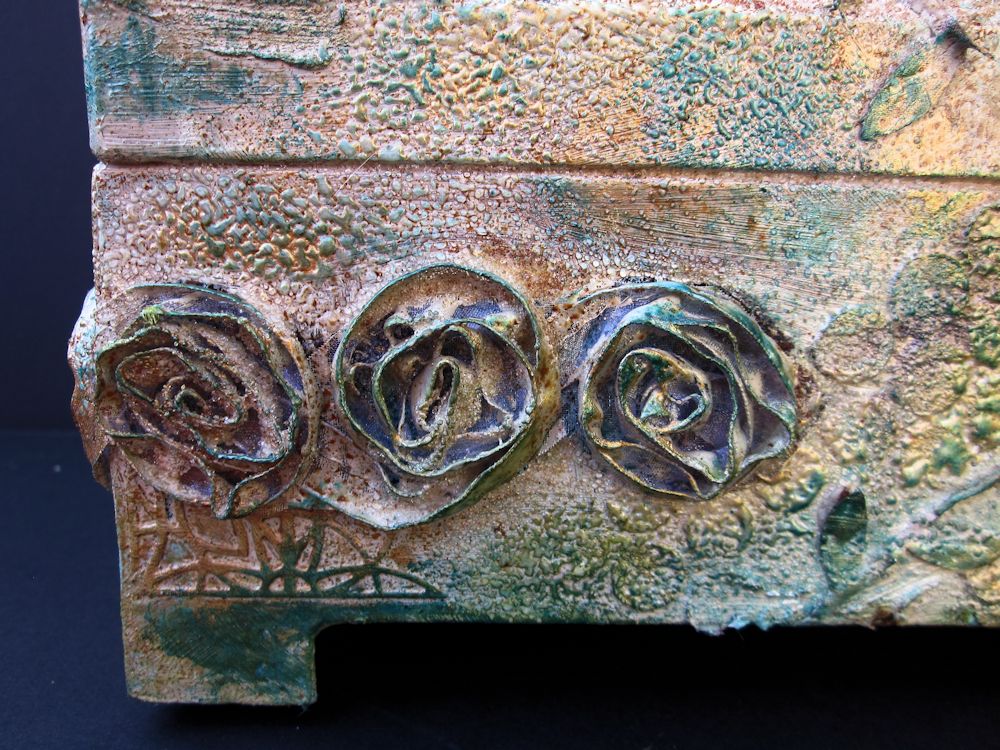
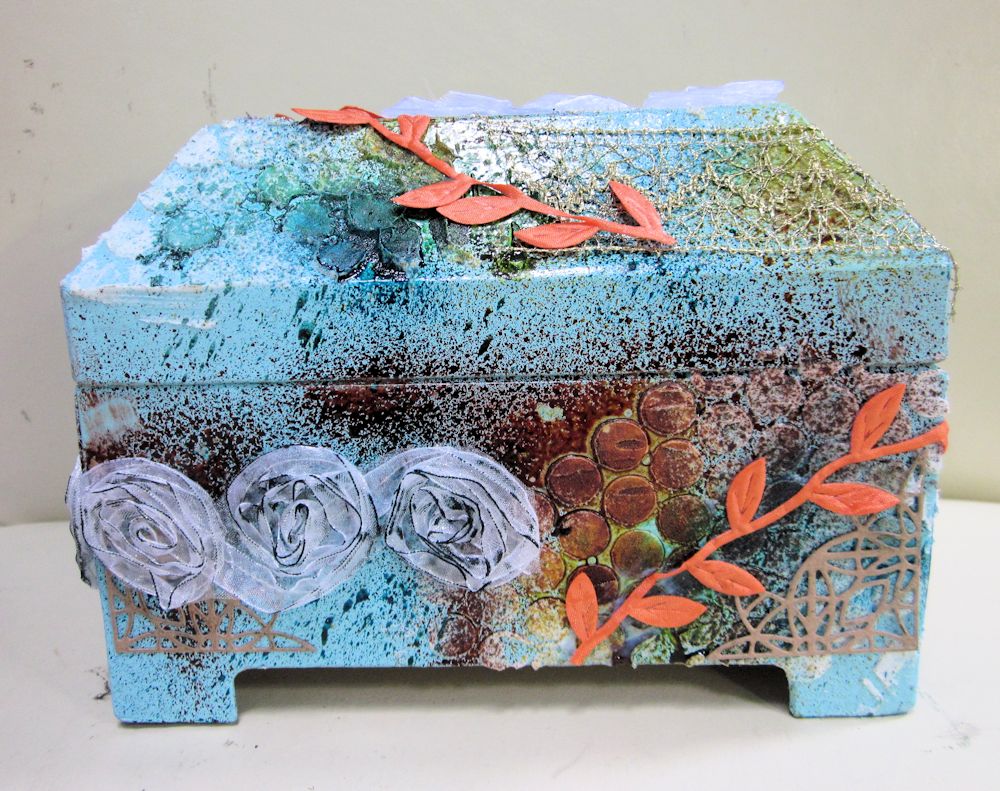
I found this paper mache box at a local craft store and loved the shape of it.  I spray painted it a pretty turqouise blue, but it was way too shiny, and just not the right base for what I had in mind. So, I decided it was time to pull out all of my mixed media goodies and go to work.

I went through my ribbon stash and found some very textured ribbons.  It doesn't matter that they clash with each other, because they are going to be covered over. I used May Arts Leaves, May Arts Sheer Woven Rosettes, and May Arts Metallic Crochet.


I used Modeling Paste and stencils, and added the first layer of texture.  After this, I added some die cuts as well. I spritzed the whole box with Smooch Spray, to give my color depth and added my ribbons.


Looks pretty scary right now, huh?


I painted over the entire thing with some inexpensive acrylic paint, letting little bits of my colors show through.  While the paint was wet, I sprinkled Wow Clear Gloss Ultra High embossing powder over it, and heat embossed. It added so much wonderful texture! Some of the ribbons (especially the organza flowers), reacted to the heat gun.  This just added more interest to the piece.


I rubbed Viva Decor Gold over some of the raised areas, sponged on more Smooch Spritz, and ended up with a very layered piece.


Challenges:
Simon Says: Anything Goes

Wednesday, April 13, 2011

My Core’dinations Creative Frenzy

I won some Core'dinations Cardstock several years ago - and since then, I've been hooked. I love all of the cool techniques you can do, and it's even more fun trying to come up with new ideas. So, I'd love to share with you some projects that I made using this versatile paper.


1. Love Wall Hanging: This is a large wall piece - Each wood frame is 10" square - without any embellishments.

I drew the patterns for my flowers and hand cut them , and shaped them. The Core'dinations is perfect to manipulate and really make the flowers life-like. I sprayed Helmar's Vellum adhesive on the pond lily and sprinkled it with glitter to give it shimmer like drops of water.


For my lily pad, I made my own embossing folder to match the pattern of the leaf, and embossed and sanded it.

The letters were a really heavy chipboard that I covered with the crumpled cardstock that was then sanded. I also used the Cosmo Cricket/Core 'dinations embossed paper to line the back of the shadow box frame.


I used the Melody Ross Chip Art tools to deboss my flower name onto chipboard tiles.


Then, I used a dymo label maker with the Core'dinations to stamp out the Latin name of each flower.


For the Easter Lily, I painted the paper white. It's such a nice, heavy paper, it held up great for this technique.


2. Imagine is a layout I created and got to use many of my favorite distressing techniques. I tore some of my edges, sanded, inked the embossed areas. I used Helmar's PVA glue to stamp butterflies from Layers of Color Art Stamps. I let this dry, and then misted the paper with Glimmer Mist.The flowers are made from Ralph Lauren fabric that was stiffened with Helmar's Fabric Stiffener.The leaves were stamped using a Heartfelt Creations stamp, and then torn. My title was cut from Cricut (this paper cuts like a dream ).


3. School Days Mini Book - I really love the vintage feel of this chalkboard effect paper from the Cosmo Cricket/Core'dinations line. The letters were also from a page in this collection, I just cut them out and glued them to the chalkboard. The image is a stamp from Pink Persimmon - I just colored her skintones with Copics, and the rest of her was paper pieced and layered.


Thanks so much for looking!

Challenges:
Simon Says Stamp and Show: Distressing