Saturday, June 8, 2013

Round One May Arts Ribbon Design Team


 I love, love, love being on the May Arts Design Team! It has been a wonderful year - It's been so delightful playing with the most beautiful ribbons in the world.  So of course, I want to try for a second year! To see more of my projects that I've designed with May Arts, please click here - be ready to see a ton of projects!

My first project is an altered junk store cabinet.  This baby is loaded up with May Arts ribbons, and I'm going to show you how to make the French Memo Boards that I used on the interior of my cabinet doors. Click here for the  directions. I know you've seen these for home decor, but there's no reason not to add them to your paper crafting projects.

On the exterior of the cabinet, I added a large bow made from 
Faux Wired Burlp 445-15-16 .  It helped to add some height and interest to the top.


Along the bottom border, I used an X-acto blade to cut slits, to run my PV17 Velvet Ribbon through.


Here's a close up of the French Memo Board.  I used the 1/2" Solid/Wrinkled Ribbon EA16 for the weave.


One of the projects tucked into the cabinet is this sweet little card.  The 3/8" Metallic/ Iridescent/Wired Ribbon (GC04) is one of my favorites for adding fancy bows to my cards.  You can shape the tail ends so pretty with the wired ribbon - and it looks spectacular!  And for the tags, in the background, I used the Paper Cord 420-09 (another one of my favorites!) , to hang the tags.


Project #2 - This was a card I made earlier in the year - but when I see this gorgeous Grosgrain Ivory Striped ribbon ruffled on the front - it just makes me smile.  The ribbon treatment was completed with Paper Cord running through the center and tying a bow with  a striped button.

Project #3 - This was a birdhouse that I created for a May Arts/ Stampendous Hop.  It's one of my favorites, and I thought I would share it again with you today.  It combines 7/8" Crochet ribbon, Burlap Cord and Grosgrain with Stitched edge ribbon. 
  
 These are just a few extras, I thought I would share with you.

This was a canvas created for Winter CHA - that uses May Arts Silk and Velvet Ribbons.

  
This is my Popcorn! Popcorn! Project - one of my most popular projects ever.  It uses the Satin/Reversible Ribbon.


Finally, I love adding ribbons to my layouts - it adds great texture and dimension.


Thanks for looking! And thanks to Bethney, my favorite Ribbon Lady, for giving me such an incredible opportunity this past year. Keeping my fingers crossed for another year of ribbon bliss!

Friday, June 7, 2013

Where Does Your Inspiration Come From?

I think that creative people are always inspired by everything they come into contact with.  I know I certainly am.  When I looked at the gorgeous flowers on this patterned paper, I wanted to see if  I could recreate one with my dies and paper.


It's really fun to get creative in your paper gardens, and see what you can come up with combining the dies.


Thursday, June 6, 2013

Xyron and Gel-a-tins Bookmark Tutorial


I know so many of us really love our electronic readers, but there is still something so comforting about actually holding a book in your hands.  So for all of those people who still enjoy turning pages, how about a quick and easy denim bookmark.  When I received the Super Star stamp set from Gel-a-tins, a red, white and blue theme came to mind.

Directions:
1.  Stamp the images using pigment ink onto canvas cloth.  Cut out the shapes.


2.  Run the canvas shapes through the Xyron Creatopia using the Fabric Adhesive cartridge.


3.  Cut a bookmark from an old pair of jeans, apply the stars.
4. Machine stitch around the stars using dark blue thread.
5.  Finish with a denim bow.

Supplies
Canvas, Denim Fabric
Clearsnap Mix'd Media Inx - School House Red

Wednesday, June 5, 2013

May Arts is Hopping with Stampendous and Core'Dinations!

All this week May Arts is hopping along with Stampendous and Core'Dinations!  Isn't that a fun matchup?
I love how big the Stampendous stamps are! So layered with some of the great Core'dinations papers and my favorite May Arts ribbon - this is what I came up with.


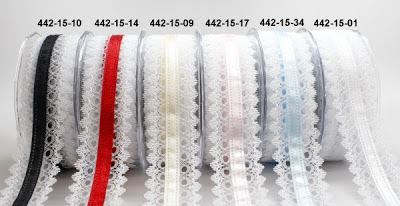
I stamped the hollyhocks and fussy cut the image.  I just used some chalk ink  and a sponge dauber to add the color to my image.  I used the new satin and lace ribbon across the card, and also edging down the side (although that strip doesn't show up so well on this picture).  I distressed the Core'dinations and die cut the Glitter Silk cardstock.

May Arts Ribbons Used


Partners in Craft Supplies Used:
Stampendous: Jumbo Hollyhock 


Other Supplies Used:
Xyron Mega Runner, Creatopia
Clearsnap Ink


Here's a lineup  of the Ribbonistas that are hopping this week. To see the other designers participating, please visit the Core'Dinations Blog and the Stampendous Blog each day this week.
Monday:
Tuesday:
Wednesday:
Thurdsday:
Friday:

Heartfelt Creations Inspiration

It's Wednesday - so another day of inspiration with Heartfelt Creations!  I stamped my flowers today using Ultra High Embossing Powders, which really gave them some great dimension.


Cheery Lynn Designs Products
Sun Kissed Paper Collection HCDP1 233
Striped Sun Kissed Fleur PreCut Set HCPC 3534
Sun Kissed Tags and Basket PreCut Set HCPC 3535
Classic Message PreCut Set HCPC 3354
Sunkissed Fleur Die HCD 734
Layered Scalloped Posy Die HCD 717

Other:
WorldWin Papers Cardstock, Vellum
May Arts Ribbon
Want2Scrap Pearls
Wow Embossing Powder Ultra High Gold
Clearsnap Ink
Xyron Mega Runner, Xyron Creatopia

You're the Best 6 x8" Card
Distress the edges of the patterned papers for your card layers, and then ink them with dark brown ink. Make two cuts with the dies from the Layered Scalloped Posy - lining them up next to each other to cut a circle and mounting circle.  Stamp the flowers onto vellum using a watermark ink and heat emboss with ultra high powder.  Cut with the matching die and assemble with pearls in the center.  Swipe some rust colored ink over the edges of the flowers, and wipe away excess with a paper towel.   Stamp the tag and fussy cut.  Stamp a sentiment and mount a portion of the stamp on the card as shown.  Finish assembling the card as shown.


Monday, June 3, 2013

All Abuzz!


There is an equestrian estate close to my house, and around the entire perimeter of this large farm, are gorgeous rose bushes. They are in full bloom now, so I was inspired to pull out my dies, and create my own rose blossom.