Showing posts with label Spellbinders. Show all posts
Thursday, November 12, 2015
Merry and Bright with Joy Clair
Good morning! I've got a new card to share with you using the Merry Christmas Sentiments from Joy Clair Stamps. This is a delightful new stamp company, and if you would like to see more of their products in action, be sure to stop by the blog and become a follower. One of the cool things about these images is that they have SVG files available for all the stamp sets - no more fussy cutting!
Monday, October 5, 2015
Thanks Mixed Media Card
It's my turn again on the ColourArte Blog! I had so much fun creating this mixed media card, and if you would like to know just how I made it, then head over for a full tutorial.
Labels:
ColourArte,
Joy Clair,
May Arts Ribbon,
Spellbinders,
StencilGirl
Monday, July 20, 2015
Life Is a Song
I've got a card to share with you today that uses a couple of the new release stamps for July from Technique Junkies. I stamped the background using the Peonies background stamp. I colored the flowers with Pan Pastels, for a soft look. The sentiment, Life is a Song, was stamped and then die cut.
Labels:
May Arts Ribbon,
PanPastels,
Spellbinders,
Technique Junkies
Tuesday, June 30, 2015
Spellbinders and May Arts Ribbons
Spellbinders and May Arts have some fun to share with you today! My tutorial for May Arts is up today on the Ribbon Resource Blog. You may want to head over there (I think there may be some blog candy!)
May Arts Ribbons Used:
Spellbinders Products Used:
Birds and Butterflies
Die Set PHS-507
Grand Calibur Machine
Other Supplies Used:
WorldWin Paper Vellum
4” Plastic Craft Ring
Collall Tacky Glue
Saturday, June 20, 2015
You're Bloomin Great
One of my favorite summer palettes is red and aqua - so I colored this gorgeous image from IndigoBlu. After my flowers were covered, I masked them and stamped the background image with embossing powder and inked over it.
Challenges:
IndigoBlu: Pocket Full of Posies
Simon Says Wednesday - Favorite Products (Spectrum Noir Markers)
Labels:
IndigoBlu,
May Arts Ribbon,
Spectrum Noir,
Spellbinders
Tuesday, March 24, 2015
Bee Well Soon
Texture and mixed media are the "buzz" words now, and Core'dinations papers are the perfect paper for this trend. Not only is the paper great for tearing, embossing, and distressing to add texture, but many of the papers have an aged look already, like the Tim Holtz Shattered Collection that I used to create this Bee Well Soon Card.
Bee Well Soon Supplies:

Step 1. Emboss a panel of Shattered with an embossing folder.
Step 2. Rub gold ink over the raised areas and sprinkle with clear embossing powder and heat set. Step 3. Stamp the bee and die cut.
Step 4. Add hand stitching around the oval panel.
Step 5. Paint the bee with Amplify! and heat set to create dimension.
Step 6. Layer the card as shown with mats, sentiment and ribbons.
There are so many techniques to try using Core'dinations! Just jump in and give it a go. ~Gini
Bee Well Soon Supplies:
- Gemstones
- Kraft-core Shattered
- Kraft-core Nostalgic
- Stampendous: Queen Bee, Timeless Tags Stamps
- Penny Black: Sweet As Honey (sentiment) stamp
- Sizzix: Book Cover #1 Embossing Folder
- Spellbinders: Classic Ovals Small, Pierced Ovals Die Sets, Grand Calibur Machine
- Close To My Heart Heat Tool
- May Arts Ribbons: 445-15-32; SM-27
- Imagine Crafts/Tsukineko: Delicata Golden Glitz; Versafine Onyx Black; Memnto Luxe Elderberry ink pads; and Shimmer Spritz Sparkle; Radiant Neon Amplify – Black, Electric Yellow; Clear Embossing Powder
- Madeira: Gold Thread
- Xyron Adhesives
- Tapestry Needle

Step 1. Emboss a panel of Shattered with an embossing folder.
Step 2. Rub gold ink over the raised areas and sprinkle with clear embossing powder and heat set. Step 3. Stamp the bee and die cut.
Step 4. Add hand stitching around the oval panel.
Step 5. Paint the bee with Amplify! and heat set to create dimension.

Step 6. Layer the card as shown with mats, sentiment and ribbons.
There are so many techniques to try using Core'dinations! Just jump in and give it a go. ~Gini
Tuesday, November 25, 2014
Heartfelt Creations Alumni Blog Hop for November
Welcome to the November Edition of the Heartfelt Creations Alumni Blog Hop!This is the first chance I have had to hop with the alumni, and I'm excited to be able to continue to share my love for Heartfelt Creations with you! The hop runs now through Friday night - at midnight. And one lucky commenter, chosen from one of the stops on the blog hop, will win a $25 gift certificate to HC. How great is that? You get to hop around and see some wonderful projects, plus have the chance to win some goodies of your own! The winner will be announced on Saturday, November 29th.
Supplies
- Heartfelt Creations Classic Sunflower Die HCD753
- Heartfelt Creations Decorative Lace Border Die HCD 713
- Heartfelt Creations Cut Mat Create 1B Die HCD 750
- Heartfelt Creations Classic Sunflower PreCut Set HCPC 3626
- Heartfelt Creations Vintage Word Background PreCut Set HCPC 3320
- Heartfelt Creations Beautiful You PreCut Set HCPC 3532
- Heartfelt Creations Classic Sunflower Paper Collection HCDP1 247
- Crafter's Companion Indian Bouquet Embossing Folder
- Lindy's Stamp Gang Azure Sea Asters Starburst Spray
- Lindy's Stamp Gang Glory of the Seas Gold Starburst Spray
- Lindy's Stamp Gang Red Hot Poker Orange Starburst Spray
- Lindy's Stamp Gang Gag Me With a Spoon Gray Starburst Spray
- Lindy's Stamp Gang Violacious Violet Moon Shadow Mist Spray
- Lindy's Stamp Gang Pumpkin Fiesta Embossing Powder
- Lindy's Stamp Gang Queen Sheba's Silver Embossing Powder
- Lindy's Stamp Gang Sunrise Salmon Gold Embossing Powder
- 3D Crystal Lacquer
- May Arts Ribbon Twine
- May Arts Crochet Ribbon
- Core'dinations Cardstock - Graphic 45 Signature Series Darks
- Core'dinations Sand-It Gadget
- Imagine Crafts: VersaMark Ink, Staz-On Ink ( Ganache)
- Spellbinders Circle Dies
- Spellbinders Grand Caliber
- Cheesecloth
- Cold Press Water Color Paper
- Xyron Mega Runner, Foam Adhesives
- Heat Tool
- Cut a piece of water color paper 5 3/4" square. Color using the mists.
- Distress the edges and dip the edges of the paper in the Moon Shadow Mist.
- Cut another square of water color paper 4 1/4". Stamp with watermark ink and heat emboss using a mix of the embossing powders.
- Spray the paper with water, and lightly mist. Use a paintbrush with the mists to achieve a water color effect.
- Flick droplets of mist over the stamped background.
- Distress the edges, and dip in the Moon Shadow Mist.
- Add layers of cheesecloth, lace and die cut borders underneath the center panel. Glue panel in place.
- Machine stitch around the two square panels.
- Layer two circle dies to cut a ring. Emboss the ring and sand the raised areas.
- Stamp the sunflowers with Staz-On ink. Die cut with the matching die.
- Color the flowers with the mists.
- Use a VersaMark pen to add details on the flower petals and heat emboss using the Pumpkin Fiesta powder.
- Shape the flowers.
- Use 3D Crystal Lacquer to glue microbeads to the flower centers.
- Stamp and cut the sentiment.
- Finish as shown, gluing the card front to a 5 x 6 card base.
Blog Hop Order
Gini Cagle - You are here
Challenges:
- Lindy's Stamp Gang November Color Challenge (All LSG products listed and linked in the supply list)
- Cardabilities Sketch 111
- Scrapyland - Challenge 6 - Die Cuts (Heartfelt Creations) and Texture
Monday, November 24, 2014
Back to the Chalkboard - Thank You Cards
During the holiday season, it is easy to focus on getting those Christmas cards made and sent out, but this time of year, we also need a steady supply of thank you cards. This trendy chalkboard card fits the bill. Add an easy matching envelope, and you have a stunning set.
Back to the Chalkboard Thank You Cards Supplies:
- Chalk Core White A2 Cards with Envelopes
- Chalk Core Colors 4 x 6 Paper
- Glitter Silk Cardstock
- Sand-It Gadget
- Darice Embossing Folder - Snowflake
- Spellbinders Dies: Snowflake Wonder; Labels 28; Decorative Labels 28
- Cuttlebug - Thanks Die
- Zva Creative Gems
- May Arts Ribbon
- Scor-Pal
- Xyron Adhesive
Step 1. Score each side of the card front to create a border. Sand with the Sand-It Gadget to reveal the chalkboard effect.
Step 2. Die cut the label, then emboss with the folder. Sand the edges and the designs.
Step 3. Die cut the decorative label. Mount on the card base with foam adhesives. Mount the snowflake label on top with more foam adhesives.
Step 4. Add gems and ribbon to decorate.
Step 5. Die cut snowflakes with Glitter Silk and layer on the card.
Step 6. Die cut the sentiment and mount on another die cut label for the inside greeting.
Envelope Directions:
Step 1. Emboss a piece of the colored chalkboard with the Snowflake folder.
Step 2. Tear the edge of the embossed paper. Trim to fit the envelope and adhere.
Step 3. Add glitter glue to the centers of the snowflakes.
Get started crafting now! Then you can have your thank-you cards ready to go, and you can sit back and enjoy the holidays.
~Gini
Labels:
core'dinations,
May Arts Ribbon,
Spellbinders,
Xyron,
Zva Creative
Friday, November 14, 2014
May Arts and Core'Dinations Blog Hop Day Five
Welcome to the final day of the May Arts Ribbon and Core'dinations Blog Hop! There has been so much inspiration this week with gorgeous ribbons and wonderful sandable cardstock. Be sure to go to the May Arts and Core'dinations Blogs to see links to the rest of the week's projects as well as to enter for some great giveaways.
I thought it would be fun to try out this fancy-edged card (it seemed perfect for the elegant May Arts Ribbons). I embossed and sanded the cardstock to bring out the design. Ribbon was layered underneath this panel. My sentiment was stamped and cut using a Spellbinders die, and dressed with a bow.
May Arts Ribbons:
Partners In Craft Supplies:
Spellbinders Labels 28
Spellbinders Decorative Labels 28
Grand Caliber
Imagine Crafts/Tsukeniko VersaFine Ink
Xyron Mega Runner
Other Supplies
Crafter's Companion Rose Plaid Embossing Folder
Crafter's Companion Floral Sentiments Stamp
May Arts Ribbonistas Blog Hop Line Up
Monday
Tuesday
Wednesday
Thursday
Friday
Monday, October 27, 2014
Zva Creative October DT Blog Hop!
Hello friends! Zva Creative and our talented Design Team welcome you to our October blog hop! Thank you for joining us today and we hope you enjoy all that we have created to share.
The hop begins at Zva Creative’s Facebook page.! Be sure head on over to check it out! You will also find a complete list of all the participating blogs there (in case there is a glitch along the way).
As you know, Zva offers many beautiful color groupings for pearls, flowers and crystals. If you like what you see along the hop you can find a list of stores and online retailers that sell Zva HERE.
I have a cute Halloween card to share with you today. I stamped my image and colored it - then I masked the image and used the Dreamweavers Tree Silhouette over it, to create a semi-spooky forest background. Then I die cut the image and mounted it on my card. The Zva Creative flourish adds a touch of whimsy and magic.
I put a layer of 3D Crystal Lacquer over the robe and cap, and added a touch of glitter to add more dimension to the coloring.
Supplies
Zva Creative: CRX-05CB-129; CRW-03CB-153
Stampendous House Mouse Stamp: Witch Way to the Candy
Zva Creative: CRX-05CB-129; CRW-03CB-153
Stampendous House Mouse Stamp: Witch Way to the Candy
Dreamweaver Stencils: Tree Silhouette
May Arts Ribbon: KB38
DCWV Patterned Paper: The Bewitched Matstack
Core'dinations Cardstock
Spellbinders- Lacey Tiers
Sakura Crystal Lacquer
Spectrum Noir Pens (OR2, GB6.GB9, EB4)
Challenges:
If you would like to play along with our design team, just follow along the blog path. I am linking to one of the Zva designers and that designer is linking to the next and so on. Be prepared to be inspired along the way!
The Blog Hop starts today, October 27th and runs through midnight US Eastern Standard Time on Tuesday, October 28th.
***Prizes***
Hidden on FIVE of the blogs along the way is a Zva Creative prize package! Winners will be randomly chosen after the hop is over. All you need to do is leave a comment on one post... you do not need to leave a comment on each and every designer's blog post to qualify. However, the more times you comment along the blog hop path, the more chances you will have to win.
The 5 winners will be announced on Wednesday, October 28th on Zva Creative’s Facebook page. We will do our best to notify each winner, but it's best if you can pop in to Zva’s page on Wednesday to see if you are a winner!
The blog hop begins here at Zva Creative’s blog. Your next stop is Windy Robinson. Enjoy!
Thank you for joining us!
________________________________________
Monday, October 20, 2014
A Thing of Beauty...Core'Dinations, Xyron and Petaloo Week
Hello again, fellow Core lovers! It's Gini, and today I have an upcycling project to share with you, using some of my favorite products. With a little help from Core'dinations, Xyron and Petaloo, I was able to transform a lowly Pringles Chip container into a dispenser for cosmetic cotton rounds.
A Thing of Beauty Supply List
Step 1. Measure around your container and cut paper to fit.
Step 2. Draw a template for your opening on scrap cardstock. Cut in the center of the paper as well as the canister.
Step 3. Stamp decorative border at the top and bottom of the paper with watermark ink. Heat emboss with gold powder. Tip: Sometimes metallic embossing powders leave a residue. Use the Dust Buddy after embossing to remove this powder.
Step 4. Run the paper through the Creative Station machine to apply adhesive. Carefully adhere to the canister, lining up the openings.
Step 5. Ink the back of the vellum quote with metallic gold. Die cut a frame using the Glitter Silk cardstock.
Step 6. Use the small tape runner to apply adhesive to the back of the frame. Center quote and trim the excess.
Step 7. Cut a circle to match the top of the canister. Add trim around the top and bottom of the canister and lid to hide the raw edges.
Step 8. Spritz the flowers with gold and let dry.
Step 9. Add the embellishments to the canister to finish as shown.
So remember, look at your empty containers with a creative eye, before you take out your trash! See you soon.
A Thing of Beauty Supply List
- Glitter Silk Cardstock
- Tim Holtz Kraft-Core Shattered Collection
- Core Essentials Cardstock Neutrals
- Core'dinations Vellum Quotes & Titles - Inspirational Motivations
- Dusty Buddy
- Xyron 9" Creative Station - Permanent Adhesive
- Xyron Tape Runner
- Petaloo Darjeeling Collection: Darjg Mix Mini Teasn; Mini Daisies with Leaves
- Spellbinders Labels Thirty-Three; Grand Caliber Machine
- Zva Creative Gem Flourish CR-06CA-104
- Graphic 45 Metal Buttons
- Stampendous Stamp
- Ranger Gold Embossing Powder
- Tsukineko/Imagine Crafts Delicata Ink- Golden Glitz; Sheer Shimmer Spritz- Gold; VersaMark Watermark Ink
- Heat Tool
- Pringles Chip Canister
Step 1. Measure around your container and cut paper to fit.
Step 2. Draw a template for your opening on scrap cardstock. Cut in the center of the paper as well as the canister.
Step 3. Stamp decorative border at the top and bottom of the paper with watermark ink. Heat emboss with gold powder. Tip: Sometimes metallic embossing powders leave a residue. Use the Dust Buddy after embossing to remove this powder.
Step 4. Run the paper through the Creative Station machine to apply adhesive. Carefully adhere to the canister, lining up the openings.
Step 5. Ink the back of the vellum quote with metallic gold. Die cut a frame using the Glitter Silk cardstock.
Step 6. Use the small tape runner to apply adhesive to the back of the frame. Center quote and trim the excess.
Step 7. Cut a circle to match the top of the canister. Add trim around the top and bottom of the canister and lid to hide the raw edges.
Step 8. Spritz the flowers with gold and let dry.
Step 9. Add the embellishments to the canister to finish as shown.
So remember, look at your empty containers with a creative eye, before you take out your trash! See you soon.
~Gini
Labels:
altered,
core'dinations,
Petaloo,
Spellbinders,
Stampendous,
Tsukineko,
Xyron,
Zva Creative
Wednesday, September 10, 2014
Heartfelt Creations New Release - Classic Sunflower Collection
Heartfelt Creations Products and Products Carried by HC
HCDP1 247 Classic Sunflower Paper Collection
HCPC 3630 Summer's Day PreCut Set
HCPC 3627 Sunflower Stem PreCut Set
HCPC 3626 Classic Sunflower PreCut Set
HCD Classic Sunflower Die
Spellbinders Classic Oval Large
Spellbinders Floral Ovals
Other Products Used
FlowerSoft Ultrafine Black
Fun Stampers Journey - Licorice Ink
May Arts Ribbon - 1.5" Faux Burlap; Paper Cord Ribbon
Art Anthology Colorations - Warm
Copic Markers
WorldWin Cardstock
Cut a 6 x 6" patterned paper piece from the Classic Sunflower collection. Ink the edges and distress. Die cut an oval window on the left side. Stamp the Sunflower Stem on the polka dot paper. Color the image, ink the edges and glue behind the window. Add ribbon. Die cut the Floral Oval and glue around the stamped image. Stamp, cut, color and shape the Classic Sunflowers twice and use the largest flower. Add Flower Soft to the center. Apply over the stamped image using foam adhesives. Stamp the butterfly, cut, and color. Glue just the butterfly body to the card. Mount on a cardbase.
Monday, September 8, 2014
Guest Designer for Craft Hoarders Anonymous
Hi! My friend Gloria Stengel asked me a few months back to be a guest designer for her Craft Hoarder's challenge - and I couldn't have been chosen for a more fitting challenge - Challenge #15 All the Pretty Flowers. This challenge is for all of you flower hoarders! Maybe you
hoard pre-made flowers. Maybe you hoard flower punches or dies. Maybe you hoard
flower stamps. "Dig" out those flowers and use them on your project! There are some great prizes, so be sure to head over and get your entry in!
Supplies
Heartfelt Creations Delicate Asters Die Set HCD 726
Heartfelt Creations Cut Mat Create 1A Die HCD 749
Heartfelt Creations Delicate Asters PreCut Stamp Set HCPC 3494
Heartfelt Creations Delicate Asters Collection Patterned Paper HCDP1 226
Spellbinders Exquisite Labels Eleven Die
May Arts Ribbon GC07
Grand Caliber Machine
Core'Dinations Cardstock
Xyron Adhesive
Close To My Heart Ink
Wednesday, September 3, 2014
Antiqued Vintage Background for Mixed Media
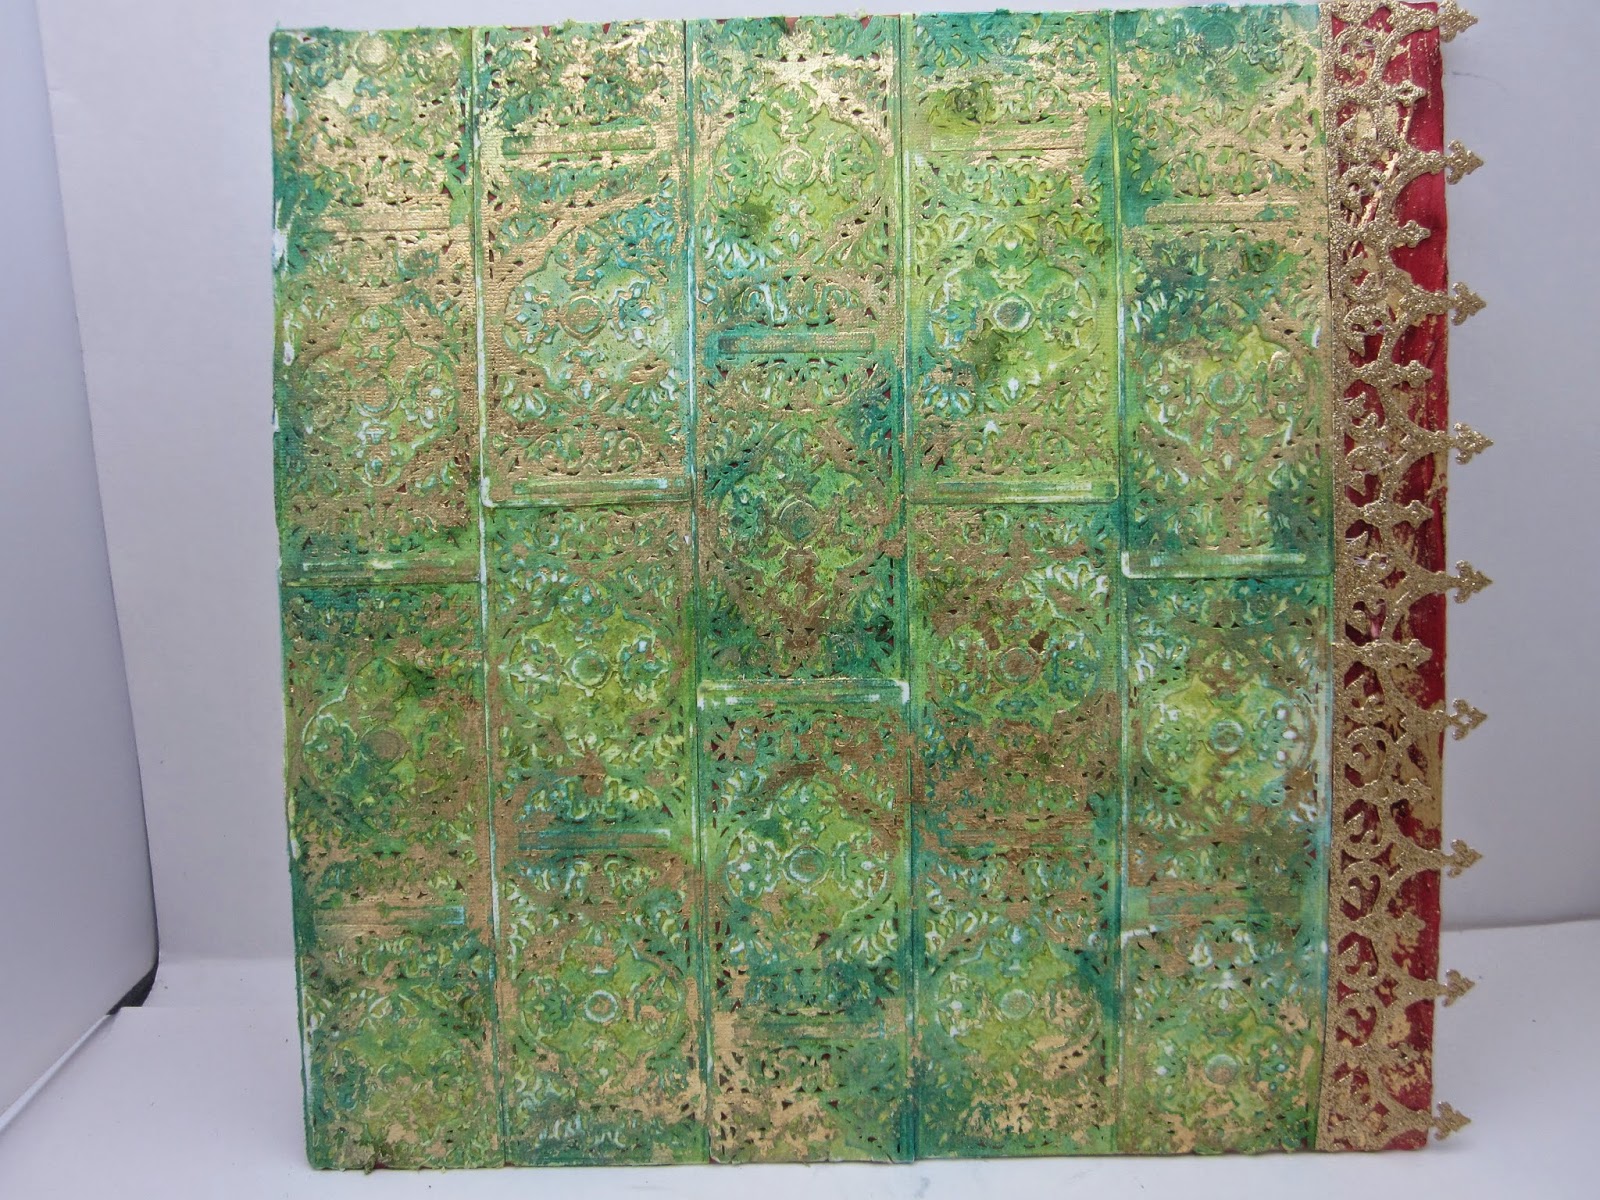
Hi, today I'm going to be sharing how I created the background for this detailed mixed media canvas. As much texture as you see now it's hard to believe it started out as a wooden panel and plain cardstock - but it did!
I inked over the raised areas with Blue Lagoon ink.
I misted over the embossed area with Grass and Waimea Bay Colorations. I left a small border of red on the left side, and added Big Dip 'O Ruby and Red Velvet Sorbet paints to add more depth.
I came back in and sanded some of the high areas to add to the distressed look and put a die cut over the red border. Finally, I used a glue stick over some raised areas and added gold leaf. This produced a background that looked like it took centuries to gain this much patina and depth! Just the look I was going for!
First, I painted my board with Art Anthology Gesso and set it off to the side.
I began diecutting these panels using A Gilded Life's Vintage Brocade die.
Since my final design was going to have red poppies on it - I wanted to tie that color into the background. I sprayed Art Anthology Colorations over my gessoed surface using Heart. This way, the small openings in my embossed card stock would have red peeking through. It's not a blaring red background, but it really helped to tie it all together.
I began gluing the embossed paper to the substrate, making sure to arrange them off-set to each other.
I misted over the embossed area with Grass and Waimea Bay Colorations. I left a small border of red on the left side, and added Big Dip 'O Ruby and Red Velvet Sorbet paints to add more depth.
I came back in and sanded some of the high areas to add to the distressed look and put a die cut over the red border. Finally, I used a glue stick over some raised areas and added gold leaf. This produced a background that looked like it took centuries to gain this much patina and depth! Just the look I was going for!
I decorated my panel with handmade poppies, antique buttons, and an altered vintage book.
Thanks for stopping by!
Subscribe to:
Posts (Atom)