Showing posts with label Sizzix. Show all posts

Thursday, November 26, 2015

Joy to the World

 Happy Thanksgiving! I think this means we are officially in the Holiday Season.  I've got a blog post up over on the CardMaker Magazine Blog, and would love to give you a little peak.

Supplies used: Cardstock from WorldWin Papers; Shimmery Cardstock, Festive Wonder Festive Frame die (#S-FW-EF6-FF) and Decorative Doily die from Crafter’s Companion: Merry Christmas Sentiments stamp set from Joy Clair; VersaMark watermark ink pad, Brilliance pearlescent olive ink pad and gold embossing powder from IMAGINE Crafts/Tsukineko; gold micro beads from Martha Stewart Crafts; 1-inch satin reversible stitched edge ribbon from May Arts Ribbon; Tattered Flower Large punch, Spiky Floral Medium punch and Holiday Greens die set (#658759) from SizzixGrand Calibur Circles dies and die-cutting machine from Spellbinders® Paper Arts.

Friday, November 13, 2015

May Arts / Ribbon Resource Holiday Card Hop

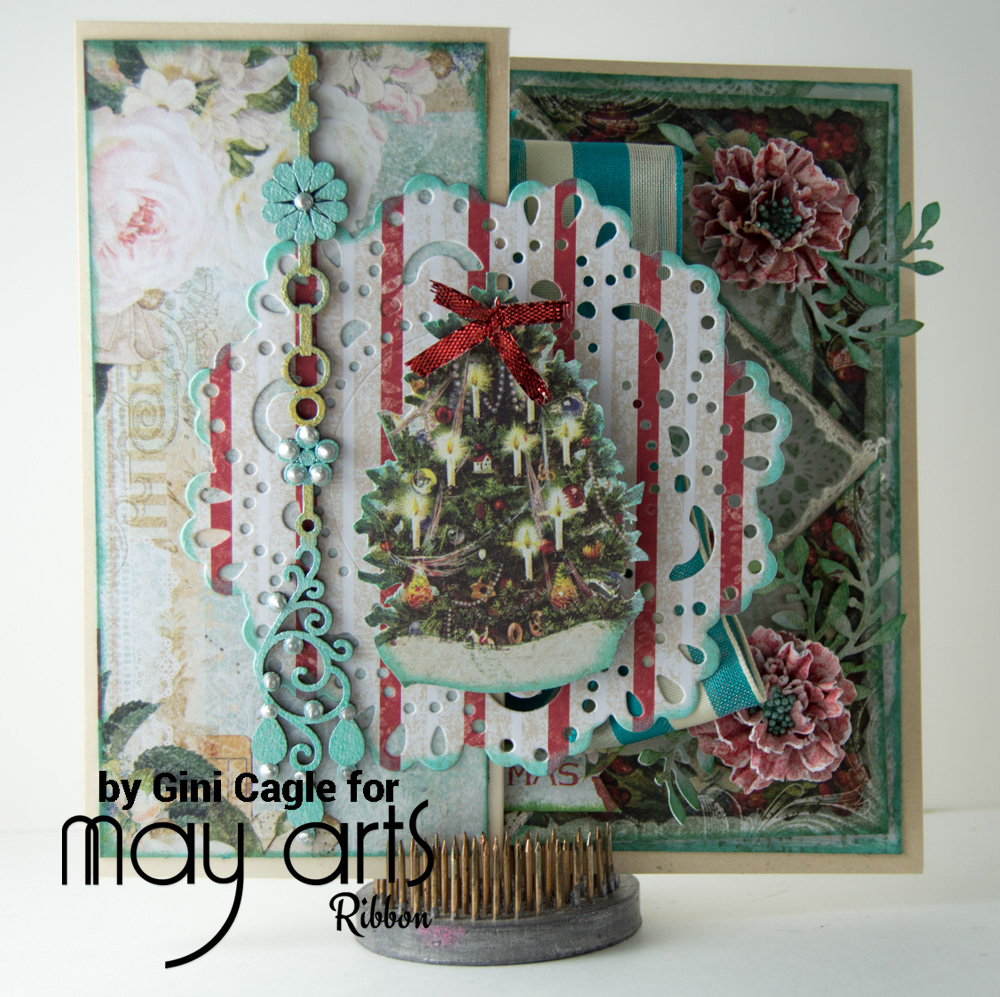
Welcome to the Ribbon Resource Holiday Card Hop! You still have a little bit of time to get those cards made and in the mail, so we've got some inspiration for you.  As always, there is a wonderful ribbon prize for one lucky commenter - 2 5-yard rolls of Christmas ribbon. So hop along, enjoy the projects and leave comments.
For my card, I made a Fold-back Pop Out Card, which was new to me (and rather fun). It was easy to embellish  with lovely ribbons.

Ribbons Used:


Monday, November 2, 2015

ColourArte Mixed Media Dragonfly Card

Nov 

 Hi, it's Gini back to share with you easy ways to incorporate ColourArte products into your everyday creations. Working on cards or other small scale projects is a great way to experiment with mixed media.  

Supplies
  1. Cut a piece of chipboard for the card front. Paint with gesso. Mist with Radiant Rain. Novstep1
  2. Die cut and emboss the dragonfly from cardboard. Paint the raised areas with the silks, then mist with Radiant Rain to finish the coloring.Novstep2
  3. Stamp the rain droplets on the background. Mix a small amount of Primary Elements with Crystal Lacquer. Use a toothpick or the end of a paintbrush to drip the droplets of lacquer over the stamps to form a dimensional rain drop. Novstep3
  4. Assemble the card adding flowers, string and die cut sentiment.
  5. Glue prills around the flower cluster, but while the glue is still wet, tap a little primary elements over the prills to add shimmer.
  6. Mix Golden Bamboo Primary Elements with water and use a spatter brush to flick onto the card.Novstep4
These were all easy ways to use different products from the ColourArte family. I really love that colors are true from one product to the next, so you can use tons of techniques, while still having the colors blend seamlessly. Until next time! NovDetail3 
  novDetail2 
  NovDetail1

Monday, August 17, 2015

Just Buzzing By

I have a thing for bees, so when I saw this Botanical Bee stamp from Technique Junkies, I had to have it.  To complete the scene, I added a honeycomb die cut background.

Wednesday, May 20, 2015

Metallic Bee Canvas

010
I love the metallic trend! and it's even better, when you can distress the finish. The new Tim Holtz Kraft Core Metallic Collection is amazing. I've created a trendy bee canvas to show you just how much fun you can have creating with this new paper.


 Metallic Bee Canvas Supplies:
001
 
Step 1. Cut strips of the copper paper 7 3/4" x 1 1/2" long. Emboss the paper. Since the paper is longer than the embossing folder, place the folder on the un-embossed end of the paper, line the design up and run through the machine again to emboss the full strip. 

002

 Step 2. Distress the raised areas with the Sand-it Gadget. This will reveal the kraft core.

003
 
Step 3. Add a layer of black slightly wider to the back of the embossed strip. Distress the edges with a tool or scissors.

005

 Step 4. With strong double sided tape, attach to the canvas.

006
 
Step 5. Die cut and emboss the bee using the gold paper. Distress the raised areas with the Sand-it
Gadget.

007
 
Step 6. Ink over the sanded areas with black ink.

008
 
Step 7. Use foam adhesives to mount the bee on the canvas.

010

This was a quick and stylish project to make. Wouldn't you Bee Happy to give it a try? ~ Gini

Tuesday, March 24, 2015

Bee Well Soon

Texture and mixed media are the "buzz" words now, and Core'dinations papers are the perfect paper for this trend. Not only is the paper great for tearing, embossing, and distressing to add texture, but many of the papers have an aged look already, like the Tim Holtz Shattered Collection that I used to create this Bee Well Soon Card. BeeWellSoonGiniWilliamsCagle  
Bee Well Soon Supplies:
  • Gemstones
  • Kraft-core Shattered
  • Kraft-core Nostalgic
  • Stampendous: Queen Bee, Timeless Tags Stamps
  • Penny Black: Sweet As Honey (sentiment) stamp
  • Sizzix: Book Cover #1 Embossing Folder
  • Spellbinders: Classic Ovals Small, Pierced Ovals Die Sets, Grand Calibur Machine
  • Close To My Heart Heat Tool
  • May Arts Ribbons: 445-15-32; SM-27
  • Imagine Crafts/Tsukineko: Delicata Golden Glitz; Versafine Onyx Black; Memnto Luxe Elderberry ink pads; and Shimmer Spritz Sparkle; Radiant Neon Amplify – Black, Electric Yellow; Clear Embossing Powder
  • Madeira: Gold Thread
  • Xyron Adhesives
  • Tapestry Needle
023
Step 1. Emboss a panel of Shattered with an embossing folder.  
Step 2. Rub gold ink over the raised areas and sprinkle with clear embossing powder and heat set. Step 3. Stamp the bee and die cut.
 Step 4. Add hand stitching around the oval panel.
Step 5. Paint the bee with Amplify! and heat set to create dimension. BeeWellSoonDetailGiniWilliamsCagle
 Step 6. Layer the card as shown with mats, sentiment and ribbons.

 There are so many techniques to try using Core'dinations! Just jump in and give it a go. ~Gini

Wednesday, January 7, 2015

Winter Wonderland Lantern

The holidays may be over, but we still have a few more months of wintery weather. Bring a little light into the season, with this shimmery tea-light lantern. Add a battery powered tea light, and the vellum paper allows a beautiful glow.


012 
 Winter Wonderland Lantern Supplies:
009  
Step 1. Die cut 2 sets of the Luminary die.

 Step 2. Score the cuts as marked on the cuts.

001
 Step 3. Add vellum to the backside of the windows with double-sided tape. 002  
Step 4. Assemble the lantern with double-sided tape.
003  
Step 6. Die cut snowflakes and glue to the center of the vellum window.

007  
Step 7. Embellish the lantern with Shaved Ice, snow border punch, ribbon and floral stems.

 011
So instead of heading out into the winter weather, stay inside where it's warm and create your own winter wonderland!   ~Gini

Tuesday, December 9, 2014

The World is But a Canvas with Video Tutorial


A few weeks back, I shared with you that I was chosen to be on the Imagine Crafts/Tsukineko Video  Artist in Residence Team.  I'm so excited!  I won't officially start posting on the blog until January, but thought I would give you a sneak peak of things to come.

The leaves and the dragonfly were made with the Vertigo film (that is one of the coolest products ever!)  If you would like to see more on how I made this, then please watch my video.  If you enjoy it - please subscribe to my YouTube channel!


Wednesday, November 19, 2014

Whimsical Chalkboard Christmas Card

The Outlines brand of stamps from Hampton Art, are the perfect choice for creating the trendy chalkboard projects. So today, I will show you how easy it is to create this whimsical card.


Supplies for Chalkboard Christmas Card
Step 1.  Emboss a piece of Chalk Core paper. Sand the raised designs.
Step 2.  Stamp the image with White ink.
Step 3.  Color the images with Inktense pencils.  Use a water brush to spread the colors.
Step 4.  Mount on red cardstock
Step 5.  Add ribbon.
Step 6.  Attach to a card base.

Wednesday, November 12, 2014

May Arts and Core'dinations Blog Hop Day Three

  Welcome to Day 3 of the May Arts Ribbon and Core'Dinations Blog Hop!  I'm lucky enough to work for both of these amazing companies, so come back on Friday to see my second project for the hop.  And with any great hop, you know there will be prizes....so go to the Core'dinations Blog and the May Arts Blog to get your entries in for great giveaways!


   There is something about cool weather season, that really makes me enjoy staying in, and adding some fun seasonal decor to my home. I found this grapevine wreath at my local craft store, and decided to use it to give a large pillar candle a make-over. This is such an easy project, and works well for different holidays and themes.

005
 Fall Mini-Wreath Candle Holder Supplies:
001
  Step 1. Die cut leaves from the Shattered Paper Collection.

002


Step 2. Emboss the leaves using the matching embossing folder.

003

 Step 3. Sand the raised areas using the Sand-It Gadget.

004

Step 4. Cut the wired edges from the Faux Burlap ribbon and fray the edges. Weave through the wreath.
Step 5. Hot glue the leaves onto the wreath.
Step 6. Tie a bow with the striped ribbon and glue on the wreath to finish.

 I'm sure you will be able to adapt this project to fit your decorating style. Thanks for stopping by today! ~ Gini

Tuesday, October 28, 2014

Turkey Treat Holder with Core'Dinations

As the holidays approach, it's fun to start planning and creating those special little things that make a hand-crafted celebration. In my family, we usually have small favors for each of our guests. I'm always hunting for ideas that are cute, but aren't too expensive or too time consuming to make. Since Thanksgiving is just around the corner, now is the perfect time to get a jump start with these adorable Turkey Treat Holders. Won't these look fabulous on the dinner table?


 Turkey Treat Holder Supply List
  • Tim Holtz Kraft-Core Shattered Collection
  • Core'dinations Heavyweight 80 lb. Kraft
  • Core Essentials Brights Cardstock
  • Sizzix Writing Desk Die
  • May Arts Ribbon - 7/8" Solid Ivory Check AKB14; 5" Tulle 471-5-28; 1/8" Burlap Cord SP-10
  • Fiskars Fuse Die Cutting Machine
  • Beacon Adhesives Zip Dry
  • Small Clay Flower Pot
  • Punch Bunch - Large Pear Punch
  • Buttons
  • Tim Holtz Mini Fasteners

 Step 1. Die cut feathers. With this die, I was easily able to cut 4 layers of paper at a time.
 Step 2. Add ribbon around the lip of the pot.
 Step 3. Glue the feathers.
 Step 4. Hand draw turkey body. Cut out.
 Step 5. Punch a pear shape to create the turkey's wattle. Snip a triangle for the beak. Use buttons and brads to create the eyes. Attach to flower pot.
 Step 6. Wrap treats in tulle. Tie with burlap cord and place in flower pot.


 Hope this helps make your holidays even happier!   ~Gini

Tuesday, December 31, 2013

The Last Card of 2013


Can you believe that 2014 is almost here?!! This is another year that has flown by - but I wanted to thank all of my blog readers for stopping by and visiting me throughout the year.   I know winter is just getting ready to kick in full gear, so I figured a nice bright flower card would be a great way to end the year.  May you have many blessings for 2014!

 I used this color inspiration from Lindy's Stamp Gang December Challenge for the inspiration for my card.  The colors were brighter than what I normally work with, but I still managed to shabby-chic them up a bit.


 After I shaped my flowers, I embossed them using HollyHock/Scarlet Plum EP.  I also added the dots to my Hellebore flower using Twilight Blue Slate.

 I built up many layers of powder for this architectural element using Aurora Amethyst and Silver Moon Turquoise


I used a Sizzix folder to emboss the wood planks for my background with a bright blue paper and painted it with watered down gesso.  I added in some washi tape for texture and spritzed some Blue Hawaiian Blue Starburst spray over the top.  I kept layering the mist and the gesso, and added a little bit of the Silver Moon Turquoise and Hydrangea Blue Mauve embossing powders over the raised areas.  I really love how the background turned out.

I'll see you back in 2014~  Have a Happy New Year!

Saturday, December 21, 2013

Who Can Resist a Christmas Tag? Video Tutorial

 Hi! It's almost Merry Christmas time, but just in case you still need some tags to add to your holiday wrappings, I've got a video to share with you today that will teach you three different resist techniques using the wonderful Art Anthology paints and Hampton Art Stamps.  If you're all done with your Christmas projects, than don't worry - you can use these techniques any day of the year!