Friday, March 13, 2015

Good Ol' Sport

 Are you ready for some good old fashioned baseball? Or at least a card to match this season's favorite sport?  Then here you go.

I added stamped embellishments to my memorabilia cluster for that charming handmade touch.
Don''t forget to decorate the inside of your cards as well - it's always a nice surprise for the recipient.

Supplies
Graphic 45 Good Ol' Sport Paper
Graphic 45 Gold Ol' Sport Chipboard 2
Hampton Art/G45 Good Ol' Sport 1 stamp set IC0299
Versamark Ink, Memento Luxe Ink
Stampendous Embossing Powder
Core'dinations Cardstock
Xyron Adhesive
CTMH Scallop Punch

Wednesday, March 11, 2015

Be Bold


I got a chance to sit down and play with the new Spectrum Aqua markers - and all I can say is wow!  These are so much fun and so easy to use.  I stamped my image with VersaMark and heat embossed with gold powder.  A few swipes of the pens and a little brush and water and my image was done.  These are going to stay out on my craft table all of the time - because I know I will be reaching for them constantly.

Crafter's Companion Supplies

Monday, March 9, 2015

May Arts Spring/Summer 2015 New Release Ribbons


May Arts has released their new ribbons for the Spring/Summer 2015 season, and you are going to love them!  The designers are sharing ways to use the new lines on their blogs, so you will want to hop around to see them all.  Be sure to leave love along the way, as the Ribbon Lady will be choosing 3 lucky commenters to win a roll of their choice from the new collection.

Instead of creating a project, I've got a video to share with you, highlighting all of the collections.  


Monday  

Tuesday

Monday, March 2, 2015

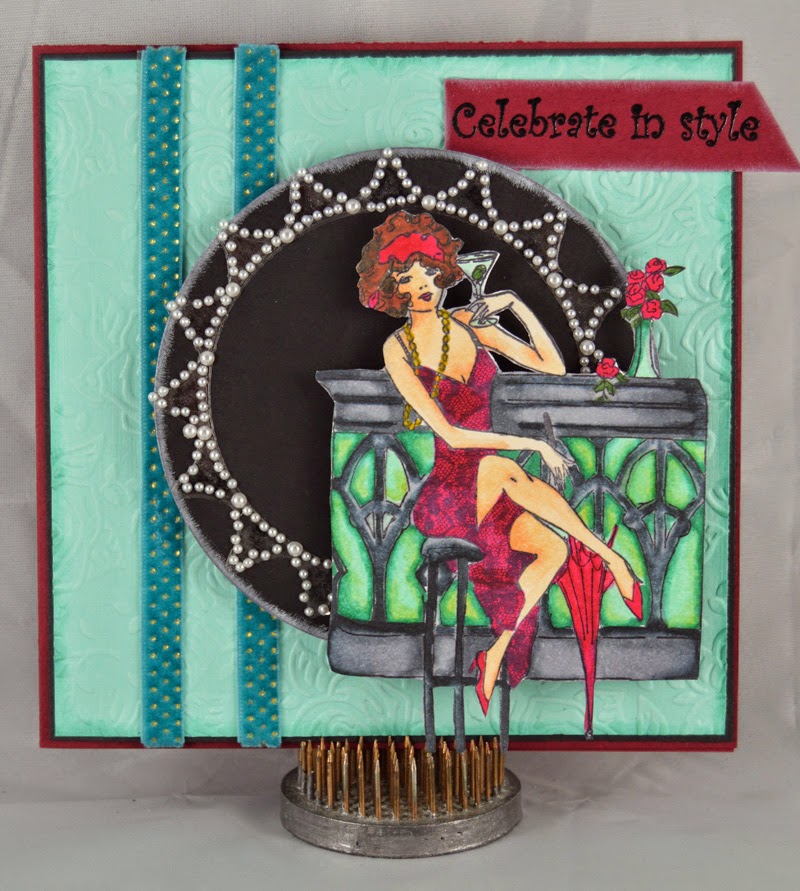
Hello Crafter's Companion!


I have some news worth celebrating! I have been asked to join the Crafter's Companion US Eduction Team - woot, woot!  As a consumer, I have been more than impressed with the quality, variety and customer service that this company offers - so I am thrilled to be a part of the team.

To celebrate, I created this card using the adorable Frou Frou line of stamps. She was so much fun to color with the Spectrum Noir markers.
Supplies:
May Arts Ribbon: 456-38-04

Tuesday, February 24, 2015

Heartfelt Creations Alumni DT Blog Hop - February

Welcome, to the February Edition of the Heartfelt Creations Alumni Blog hop! The hop runs now through Friday night - at midnight.  And one lucky commenter, chosen from one of the stops on the blog hop, will win a $25 gift certificate to HC.  How great is that?  You get to hop around and see some wonderful projects, plus have the chance to win some goodies of your own!  The winner will be announced on Saturday, February 28th.

Today, I created a CAS card - but it makes the sentiment really stand out.  I used the Arianna Birthday Stamp Set (HCPC 3612) and framed it using Spellbinders Delightful Foliage die.

Be sure to hop the rest of the list and leave some love for your chance to win the HC gift certificate.


Blog Hop List

Sunday, February 22, 2015

St. Patrick's Art Tag

St. Patrick's Day, and all that is green is soon approaching. It just so happens that green is my favorite color - any shade possible! To celebrate, I thought that an easy mixed media tag would be fun to put together.

 001  

St. Patrick's Art Tag Supplies:
005_edited-1
 Step 1. Cut tag from green cardstock and emboss with folder.
 Step 2. Sand the raised areas. 030
 Step 3. Paint the edges of the tag.

031  
Step 4. Spread Creative Medium through stencil and sprinkle with glitter. Allow to dry.
 Step 5. Arrange ribbons on the tag and nestle printed paper as shown.
 Step 6. Ink the edges of the foam shamrock and add to the ribbons along with small green flowers.

 I hope the luck of the Irish is with you this season! Thanks for stopping by.   ~Gini

Friday, February 20, 2015

Image Transfers with Imagine Crafts


Today, I'm up on the Imagine Crafts Blog, with a video tutorial on image transfers using Imagine Crafts' Creative Mediums.  I hope you will check it out!

Wednesday, February 18, 2015

Discover Your Passion

It turned out to be a day of experimenting  with colors and mists ( and yes, I still have the proof on my fingertips!)


Challenges:
IndigoBlu stamps used: Bloomin' Great; Crackleglaze Background; Discover Your Passion

Inspiration Photo + Ombre Effect
I was inspired by the colors and the layered swirls - I created the ombre on my background - and turned it sideways so the darkest color was to the left and it gradually lightened.

Lindy's Stamp Gang
LSG products used:Embossing Powder:  Hyacinth Blue Jade , Magic Moon Pearls , Midnight Ruby

Sunday, February 15, 2015

Good Wishes


The winter storms are about to hit, but I would like to wish all of my readers a bouquet of good wishes (and some spring weather too!)  I just finished up this card for fun.  The poppy  stamp was so easy to fussy cut - and made such a lovely border.  I colored it with my Spectrum Noir alcohol pens, and added a little shading with their pencils from the Primaries Collection.

Challenges:
Chocolate Baroque - February Color Challenge
Spectrum Noir - February Challenge (CR8,CR10 - plus the pencils)

Supplies:
Chocolate Baroque: Poppy Edges, Mackintosh Sentiments
Spectrum Noir Alcohol Markers, Colored Pencils
May Arts Ribbon
Core'dinations Cardstock
Darcy Poppy Field Embossing Folder
Imagine Crafts/Tsukineko Inks

Tuesday, February 10, 2015

Flower Pot Card with Hidden Tag

We still have weeks more of winter, but I am already yearning for the warmer days of spring. I adore the bright and beautiful flowers of the season, and find that they lift my spirits like nothing else. I find that I often start making cheerful projects to help me get over the winter blues. This fun card is sure to brighten someone's day as well.

008
 

Flower Pot Note Card Supplies:
012

Step 1. Score a piece of cardstock along the top edge of the card base (large enough to accommodate the flower pot die). Tape the die so the top cutting edge is off of the cardstock, and cut.

001

 Step 2. Die cut the smaller sized flower pot and distress the surface with the Sand-It Gadget.

002

 Step 3. Machine stitch the smaller pot onto the larger one, leaving the top open to form a pocket.
 Step 4. Decorate the flower pot with die cuts and ribbons.

005

 Step 5. Use the smaller die to draw a line to trim a large tag, so that it will fit into the pocket, while leaving enough visible at the top to add flowers.

003
006

 Step 6. Decorate the tag with flowers, ribbon and vellum sentiment.

011

 Step 7. Slide into the pocket to finish.


010

 I hope that I have put a little spring into your day! Thanks for stopping by. ~Gini