Tuesday, June 19, 2012

I Thank God For a Friend Like You


I hope you had a great weekend! I've got a card to share with you that would be great for any occasion - made with lots of goodies from Scrap-Mart. After I stamped my flower and leaf, I colored in the details with my new Tim Holtz Distress markers.  They really make it easy to add more defined details than just inking with the pads. Then, I shaped the flower using the McGill Flower Tool/Pad.

Heartfelt Creations Stamps:
Prima Patterned Papers
WorldWin Cardstock

Monday, June 18, 2012

Pumpkin Patch


I know it's just the start of summer, and I've already got a fall layout to share with you, but it seems like in the paper industry, we are always working at least a season or two ahead of time! At least this layout can remind you of those crisp autumn days ahead.


I just got the Victorian Picket Fence die, and thought it would be perfect with my photo. It's so easy to see this die as ultra feminine, but it worked great for a boy layout too. My daisies are made with Stacker Flower #2. I added greenery with the Flourish Leaf Strip and the Iris Leaves. I finished off with some great borders - Francesca and the Daisy Lace Bracelet.


This weeks challenge over on the CLD Challenge blog is Red, White and Blue - that should get you in the mood for the 4th of July! And remember, all entries this month will be entered to win aBigShot Die Cut Machine!

Cheery Lynn Designs Dies

Saturday, June 16, 2012

Wow! Powder Puff Girls Blog Hop

Hi! and welcome to the Powder Puff Girls Blog Hop for Wow! Embossing Powders.  This month it is our team's turn to host the hop, and we have lots of fun things for you to see along the way.  You should have arrived from Birgit's blog - if not, you will want to start at the Wow Blog, so you don't miss anything.  Be sure to leave comments along the way for your chance to win some of our awesome embossing powders and more.

Since everyone is getting into the full swing of summer, here in the United States, I thought I would share this altered frame, with one of my favorite beach pictures of my husband and me.

The chipboard chair, umbrella and sentiment are from Twiddleybitz, and I embossed them using some of my favorite Suzy West colors - Cotton Candy,  Bubblegum and Earthtone Pepper.


To make the polka dots on the umbrella, I added mini glue dots over the already heated blue base, then sprinkled pink over the glue dots and embossed.  It's really a quick and easy was to create dots on your projects.

It's time to hop on  to Jan's blog and see what she has cooked up for you!  You've got a week to get your comments in . Have a great weekend!


WOW blog http://www.wowembossingpowders.blogspot.com/
Gina http://canoncreativegirl.blogspot.com/
Birgit http://birgitkoopsen.typepad.com/
Gini http://www.ginicagle.blogspot.com/ You are here
Jan http://papercraftpleasures.blogspot.com/
Jennifer http://tennisgirl27.blogspot.com/
Katarina http://krumeluran.wordpress.com/
Patti http://www.mypiecesoftime.blogspot.com/
WOW blog http://www.wowembossingpowders.blogspot.com/

Wednesday, June 13, 2012

Paper Pieced Hampton Art Card


Paper piecing can be so fun, and using this Outlines/Hampton Art stamp and American Crafts Paper, I was able to piece my entire stamp!


Supply List:

Hampton Art Stamps:  Posy Collage  #PS0619

Clearsnap:

Colorbox Archival Dye: Wicked Black

Colorbox Chalk Ink: Chestnut Roan

Top Boss Watermark Ink

American Crafts papers, metal badge: Garden Cafe

Worldwin Cardstock:  CutMates Molasses Cookies

Gold Embossing Powder

Cheery Lynn Designs Die:  Anastasia Border

Viva Décor Pearls: Kiwi

Want2Scrap Pearls

Copic Markers

Shimmer Satin Ribbon, Really Reasonable Ribbon

Tools: Grand Callibur, Close To My Heart Heat Gun

Adhesives: GlueArts Glue Glider Pro – Perma Tac; U Cut It Dimensional Adhesive

Art Glitter Dries Clear Adhesive


Designer Notes:

1.      Stamp the Posy Collage on white cardstock, using Wicked Black, for the base image.

2.      Stamp the image again on coordinating patterned papers, and fussy cut the inner flower petals.

3.      On the base image, color the outer edge of each flower, with a coordinating Copic marker.

4.      Glue each of the patterned paper flowers down to the base image.

5.      Stamp another Posy Collage image on the Molasses Cookies Cardstock, using the watermark ink.  Sprinkle with gold embossing powder and heat set.

6.      Cut each of the flower centers out, and adhere to the base image.

7.      Add decorative accents to the flower centers with adhesive pearls, and Viva Décor Pearls.

8.      Ink the edges of all papers with the Chestnut Roan ink.

9.      Assemble as shown.


Monday, June 11, 2012

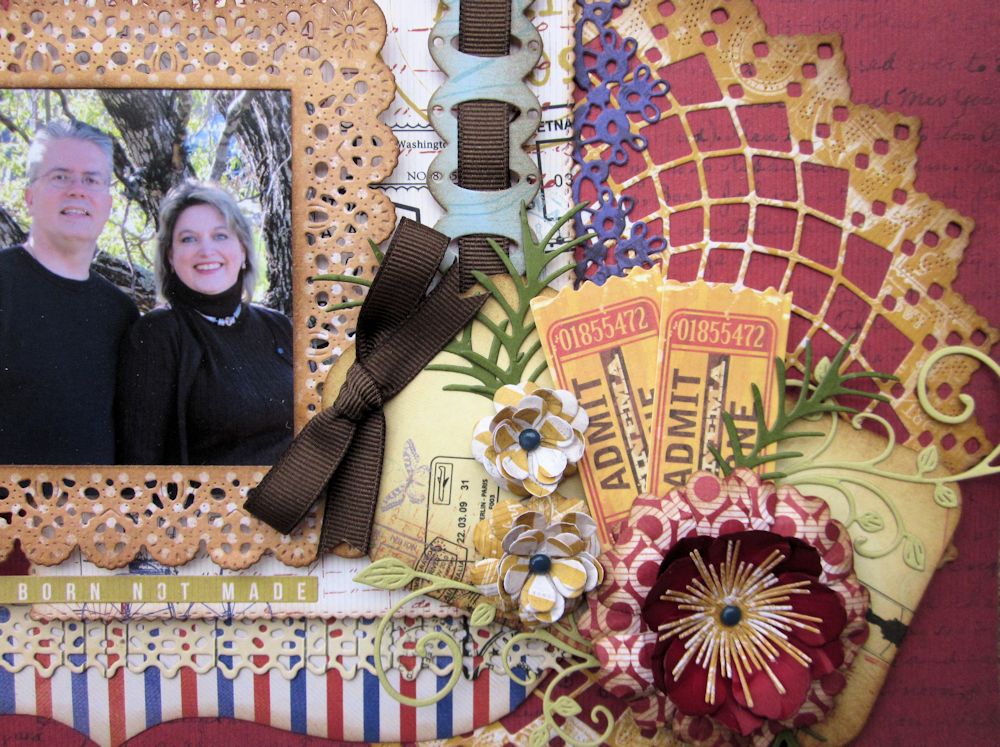
Where Our Journey Began


I was going through some of my pictures this weekend, and found this one. that I really like, of me and my husband.  It was taken at the lake in our neighborhood, which happens to be where we got married.  I had this journey themed paper from Kaisercraft ( Check In) - which typically would be used for trips and vacations.  But I got to thinking...journeys don't always involve traveling. Much more often, it has less to do about where we go and more to do about who we become.

My new Cheery Lynn dies for the month arrived on Saturday - so this layout was the perfect opportunity to start playing with them!


The new challenge this week is "roses".  So be sure to get those entries in for your chance to win a $20 gift certificate.  Also,  all entries for the month of June will be eligible to win a Big Shot Machine - how awesome is that?  You can only enter one project a week - but make sure you enter each week, for four chances to win!

Cheery Lynn Designs Dies
Kaisercraft Check In Collection
Departure/P857
Arrival/P856
Passport/ P860
Destination/ P864
Roam/ P861
6 1/2 inch Check In Paper Pad
Borders Sticker Sheet/ SS138
Check In Collectables/ CT716

Challenges:
Kaisercraft: Saturday Sketch Challenge #2
Catered Crop: Banners or Buntings

Masculine Birthday Card


My boss' s birthday is coming up in a few weeks, and I didn't want to wait until the last minute to get his card made.  So, when I saw that the JustRite Stampers challenge this week was masculine cards, I thought this would be the perfect prompter for me.


He is going to be 36, so I took some Tim Holtz Ruler Ribbon, folded it, so that the 3 and 6 were beside each other, and stapled it in place.  I took the postage stamp die from Spellbinder's/ Becky Fleck's Office  Supplies, and cut away the embossed center rectangle and used this to frame my "36".  The Happy Birthday sentiment is from JustRite's Always and Forever Medallion Labels set. My patterned papers are from Simple Stories, and my kraft cardstock from Worldwin Papers.


The main image is from JustRite's Oceanside Oval Medallion Labels set.  it was cut and framed using the Spellbinders/ JustRite Oval Medallion Label die. The image was colored with Copics. I also cut a tattered page border from the Office Supplies set, to go under my paper tag layer.  I inked the edges of all of my papers with Distress Ink, and finished the card off with a manly jute ribbon bow.

Challenges:
Mojo Monday: Sketch
JustRite Friday Challenge: Vintage Masculine

Friday, June 8, 2012

Beauty In All Things


It's a beautiful summer day, here in the mountains of North Carolina, and I thougt I would share a happy card with you.  I've got lots of projects that I'm working on for the Summer CHA, but just wanted to sneak a fun card in for you today.

I hope you have a great weekend!

Patterned Papers: Pink Paislee
Cardstock: WorldWin Papers
Stamp: Unity Stamp - Kit of the Month June 2011
Cheery Lynn Designs Dies: Horizon Coved Rectangle Reflections Die, Border Carnivale
Wow Embossing Powder
Spellbinders Labels Five
Want2Scrap Nestabling
May Arts Ribbon

Challenges:
Friends With Flair - Friday Hop
Unity - KOTM Sketch Challenge
Simon Says: Diamond Jubilee
Unity Challenge: Stripes
Stamp and Show: Texture

Thursday, June 7, 2012

Wow! What a Cute Gift


Recently, I saw the cutest altered mason jars on Pinterest.  Someone had glued real doilys on the outside of them.  This got me thinking of a way to create something similar, without having the bulk of a real doily. 


So, I die cut a doily using my Cheery Lynn Nautical Wheeler Doily die and adhesive vinyl.  I stuck this to my jar, to use as a mask.  Next, I took my Versamark pad, and inked over the doily.  I sprinkled Wow Opaque Bright White Embossing Powder liberally over this, and heat set it. 

Now, there are a couple of things to be aware of when trying this technique...First - the glass will get very hot. So make sure, you have it sitting on a surface - don't try to hold it.  Also, areas if the vinyl will curl up. Don't worry, your embossing powder will stay stay exactly where you want it to.


After all of the embossing powder is melted, just peel off the stencil, and decorate with ribbons and flowers. 

Wednesday, June 6, 2012

Vintage Chocolate Doily Card


I hope your week is going great! Today, I've got a card to share with you that is made with Kaisercraft's Sweet Nothings line.  To me, this card looks like it needs a yummy box of chocolates to go with it, but the good thing is, the card doesn't have any calories.  I really enjoy using different textures togther, and the show-stopping bow is made with lace, crinkle ribbon, organza, and twine - topped with a vintage button.  I added French Knots around the holes on the Cheery Lynn Designs doily, made with the same twine, to help tie it all together (pun intended!)


Kaisercraft Patterned Paper:  Sweet Nothings
Kaisercraft Rub Ons: Madame Boutique (RB949)
Worldwin Cardstock:  Ivory ColorMates
Cheery Lynn Designs Dies:  French Pastry Doily, Lace Corner Deco I
Epiphany Crafts Shape Studio Accessories Bubble Caps Round 25
May Arts Ribbon
Madeira Thread
Ranger Distress Ink: Vintage Photo
Other: Linen thread, vintage button
Tools: Grand Callibur, Basic Grey Rub-On Roller Stylus Tool, Sewing Machine, Epiphany Crafts Shape Studio Tool Round 25
GlueArts Glue Glider Pro – Perma Tac; U Cut It Dimensional Adhesive; Extreme Tac Adhesive Squares

Challenges:
Sweet Stamps: For Dad

Tuesday, June 5, 2012

Me at 45


The challenge this month at Once Upon a Sketch has to do with birthdays, and many of their DT chose to highlight their current age - and I thought that was a great idea.  I wrote about who I am at 45 on a tag, that slides into a pocket underneath my Horizon Coved Rectangle die cut.  You can see the journaling card pulled out in the picture below.


Creative Inspirations Paint – Beige

Art Institute Glitter – Ruddy Red
Art Institute Dries Clear Adhesive and Ultrafine Metal Tip Applicator

Kaisercraft Rhinestones
Ranger Distress Ink: Barn Door, Vintage Photo, Black Soot

Bo Bunny Patterned Paper, stickers:  Serenity
Worldwin Cardstock:  Kraft

Madeira Metallic Thread

Tools: Grand Callibur, X-acto Tool, Sewing Machine

1/8 Scor-Tape
GlueArts Glue Glider Pro – Perma Tac; U Cut It Dimensional Adhesive; Extreme Tac Adhesive Squares

Challenges:
Once Upon a Sketch: Birthday Sketch
Simon Says: Anything Goes
Stamp and Show: Show Some Texture