 If you are ready for a ton of inspiring ideas and fun new techniques to try, then you are going to want to check out all of the projects from the talented Crafty Secrets DT! We are introducing 15 new sets for CHA - and they are all must haves! If you would like to find out how I made this card, please see my tutorial below.

Step 1: Cut four squares of cardboard 2.25 x 2.25
 Step 2: Paint the board with black paint. Try to leave texture in the paint.
 Step 3: Stamp each block with a different image from SM42 Lacey Patterns using Versamark ink. It's really easy to line the stamps up in the center of the square since the stamps are clear.

Step 4: Emboss with amethyst embossing powder and heat set.
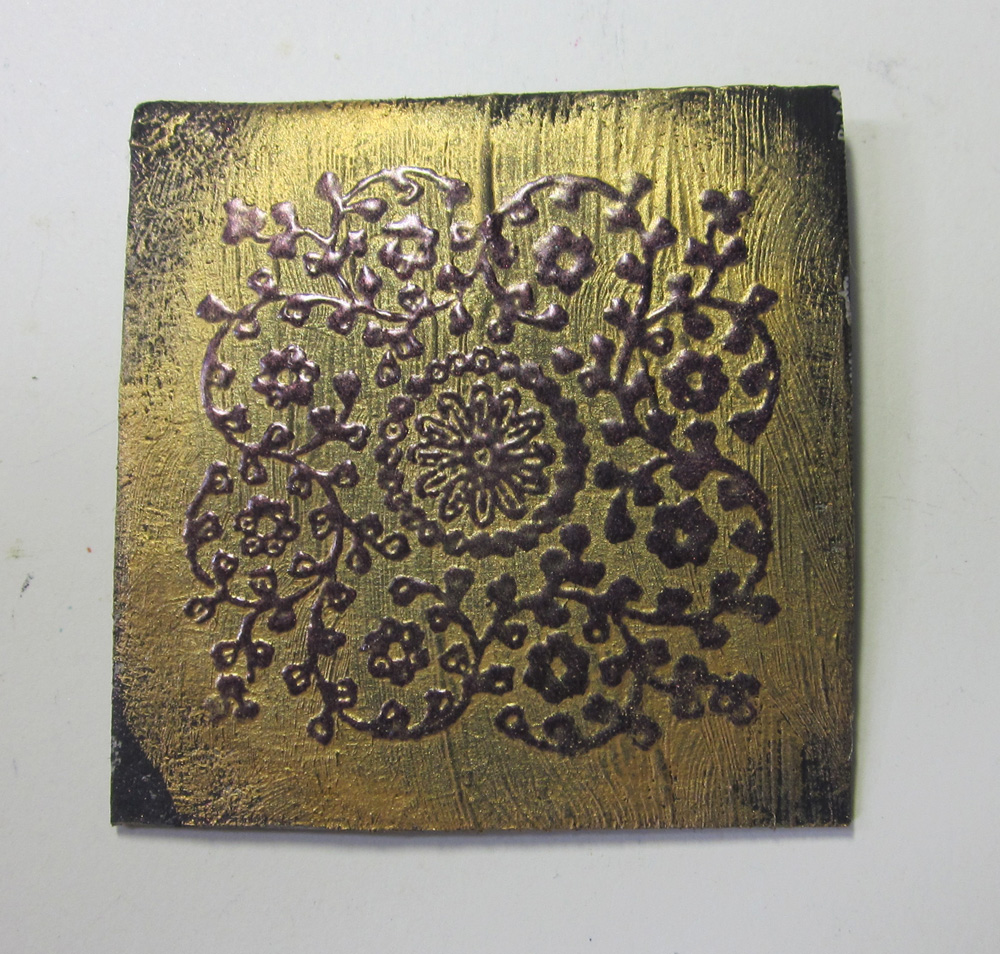 Step 5: Rub over the image using Viva Decor Inka Gold. Take a damp paper towel and rub off the gold from the embossed area.

Step 6: Add some thick tacky glue to your non-stick mat and water it down.
 Step 7: Add a little around the edge of each tile, and sprinkle with glitter.

Step 8: For my patterned paper, I print one of the PNG files from our new CD, Creating with Vintage Patterns, at 5.75 x 5.75 inches onto Bazzill cardstock.
For the rest of the card, I colored and cut out the fairy from SL41 Born To Fly . I used Viva Decor Inka Gold to color the Embossed Frame. The small epoxy squares were made using the Mini Vintage Creative Scraps. Those scraps are so pretty, I had to force myself to cut into them! I also trimmed out the edges of the card using the Metallic Peel Off Stickers Gold Scallop and Dot Mini Trim. A few pearls, some seam binding and a vintage button, and this card was completed.

I know you are going to want to see what the rest of the design team came up with, so here's a list of everyone, so you can check it out! Keep your notepad handy, cause I'm sure you are going to want to start your shopping list! So when you finish, you can head to the Crafty Secrets website and get some Crafty Secrets goodies delivered to you! And to make sure you don't miss anything, why not subscribe to the Heartwarming Vintage Blog? There's always lots of inspiration, announcements and giveaways.
- Amy Teets
- Debbie Marcinkiewicz
- Fauve vanMaanen
- Gini Cagle
- Heidi Blankenship
- Jan Hennings
- Julie Campbell
- Linda Duke
- Michele Kovack
- Pam Hooten
- Tammy Roberts
- Vicki Chrisman
- Victoria Warren-Mears

- Viola Mahr
Challenges:
Simon Says: Anything Goes
Creatalicious: 1920's
Simon Says Stamp and Show: embossing
Simply Scrapping Crafts: Embossing
26 comments:
OH.. Love learning something new! Thanks for the tutorial! Very cool!
Such a neat technique and great project!
SO LOVELY!!!!!!!!!! I adore the retro look you mixed with the shabby. just sweet!
Great card... so much detail!!
Beautiful card & fabulous tutorial!
Julie
Beautiful card, great tutorial!
What a wonderful tutorial, thanks so much for sharing, Marilyn
Oh great, thanks for showing the tutorial for your beautiful work.
Wow - this is gorgeous! This is quite the process - not sure if i have enough patience to tackle it but I am glad you gave the tutorial because I may want to at some point :)
rebeccadunham at hotmail dot com
really cute. especially the fairy.
tfs
Great project. I've learned something new. Thanks.
Love your rich colour choices!
Love the detailing! The colors are beautiful!
Beautiful, and thanks for the great tutorial.
Gorgeous card Gini :-) the tutorial is fab ,, I love the printed background and all the embossing ,, very arty and fabulous ! :-)
thanks for joining us on the Simon Says Stamp Challenge :-)
luv
Lols x x x
WoW, so beautiful, thanks for sharing the great way you created this.
Gorgeous! Just love those tiles in the background! Thanks for joining the Simon Says Stamp and Show Challenge!
Gorgeous! The individual lacy images reminded me of tin ceiling tiles. Beautiful!
Another great tutorial with an outstanding result.
stunning ~ thanks for joining us at SSC...
Fantastic color combo!And love the tutorial!!!
Oh my gorgeouness this is BEAUTIFUL! Love the purple, and that fairy is stunning!
GORGEOUS,a fabulous design and love the rich colours!!! Thanks for joining us at Creatalicious!!
xx
Gorgeous project, love the details and all that embossing.
oh just love this,great tutorial too,super card you have done with this,technique,bless you for playing at creatalicious this month hugs cherylxxxxxx
Fabulous technique and want to try this soon. Gini, your card is gorgeous!!!
Post a Comment