Monday, February 28, 2011

JustRite Challenge


This is a card that I made using Graphic 45's latest collection - Le Cirque. This is such a fun and whimsical line - I just love it!

The current challenge at JustRite is Direct to Rubber. I chose to use the Rock and Roll technique to add two colors to my stamp. The sentiment was stamped separately in black ink and covered in glossy accents. All of my stamps are from the new You Inspire Me set - such a gorgeous set!

Challenges:
JustRite: Direct to Rubber
Creative Cutter: Graphic 45

Sunday, February 27, 2011

Graphic 45 Love

I really love Graphic 45! So of course, when I saw that they were holding a DT call, I knew that I wanted to give it a try. Their paper and embellishments are like no one else's. The vintage style, the colors, the imagery...every thing about this line is so creative and wonderful - and it fits my style of crafting to a tee! I'd like to share with you some of my favorite Graphic 45 projects.

Le Cirque


Curtain Call


Domestic Goddess


Blackboard/ Altered Silver Serving Tray

Steampunk Debutante


Once Upon a Springtime


Mixed Collections

On the Boardwalk


Wednesday, February 23, 2011

Waltzing Mouse Sketch Challenge

I was playing around with 3-d stars, and decided to use it for the sketch at Waltzing Mouse designs. The stamp in the center is a new one from Graphic 45/Hampton Art.

Heartfelt Creations Wednesday


I shared one of my cards for Heartfelt Creations with you yesterday - but I have a fun little Easter Card to show you today. Remember to check out the Heartfelt Creations blog every Wednesday for inspiration from your favorite HC Designers! Heartfelt Creations is also holding a Design Team call until Feb 28th! They will be adding 10 new designers - so if you've dreamed of working with this fabulous company, now is your chance!


HCPC 3366 Wrought Iron Cross PreCut Set (sentiment only)

HCPC 3368 Egg-Citing Day PreCut Set

Spellbinders Fancy Tags Three

Spellbinders Standard Circle Small

other: Copics (YG21,Y21,R21, BV02); Souffle pens, Martha Stewart Fringe scissors, pearls, ribbon, Echo Park paper (Little Girl)

Stamp, cut and color the three eggs for the Egg-Citing Day stamp set. Cut a strip of green paper 1.5" x 6" for your grass. I used Fringe scissors to cut the grass, but if you don't have these, you can just individually cut each blade of grass. Roll each blade of grass in various directions and amounts. Attach to your card base and "hide" the eggs, by gluing them in the grass with dimensional adhesives. Stamp the sentiment and cut out using a Standard Small Circle. Pop it up from a cut from the Fancy Labels 3 set. Finish assembling the card as shown.

Chapel Road Stamps


I don't know if any of you noticed, there is a new "I design for" blinkie on my sidebar! I couple of weeks ago, I got the wonderful news that I had been asked to be a designer for Chapel Road line. These stamps are part of the Class Act Stamp company. My term doesn't officially start until March, but I just wanted to share a card with you today, so you can see the fun things that will be coming your way. There will be monthly challenges, that you will want to play along with, for your chance to win some great stamps!

Stamps used:
Butterfly Angle
Birthday Abermarle
Butterfly Background

Tuesday, February 22, 2011

Let's beat those Winter Blues!


Hi! It's the second week of our challenge at the Beary Scrap - Winter Blues. This week I am sharing a way to help beat those winter blues! Flowers and springtime colors - yay!

I made a never-ending card (which is so fun- it just keeps opening, and opening and opening!) If you have never made one of these, there is a great video tutorial at Creations by Christie. I used the Graphic 45 Once Upon A Springtime paper, tons of vintage German Glass Glitter, and stamps from Heartfelt Creations - all things that I love!

Here is what the front of the card looks like...


And then you open it and see this view....


And then this view...


And finally this one - after this is goes back to the beginning.


This card would have been pretty, but when I added all of the German Glass Glitter, it became a wow card!

I know some of you are wondering what adhesive to use with this glitter.... You can use all kinds of different things, but, you will get different effects. I experimented a little with some of the glues that I had around the studio and thought I would share what I found.

Fabri-tac glue: one of my favorite glues - It will work with this glitter, but doesn't give you much control. That could be good if you wanted a random type effect.


Flower Soft glue (or Aleene's tacky glue): This gives you a rather 3-d effect as the glue dries without spreading out. You can't really get fine detail effects, but if you want chunky, with lots of dimension, this is great.


Scor-tape: This is easy and quick with no drying time. Perfect if you want very uniform borders. You can also get sheets of Scor-tape, and cut with your die-cut machines to make a very glittery embellishment.


Art Glitter Glue Dries Clear (there is also a dries white version) with the fine metal tip applicator: This is a much runnier glue, which allows you to use the metal tip that will dispense the finest lines of glue that you can imagine. This will let you take a stamped image , and trace around the areas that you would like to highlight and add your glitter.


Another great thing that I've found when using this glitter is that it's not as messy - there is no static cling to the glass, so it goes right back in it's container when I'm finished. And the sparkle does not even compare to your normal plastic glitter. Once you try this, you will end up wanting it in every color (I think I have almost all of them now!)

Remeber, you still have about a week and a half to get your entries in for our Guest Designers!

Wednesday, February 16, 2011

Flower Soft Hop


We have a special blog hop today! The Flower Soft team will be showing you some new products that were recently released at CHA. Lots of fluffy goodness along this hop!

One lucky blog hopper who comments on all the blogs will win a $50 Flower Soft gift certificate!!!

The blog hop will remain open until Tuesday February 22nd. The winner will be announced on the Flower Soft blog on February 23rd.


Stacker cards are so fun! I used our new Country Village 3D Stackers for today's card. It was so easy to cut them out using Spellbinder's Standard Circles Large. I accented by design with Marigold, Meadow and Ivory Flower Soft. I also added a gold peel off sticker around my outer border. You may be noticing some other Spellbinder's on my card...I was the very blessed winner of the entire winter release - and my big box of goodies just arrived. So I used the Parisian Accents and Motif on my card. My designer paper is Little Girl from Echo Park.


You've got one more stop on this hop, the sweet Cibele!

If you get lost along the way please visit the Flower Soft blog where there will be a complete list of the Flower Soft Hop participants.

Flower Soft Blog

Debbie Sherman

Linda Beeson
Debbie Seyer
Jeanne Streiff
Vicki Garrett
Dina Kowal
Deb Felts

Gini Cagle
Cibele Glazer

Heartfelt Creations Wednesday

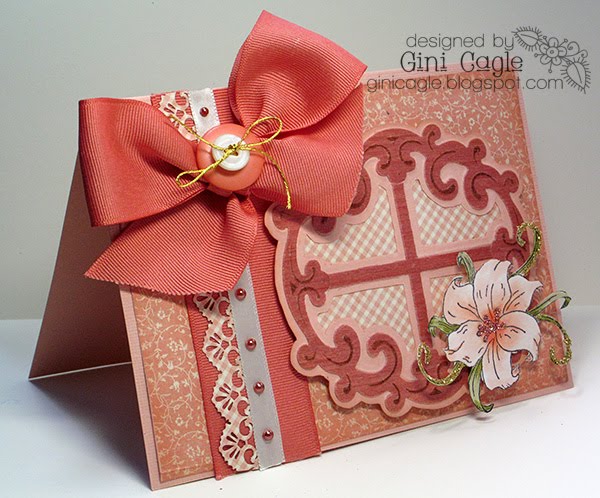
Welcome to another Wednesday full of inspiration from Heartfelt Creations! There is an announcement over at the Heartfelt Blog that you are not going to want to miss (besides, you know you don't want to miss seeing any of the other wonderful projects posted by the other DT members ).


Rejoice for He Lives (6 x 7)


HCPC 3366 Wrought Iron Cross PreCut Set (sentiment only)

HCPC 3370 Easter Lilies PreCut Set

HCD Decorative Oval Window Die

Cut and emboss one Decorative Oval Window. Stencil using Peeled Paint Distress ink. On pale pink cardstock, stamp the three crosses stamp using Versamark ink. Let dry. Stamp over the top, the sentiment, using the Peeled Paint ink. Stamp 4 of the lily swags. Color and cut two complete images, using Copic markers ( YG01, YG03, R20, R21, R22). Color just the flowers of the second set of swags, and cut the flowers out. Cut deep into the petals to allow you to shape each petal upward. Attach these to the colored images using dimensional foam. Use glass glitter and dew drops to embellish the flower centers. Assemble t
he centerpiece as shown and place on card. Add ribbons and pearls as shown to finish.


6 x 6 Wrought Iron Cross Card


HCPC 3366 Wrought Iron Cross PreCut Set

HCPC 3303 Posy Patch Flowers Precut Set

HCPC 3367 Vintage Life Background PreCut Set

HCPC 2255 Large Fancy Flourish

HCD 701 Posy Patch Die

HCD 702 Decorative Butterfly-Border Die

Background Paper: Stamp the Vintage Life background on water color paper using Vintage Photo distress ink. Let dry. Stamp the Fancy Flourish using Versa-mark ink over the top, and emboss with a clear embossing powder. Ink over the paper using Distress Inks ( Spun Sugar, Worn Lipstick, Victorian Velvet). Start with the lightest color, and work away from the center with the darker colors. Distress the edges and add a little Vintage Photo around the edges. Punch a border and tuck under the right side of the background mat. Add bling and ribbon to decorate.

Cross: Stamp the Wrought Iron Cross using gold ink onto watercolor paper and cut out. Ink the outside edges using the Victorian Velvet ink. Paint the brown of the cross using Glimmer Mist in Suede. Stamp and cut two Posy flowers and pop them up on the cross, using dimensional foam. Cut two of the small decorative corners form the HCD 702 die set, and tuck under the cross. Assemble card as shown.


Vintage Cross Card

Products Used on This Project

HCPC 3365 Decorative Vintage Cross PreCut Set
HCPC 3367 Vintage Life Background PreCut Set

Other: gold embossing powder, Versamark embossing ink, CTMH White Daisy Pigment ink, adhesive pearls, Webster’s Pages DP, LuminArte water color paints, gold lace

Stamp the Vintage Life Backgound stamp set on Kraft cardstock, using white ink. Allow to thoroughly dry (or use a heat gun to speed the process). Stamp the cross over the background using the embossing ink. Sprinkle with gold embossing powder and heat set. Stamp two more cross images one on watercolor paper, the other on the DP. Cut out the cross from the DP (just cutting the main cross image). Use dimensional dots to pop this up from the base. Finally, use water colors to paint the flower that is stamped on the watercolor paper. Cut this out, and use another dimensional dot to layer this up. The butterflies were cut from the DP and layered where the butterflies originally appeared on the designer paper.


Tuesday, February 15, 2011

Unity Co-brand Finalist - Please vote!

This post will remain at the top until voting is final on Feb. 15th!
Please, vote and help spread the word!


Gosh, I found out a couple of weeks ago that I was one of five finalists for the Unity Stamps co-brand challenge - And now it comes down to a vote. Up for grabs is $500 in Unity Stamps and a 3 month design team gig.

I really need everyone's help - There are two ways to vote.

1. You can "like" my photo on Facebook. I think you will have to "like" Unity Stamps before you will be able to access the link to "like" my entry. Remember, you have to "like" to register a vote - I love reading all of the comments, but they won't count as entries.

2. Also you can leave a comment on the Unity Blog, saying that you would like to vote for Gini Cagle.

If you can pass this along, re-post it - anything you can do to help get the word out!

Thanks!

Beat Those Winter Blues!


Hi, it's time for a new challenge theme at the Beary Scrap, and we chose Winter Blues. Your project can be wintery, or blue, or how you escape your winter blues - however you would like to interpret the theme.

I decided to use the Bo Bunny Midnight Frost papers (and gorgeous trim) - but decided I would use these papers for blue skies rather than a winter chill! So I added some stamped images from Unity stamps - and colored with copics. It's really fun sometimes to use your copics on designer papers rather than white paper. I inked the edges of my paper with Distress Ink and the Ranger Blending Tool (I love this little tool, and keep one of the pads for each color of Distress Ink in a divided craft box). I added a couple of Kaiser Craft Pearls to set off my Bo Bunny Wraps. I love keeping a great stash of the pearls on hand, in all colors. You know how us Southern girls are about our pearls!

Please don't forget to enter your sketch for the Beary Scrap Guest DT call. This is such a fun group and we would love for you to be a part! Check out the details here.

Challenges:
Bo Bunny - Valentine Candy