Wednesday, September 11, 2013

Introducing Heartfelt Creations Season of Joy Collection

The Season of Joy Collection has been put together so you can create your most elegant Christmas cards, layouts and 3D projects. Create gorgeous typography backgrounds in your favorite Christmas hues. The hand-drawn, detailed stamps provide new excitement to every Christmas project you'll create as the snow flies and the hot cocoa simmers on the stove. Feel your heart ignite with passion and excitement as you delight yourself with the Frosty Blanket Paper Collection. Match the ornate poinsetta stamp with the cutting-edge Sun Kissed Fleur die and you'll save time while creating your Christmas projects.

And for 4 weeks only, gift yourself with the whole collection and save $20 off the regular price!
With this set you can create the most elegant, delicate creations your friends and family have seen. Being a smile to your loved ones' faces. See the Season of Joy Collection here.


Heartfelt Creations Products
Striped Candy Cane PreCut Set HCPC 3558
Christmas Poinsettia PreCut Set HCPC 3557
Christmas Sentiment Circles PreCut Set HCPC 3561
Other:
May Arts Ribbon  382-34-14
WorldWin Papers Cardstock
Want2Scrap Pearls
Momento Ink
Copic Markers: R30; R37, R39, YG17; YG25, W0, W1
Stickles
Xyron Mega Runner, Creatiopia

5x7 Seasons Greetings Card

Use the largest die in the Elegant Labels set, wrap ribbon around the center and adhere to the card base.  Cut the next die, and mount to the card using foam adhesive.  Stamp the candy cane, color with Copics, and hand cut.  Apply to the card with the foam adhesive.  Tie a bow, and adhere to the right side.  Stamp the sentiment, handcut, and a pearl to the center, and apply beside the bow.  Stamp and cut the flower, using the matching die.  Paint with the 3D Glitter Paint, and shape with the tool kit.  Color a clear sparklet using a Copic marker - add to the center of the flower.  Stamp and cut the holly leaves with the matching dies.  Color with the Copics,  add Stickles to the center vein, and Crystal Lacquer to the berries and adhere to the card.


Thursday, September 5, 2013

Wednesday, September 4, 2013

Heartfelt Creations Inspiration

Heartfelt Creations Products
Christmas Card Collection HCDP1 236
Peaceful Night PreCut Set HCPC 3553
Ornamental Add On Die HCD 738
Other:
May Arts Ribbon 441-78-33
Lindy's Stamp Gang Embossing Powder - Hydrangea Blue Mauve
Versamark Watermark ink
WorldWin Cardstock
Xyron Mega Runner, Creatopia
CTMH Ink

Cut the 6 x6 card front from the paper pad.  Stamp the small flourish over the paper using a brown ink.  Add a ribbon across the center of the panel.  Cut the decorative panel from the pad.  Distress the edges.  Fold opposite corners down and hold in place with a brad.  Stamp the sentiment with watermark ink, and heat emboss with blue powder.  Die cut with Opulent Ovals die, and ink the edges.  Die cut the Ornamental Add on in blue, and tuck under the sentiment.  Attach to card base.

Thursday, August 29, 2013

Easy Back to School Project with Xyron

It's always fun to surprise your back-to-schooler with a special treat, tucked into their backpack.  My nephew loves to color, so I made him this fun little Crayon tin using an up-cycled Maya Road Tin and my favorite Xyron adhesives.
 

So this is what the tin started off like - but of course, you could use any similar container that you had.
 I traced around the base of the tin - to make a liner.  After this was cut, it went easily through my Xyron 5" Creative Station.  For something like this, that will get a lot of use and abuse, you want to use an adhesive that will keep the whole sheet down, and not peel up.  So Xyron does the trick.
 I did the same thing for the lid (but had to trace around the acetate window).  To finish the box off, I used May Arts Ribbon.  My favorite way to glue my ribbons is with the Xyron 1.5" Sticker Maker.  I ran the length of ribbon I needed through the machine, peeled off the backing and added it to the box.  I used the new High Tack Adhesive Dots to apply my ribbon.
 What a fun way to carry your crayons in style!

 
 Xyron 5" Creative Station; 1.5" Sticker Maker; High Tack Adhesive Dots; Re-purposed Maya Road Tin, May Arts Ribbon, Graphic 45 Paper.

Wednesday, August 28, 2013

Heartfelt Creations Inspiration

Heartfelt Creations Products
Christmas Card Collection HCDP1 236
Bright Christmas PreCut Set HCPC 3552
Holly Berry PreCut Set HCPC 3551
Ornamental Add On Die HCD 738
Other:
May Arts Ribbon 445-15-32
Versamark Watermark ink
Want2Scrap Pearls
Lindy's Stamp Gang Embossing Powder - Twilight Bronze
Worldwin Papers Cardstock
Xyron Mega Runner, Creatopia

Distress the edges of the 6 x 6 card front. Add burlap ribbon across the center.  Cut the decorative panel from the patterned paper.  Stamp and cut the holly branch with the coordinating die. Adhere to the left of the candle.  Add red pearls over the stamped berries. Stamp the sentiment with watermark ink and heat emboss with bronze powder.  Die cut with scalloped circle. Adhere to the card with foam adhesive.

Monday, August 26, 2013

Beautiful Friend


School officially starts back today - so I thought it was a great time to start sharing more fall-themed cards.  Just by adding some fall foliage to my flower cluster it really helped with the theme.  After I cut my flowers, I painted them with Viva Decor 3D Metallic Stamp Paint, and then shaped them.


Hampton Art - stamps
May Arts Ribbon NQ33
Want2Scrap Pearls
WorldWin Papers Cardstock
Smooch Spritz
Viva Decor 3D Metallic Stamp Paint. Glitter Liner
Xyron Mega Runner

Wednesday, August 21, 2013

Heartfelt Creations Inspiration


Heartfelt Creations Products
Christmas Card Collection HCDP1 236
Sweet Memories PreCut Set HCPC 3555
Christmas Song PreCut Set HCPC 3556
Ornamental Add On Die HCD 738
Other:

Want2Scrap Bling
CTMH ink
May Arts Ribbon QM16
Kraft Tag

Cover the bottom of the tag with patterned paper.  Stamp pine boughs behind where the die cuts will be positioned.  Stamp the sentiment a cut with a circle die.  Ink the edges.  Stamp the bird, color with ink and blender and fussy cut.  Die cut the ornamental die and position at the bottom of the sentiment.  Cut foliage and arrange at the top, and place the bird nestled in it.  Add Want2Scrap bling around the sentiment. Finish with ribbon.

Monday, August 19, 2013

May Arts Ribbon Cutting Blog Hop


The May Arts Ribbonistas are so excited - and we know you will be too...to celebrate the launching of the new and improved May Arts Ribbon Website. This celebration is so big that  last year's design team has joined up with the new design team for one more hop.  And big prizes? Oh yeah - over $1000 in goodies are up for grabs!  Leave comments on any of the designers  blogs for entries to win!


I interpreted "ribbon cutting" by cutting into a brand new roll of ribbon! And honestly, this ribbon is so yummy, I don't know how I have resisted using it, until now.

  
I created a pocket card, decked out with May Arts ribbons - and my tag, has a piece of ribbon with "Congratulations" stamped on it. Of course, this is congratulating May Arts Ribbon and Bethney, the Ribbon Lady, on such a fantastic new site!


The hop is only two days, but don't worry, you will see so many ribbon ideas to inspire you!  Here is the line up for today:
·         Christina Colón
·         Gini Williams Cagle
·         Emily Lanham
·         Jenifer Cowles
·         Jessica Kephart
·         Courtney Lee
·         Latrice Murphy
·         Charlene Driggs
·         Erin Thiem

May Arts Ribbons 

Partners In Craft Supplies

Other Supplies:
Black Tag
WorldWin Papers Kraft Cardstock
CTMH Ink, Enameled Number Tag

Steampunk Canvas


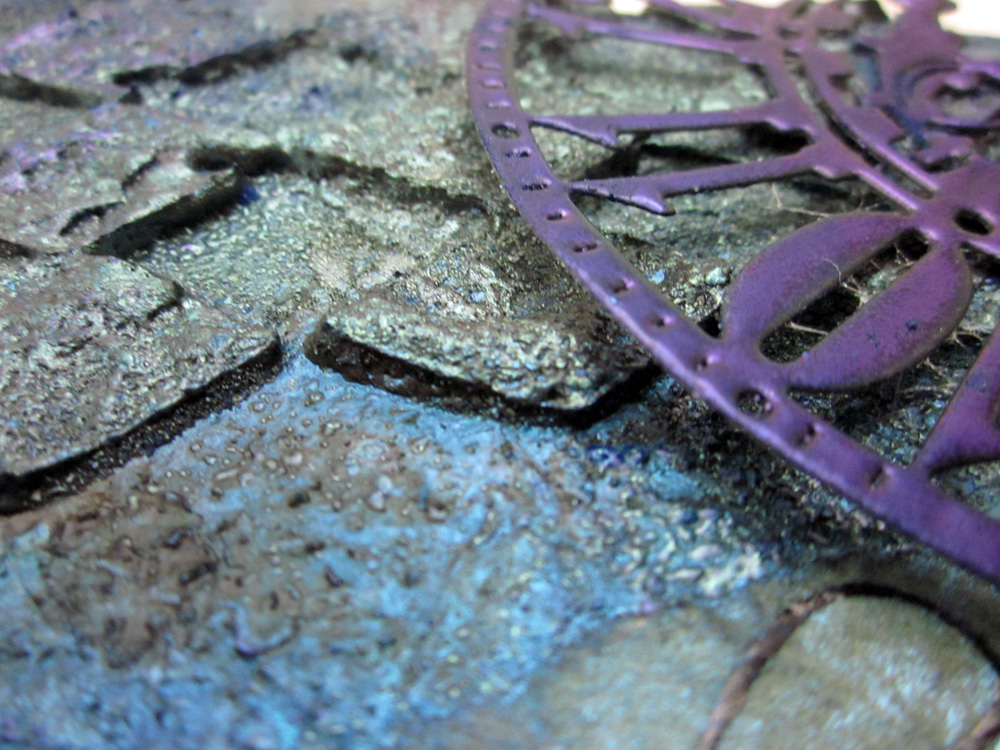
I love trying new techniques and creating mixed media explorations.  A week or so ago, I had finished the base of this canvas –  it was covered with embossing powders, pastes and sprays, but had no final decorations added to it. I decided to add some steampunk elements to finish it out. 


Supplies

 Stamps
Hampton Art / 7gypsies  Time is Precious (PS0742), Distressed Clock (PS0679)
 Ink
Clearsnap  Top Boss – Watermark ink
Other Supplies
WorldWin Cardstock
Lindy’s Stamp Gang Embossing Powder  
 Moon Shadow Mists
 Starburst Mist
Dreamweaver Black Embossing Paste
TCW stencil
Gesso
Tissue Paper
Canvas
Xyron Mega Runner

Here is how I put the canvas together-
Crumple tissue paper and run through Xyron 5” Creative Station to apply adhesive to the surface.  Tear pieces of the paper and lay onto the canvas.  Cover the entire canvas this way.  Paint a layer of gesso over the tissue paper and allow to dry. Rub the watermark ink over the high spots of the canvas and heat emboss with the dark blue powder. Spritz with mists. Randomly stamp the watermark ink across the canvas and sprinkle with the light blue powder and heat emboss. Mist again.  Use a stencil template to apply embossing paste in a diamond pattern. While wet, sprinkle with embossing powder, and heat set immediately.  This will cause the embossing paste to bubble some. Add another layer of mists and more random embossing powder.   Stamp the sentiment and the clock onto tissue paper with watermark ink, and heat emboss with a black powder.  Glue onto the canvas and spray heavily with the mists and allow to air dry.  Die cut the Steampunk elements and rub with the watermark ink, and heat emboss 3 layers of powder.  Apply to the canvas.  

If you would like more explanation, please check out my video tutorial. 


Friday, August 16, 2013

Don't Follow Your Dreams, Chase Them


I thought this hot air balloon stamp was so cool, when I saw it from Viva Las VegaStamps! and knew I had to have it.

This is a super easy fold card, but I think it's really nice for a more masculine type card.

Cut your paper 6 x 12 and score at 3" and 6".  That's it!

Add a die cut frame to the front panel for your sentiment, and decorate how you like.


Stamps: VLVS
Scoring tool: Scor-Pal
Patterned Paper: CTMH
Ink: CTMH