Friday, August 24, 2012

Warmest Thanks


Last card for today! All this week, I've been enjoying reading about  the Card Design Handbook at Moxie Fab World. And of course, there are challenges going on there to test just how well you paid attention to the rules of design.  For this card, I wanted to try out the principles of the Focal Point and  wanted to focus on the vellum rose that I made using the new Cheery Lynn Designs Build a Flower 2.  I colored the plain vellum using Faber Castell Pitt Big Brush Artist pens and Art Grip Aquarelle pencils.  This let me create a very realistic striated rose petal.


The background was stamped using Verve's Artful Elegance stamp set (as well as the sentiment). The tag was cut using Verve's Tiny Sweet Scallop Die Set.  The white satin pleated ribbon is from May Arts as well as the very cool paper cord.
 
Challenges:
Moxie Fab World - Focal Point

Happily Ever After

 
Here's another card for today - an anniversary card using the Fairy Tales Stamps from Verve.
The papers are from DCWV, and the wooden accents are from Kaisercraft.
 
Challenges:
DCWV: August Card Stack-a-Holic Challenge

Fabulous- Just the Way You Are

 
Today, I have just been playing in the studio, just for fun.  I've been making challenge projects - and wanted to see how many I could get done -lol!

This card uses the oh so pretty Love's Flower stamp set from Verve.  They are having a new release party tonight over at Splitcoast Stampers. So, if you don't have plans tonight, you might want to stop by.


Challenges:
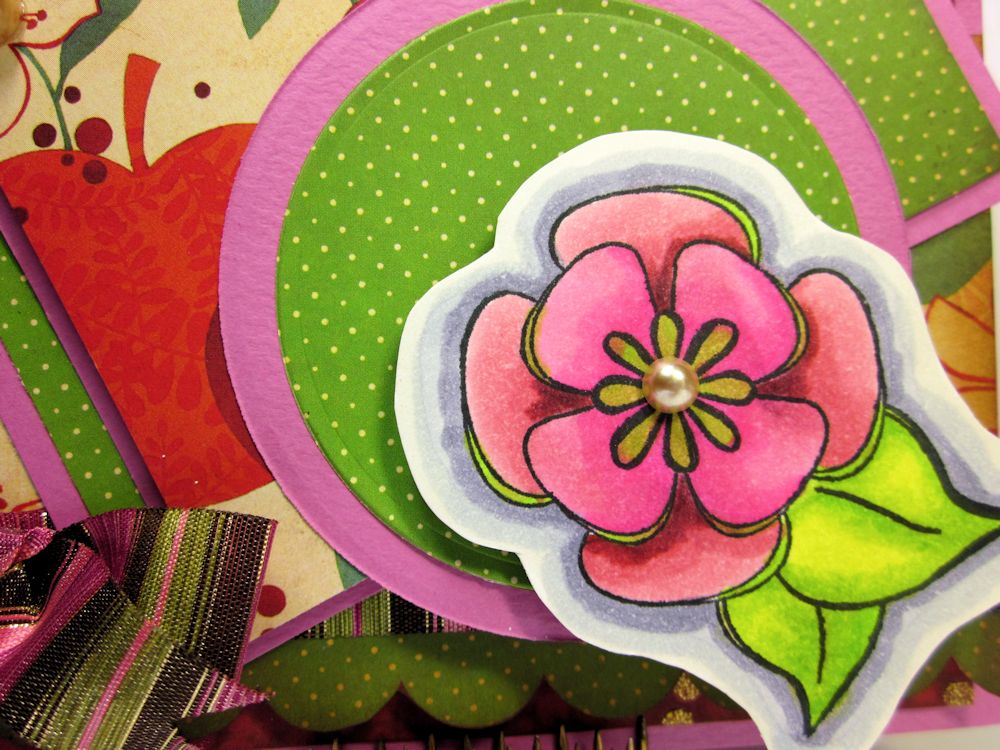
Touch Twin: Good Eats with Shadowing (My DP has apples)

Wednesday, August 22, 2012

Thinking of You


I have a card today to share with you that combines Spellbinders and JustRite Stampers.  I always love the combination of these two companies - and let me tell you what is even more exciting...
Scrap-mart has teamed up with these companies and Becka Feeken (card maker extraordinaire) to bring you an exclusive monthly kit that will only be available at Scrap-Mart with stamps and dies that will only be in the kits. How cool is that?!!


OK, on to my card....I used the Elegant Fronds Background stamp to make the darker patterned paper.  I embossed the design with Wow Honey powder, and then added the purple by using various colors of Faber Castel Gelatos.  The intricate cuts were made with the new Spellbinder's Venetian Motifs, and the label is the JustRite/Spellbinders Antique Labels One Dies.   The sentiment and violets were stamped using Violette Vintage Labels.  The flowers were colored using Souffle pens - so that it would show up on the purple cardstock.  I didn't have the right colored pearls, so I changed them up with a Copic marker.  The card was finished off with May Arts Ribbon - in a 5/8" reversible stitched satin, topped with a flower made with the Bitty Blossoms dies and glitzed with Stickles.


How about you? Are you excited to sign up for the new kit club?  The September set is online now, so you can check it out!


Challenges:
JustRite Stampers: Opposites Attract

Monday, August 20, 2012

Easy Peasy Birthday Card


I know that I am always making detailed projects, but today I wanted to show you how with just a couple of cuts with your Cheery Lynn Designs dies, you can make a quick and elegant card.

The new release of dies has several sentiment dies, including this Happy Birthday. The script is so lovely, it just seemed like it would be too much to add a ton of embellishments.  I used the Japanese Garden Lace Oval (which now comes with an Angel Wing) to frame the sentiment, and just finished the card off with a large bow.

This week's theme at the challenge blog is to use doilies (and of course CLD has the most gorgeous doily dies ever!)  So, get to crafting, so you might win a $20 gift certificate.

Saturday, August 18, 2012

Rowdy Boys Layout

It's time for another day of inspiration fromWow Embossing Powder's group - the Powder Puff Girls.  Be sure to head over to the blog, to check out all of the gorgeous inspiration from my team members.


I created this layout using a picture I found in my Great-Grandmother's scrapbook.  The only "clue" I had about it, was her caption "Rowdy Boys".  I can only imagine the stories that went along with this picture.


I love the look that the ultra high embossing powders give - so thick and textural! I used the Copper Ultra High powder to cover my chipboard letters.


I also used the powder to distress the edges of my papers.


This  layout was created for Kaisercraft's Summer CHA booth - and I'm happy to share it with you today.


Rowdy Boys Layout by Gini Williams Cagle featuring the Sears and Son Collection
Wow Embossing Powders

Kaisercraft Products


Cheery Lynn Designs Dies


Glue Arts Glue Glider Pro Perma Tac

Glue Arts U Cut It 3D Adhesive Foam Blanks

Friday, August 17, 2012

More from Cheery Lynn Designs New Release


I have a second project to share with you from the new die release at Cheery Lynn Designs.  This one uses  New dies used: B207 Cross Set, B189 Sentiment Frame 1,
B190 Sentiment Frame 2, B187 Build a Flower #2;
B188 Embellishment 2, B200 Celtic Band

If you haven't gone over to the Cheery Lynn Designs Storefront - you really need to go see all of the new release! There are so many incredible dies!

Wednesday, August 15, 2012

Release Day At Cheery Lynn Designs!

I get so excited every time Cheery Lynn Designs has a new release, because they always add the most fantastic dies! And I know, you are not going to be disappointed with this one.  Get your shopping lists ready, because you are going to want to add so many of these to your collection. Be sure to check out the CLD Inspiration Blog today to see all of the samples created by the Design Team and then head over to the Cheery Lynn Designs Storefront, to get these goodies delivered straight to your front door.


The Secret Garden Layout

Build a Flower #2
Build a Flower Embellishment #2
Ornamental Gate
Lace Humingbird
Pinwheel Doily with Angel Wing
Mini Dimensional Butterflies
Chicken Wire Frame
Celtic Chain
Fanciful Flourish


Patterned Papers and Velvet Papers SEI
Dusty Attic Chipboard Letters
Clearsnap Mixd Media Inkz
Mini Clothespin - Canvas Corp
Stickles Glitter Glue


The much anticipated Build a Flower #2 is awesome! There are so many kinds of flowers you can make with these components.  Poppies are one of my very favorite flowers, and are so easy to make with this set.  I also used the Build a Flower Embellishment #2 for my flower centers and to make the Baby's Breath.

The Chicken Wire Frame is another one of my favorites.  This is such a trendy look, and is the perfect way to "pin" a picture to my layout.


I used the Inlay technique that Mike explains in this video workshop to add colored velvet papers to my hummingbird.  I added several layers of cardboard underneath my bird to raise him up, so that he is feeding from the flowers.


Tuesday, August 14, 2012

Feminine and Frilly


I have a rather girly card to share with you today.  Sometimes, it can be a little scary, figuring out how to use patterned papers with detailed scenes or graphics, but you just have to jump in and not worry too much about covering over some of the gorgeous designs.  Although it is very layered, I still kept a light and airy feeling by using transparencies, vellum and sheer ribbon for my layers.


Here is a close-up, where you can see the layers a little better. 


 I used the new Spellbinders Marvelous Squares, and cut two layers from WorldWin Papers vellum. Next, I cut a layer using Scor-tape, and then attached one side of the sticky to my vellum, and then removed the backing paper and sprinkled it with Wow Embossing Powder (Opaque Bright White Regular). I heat set the powder, and it gives a nice distressed appearance, as the adhesive heats up, and crackles a bit. 

I assembled my card, and added the cardstock lady from Pink Paislee's Vintage Vogue collection, a few flowers and a lovely May Arts Ribbon Bow (350 5/8"x50y SHEER/RUFFLE EDGE - 350-58-17).  I inked the edges of the Webster's Pages background with Tattered Rose Distress ink.

Thanks for stopping by!

Monday, August 13, 2012

All Aboard Layout with Cheery Lynn Designs


My great-grandfather was a conductor for Southern Railways - so when I saw this paper collection, Check-In from Kaisercraft, I knew it would be perfect for a layout of my Daddy Ed.


I love the visual interest that the intricately cut Cheery Lynn Designs border dies add to my layouts.


Layering the Mediterranean Lace Rectangle over the patterned paper, almost gave a road map look to this layer.


It's just a few days until the August release of new dies for CLD - so be sure to come back on Wednesday to see tons of inspiration and incredible new dies!

Also, if you want a chance to win a $20 gift certificate to the CLD store, be sure to play along with this week's challenge - ABC (use a letter)

Cheery Lynn Designs Dies
Kaisercraft Products
Other Products
Art Institute Glitter – Retro Red
Hampton Art Glue Pad
Glue Arts Glue Glider Pro Perma Tac
Glue Arts U Cut It 3D Adhesive Foam Blanks