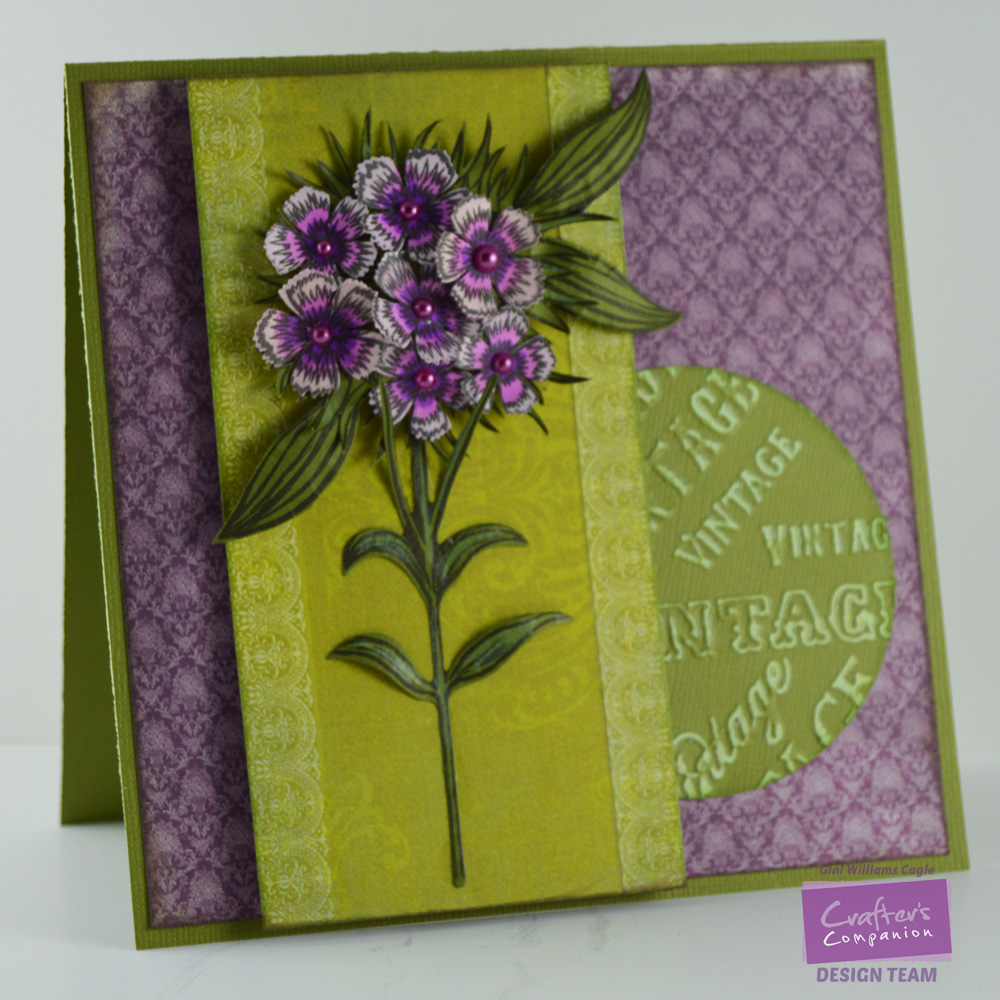
I love this release- and I know you will too! There are so many gorgeous flower stamps/dies - and they are all so lifelike. Be sure to check out the Crafter's Companion Facebook page to see more inspiration, and head over to the store to grab your own.
Showing posts with label pink paislee. Show all posts
Thursday, July 9, 2015
Monday, May 25, 2015
I Love You to the Moon
I'm back today to share a sweet vintage card. Sometimes detailed images, like this Mother and Child, can be slightly intimidating to color, but it is super easy. I used Spectrum Noir Alcohol markers to color and then just cut out the image. I matched the colors of the patterned paper with my markers. The sentiment, To the Moon, was stamped on patterned paper to tie it all together.

Tuesday, January 7, 2014
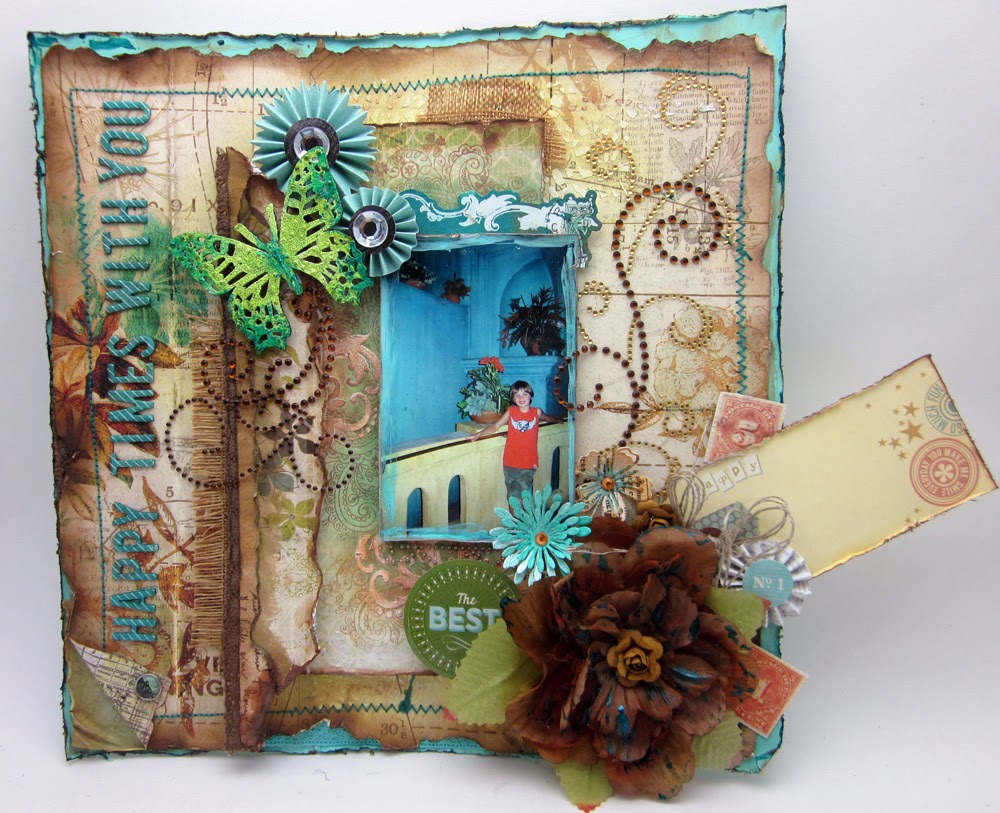
Happy Times With You
Hi! I've got a mixed media layout to share with you today - and it really goes to show how easy it is to introduce mixed media techniques into your everyday projects. I've used Art Anthology Colorations mists and the Sorbet and Velvet dimensional paints.
Here is a close-up of the wooden butterfly. It was misted first, then embossed, and then misted again. It really creates a ton of texture.
This piece of paper was stamped, then a stencil was laid over the top, and texture paste was applied. After it was completely dry, the Colorations were sponged on. You will also notice that the photo has been rubbed down along the edges with the Velvet paint.(I just finger painted this on).
Finally, I added highlights to this silk flower by brushing on the Sorbet paint. It really added some highlights to the flower, as well as drawing in the main colors of the layout.
I hope you give some of these quick and easy techniques a go. I will be back on the Art Anthology Blog on January 25 with a really fun video to create a faux mosaic background.
Sorbet - Viridian
Velvet- Aloha Zva Creative
I hope you give some of these quick and easy techniques a go. I will be back on the Art Anthology Blog on January 25 with a really fun video to create a faux mosaic background.
Sorbet - Viridian
Velvet- Aloha Zva Creative
Orange Crystals CRW-03CB-146
Large Crystals CRW-05CA-169
Large Flower FL-04CA-107
Small Bling Flourish CR-07CA-121
Bling Flourish CRB-07CA-108
Small Pearl Flourish CRW-07CA113
Pink Paislee
Hope Chest Patterned Paper
StencilGirl
Damask, Crackle
Spellbinders
Blooms One, Blooms Three
Susan Lenart Kazmer
Iced Enamels Relique Chartreuse
Xyron
Mega Runner, Teresa Collins Foam Adhesives
Labels:
Art Anthology,
pink paislee,
Spellbinders,
stencil,
StencilGirl,
Xyron,
Zva Creative
Monday, December 30, 2013
Zva Creative December DT Blog Hop
Happy holidays to you! Zva
Creative and our talented NEW
2014 Design Team welcome you to our December blog hop where we officially
welcome many of our new team members to our monthly hops! We are very excited
about this year’s team and are sure that you will be inspired by and love their
work. Are you ready to hop along and get to know them better?
And as a bonus— today’s hop is EXTRA special
because you will get a sneak peek of Zva’s newest products which are set to be
released at the next CHA tradeshow!
The hop begins at Zva Creative’s blog! Be
sure head on over to check it out! You will also find a complete list of all
the participating blogs there (in case there is a glitch along the way).
As you know, Zva offers many beautiful color
groupings for pearls, flowers and crystals. If you like what you see
along the hop you can find a list of stores and online retailers that sell Zva HERE.
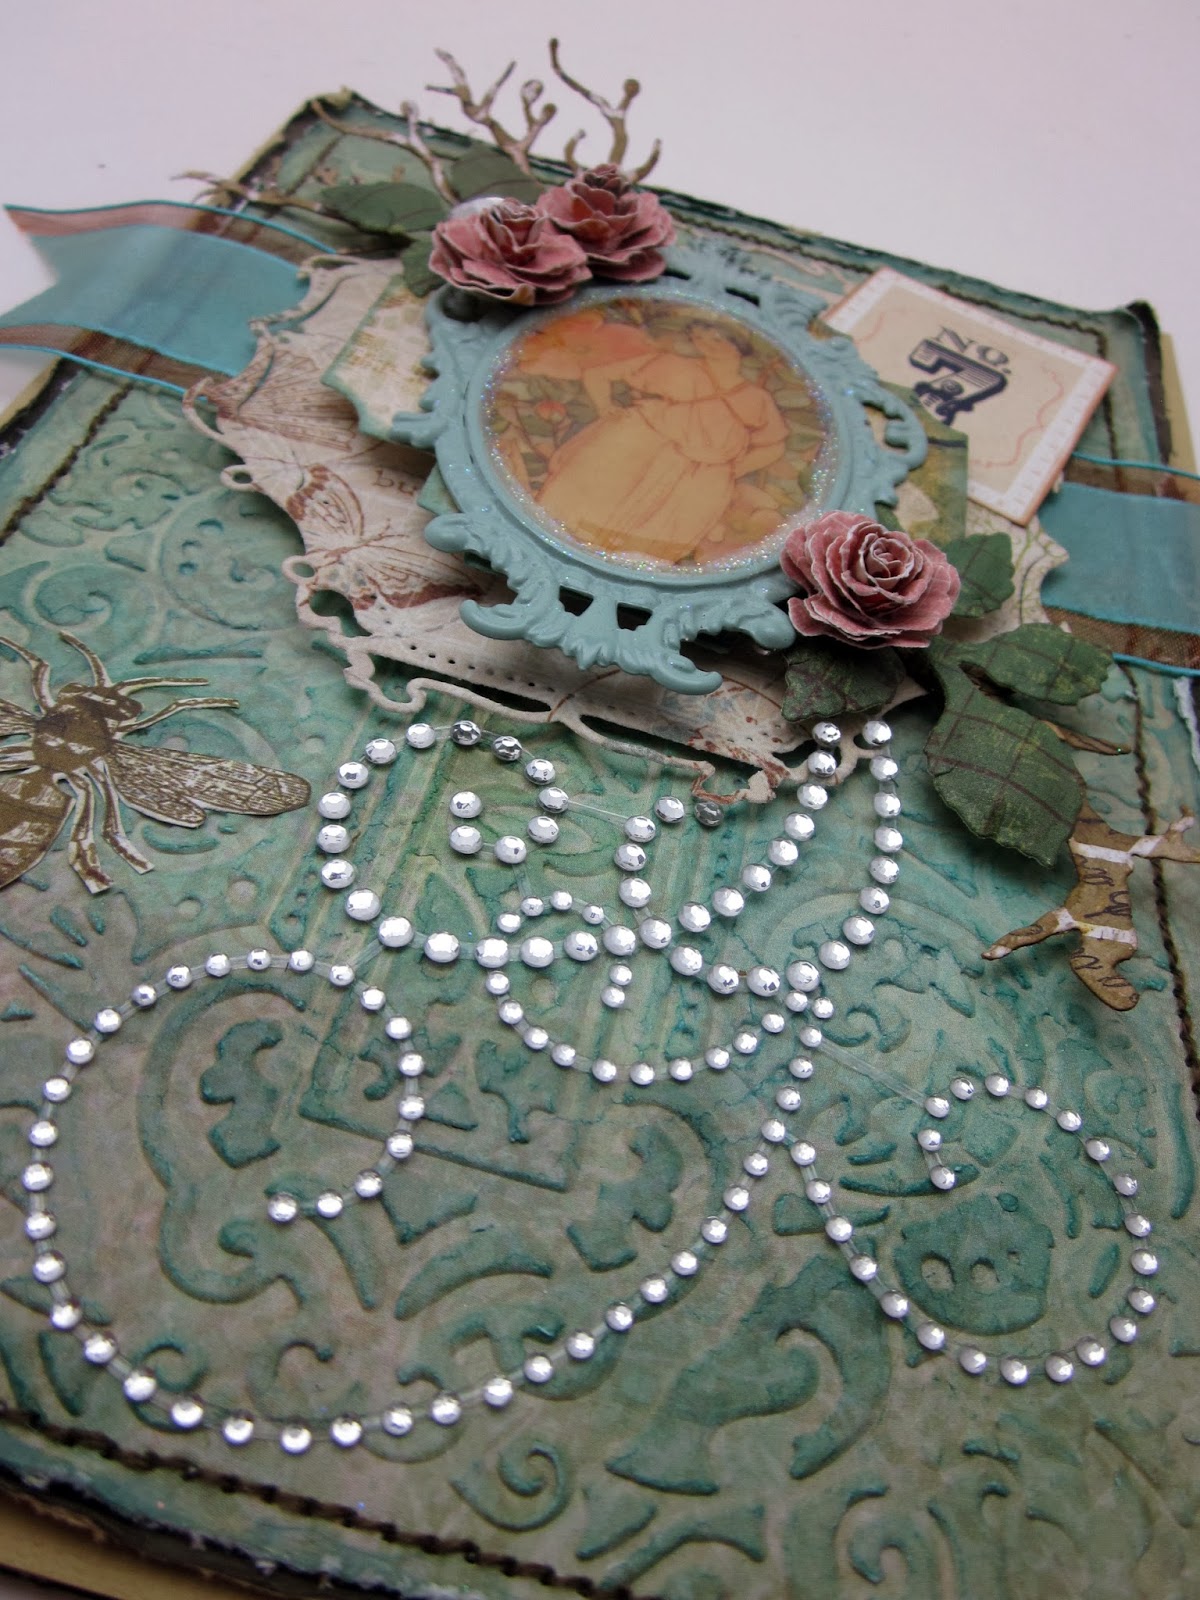
I'm really excited to be hopping along for my first time as a member of the Zva Creative team! I hope you enjoy the card that I have to share with yo today. I have featured one of our new crystal swirls - CR-07CA-114. It is the perfect size to make a statement on a card.
I also got a chance to play with the set of PanPastels that I got for Christmas. After I embossed my patterned paper, I brought out the raised areas using the pastels.
The roses were made from patterned paper and die cut with Spellbinders Bitty Blossoms. I also tucked a large Zva Creative Crystal ( CRW-05CA-169) into my floral cluster.
If you would like to play along with our design
team, just follow along the blog path. I am linking to one of the Zva
designers and that designer is linking to the next and so on. Be prepared to be
inspired along the way!
The
Blog Hop starts today, December 30th and runs through midnight US Eastern
Standard Time on Tuesday, December 31st.
***Prizes***
Hidden on FIVE of the designer’s blogs is a Zva
Creative prize package! Winners will be randomly chosen after the hop is over. All you
need to do is leave a comment on this Blog Hop post... you do not need to leave
a comment on each and every designer's blog post to qualify. However, the
more times you comment along the blog hop path, the more chances you will have
to win.
The 5 winners will be announced on Wednesday,
January 1st on Zva Creative’s blog. We will do our best to notify each winner,
but it's best if you can pop in to Zva’s blog on Wednesday to see if you are a
winner!
We also thought it would be more fun to add even
more chances to win our blog hop prize! To increase your chances of
winning:
* Comment to let us know that you posted on your
Facebook page about our hop (link to any of the blog hop posts)
* Comment to let us know that you
"tweeted" about our hop (link to any of the blog hop posts)
* Comment to let us know that you asked your
local store to carry Zva creative products. If they already do, that's
fantastic, maybe you can suggest other products that they don't carry.
*Hop over to Zva’s facebook page and
“like” our page or leave a comment there to tell us that you stopped by if you
already like follow us there!
Thank you for joining us!
P.S. Mark your calendar to join us again on January 27th
for our next Zva blog hop!
Labels:
May Arts Ribbon,
pink paislee,
Spellbinders,
Xyron,
Zva Creative
Friday, December 6, 2013
Xyron and Heidi Swapp Blog Hop
Today is the final day for the Xyron and Heidi Swapp Blog hop - and we have had so much fun creating with these great products! If you have missed any of the projects, be sure to see them all on the Xyron Blog and the Heidi Swapp Blog!
I have a tea bag dispenser to share with you today. The original tutorial can be found here, but I changed the dimensions a little bit, so that the scoring is more user friendly.
Cut a piece of red cardstock 6 x 12". Line the paper up on a Scor-Pal with the short edge against the left side. Score at 3", 5 3/4", 8 3/4" and 11 1/2". Turn the paper so the short edge is at the top, and the long edge is against the left fence of the board. Score at 1", and at 1 3/4" - ONLY IN THE 2ND BLOCK.
Trim the papers as shown.
Cut patterned paper to decorate the sides of the box.
(2) 2 3/4" x 4 3/4"
2 1/2" x 4 3/4"
2 1/2" x 3 7/8"
Run the patterned paper through the 5" Creative Station, and adhere to the cardstock base. Use the Xyron Double Sided tape to assemble the box.
To make a lid, cut a piece of cardstock 4 1/2" x 4 3/4". Score at 3/4" on all four sides. Trim the flaps and adhere using the Xyron Adhesive Dots.
Decorate the top with patterned papers.
3 x 2 3/4"
(2) 1/2" x 2 3/4"
(2) 1/2" x 3"
Cut a 3 3/4" x 3 3/4" piece of cardboard for the base and decorate using the Heidi Swapp Embellishments. Adhere the box to the base using the Double Sided Tape. Decorate with ribbons and other embellishments as desired
May Arts Ribbon: 1.5" Crochet NP10; 3/8" Reversible Dots 453-38-14
Labels:
Heidi Swapp,
May Arts Ribbon,
pink paislee,
tutorial,
Xyron
Saturday, February 9, 2013
New Chipboard Release at Words or Whatever - Wow
Each month, Words or Whatever has a wonderful new product release. This month, they are celebrating Back to School ( since it's an Australian company, their kiddos are heading off to school now).
So here are a couple of layouts that I created using a few of the new goodies.
I colored my chipboard with Clearsnap ink, and also added hightlights with Smooch. My journaling was printed onto vellum and cut into strips and run through my Xyron 1.5" Sticker Maker - it works beautifully with the vellum, as it shows none of the adhesive through the paper. I added a little text to the book in the lower right corner, by cutting apart Tim Holtz Tissue tape.
I found an image of an old school library card, and printed it out on cardstock and made a cute little library pocket for it.
The Little Kids border is not a new release, but it was perfect for this theme.
School Days:
AltaMATZ Chicken Wire Piece (Alta055)
Graphic 45 Patterned Papers - An ABC Primer
WorldWin Papers Vellum
Xyron Mega Runner
Xyron 1.5" Sticker Maker
Clearsnap Ink
Graphic 45 Patterned Papers - An ABC Primer
WorldWin Papers Vellum
Xyron Mega Runner
Xyron 1.5" Sticker Maker
Clearsnap Ink
I added some puff paint to my abacus beads to make them look rounded and then painted them with Smooch.
I cut apart one of the "2013" titles, and used it for my math equation, with the help of some simple embroidery.
"No Matter How You Count It"
Pink Paislee Patterned Paper - Old School
Epiphany Crafts Tools and Epoxies
Be sure to check out the Words or Whatever Blog, for my inspiration from the rest of the team, and to see more of the new products!
Labels:
Clearsnap,
Graphic 45,
layout,
pink paislee,
Words or Whatever - Wow,
Worldwin Papers,
Xyron
Sunday, December 2, 2012
Scor-Pal and Pink Paislee Week
It's always fun to try different fancy folds on cards and the trendy papers from Pink Paislee's Portfolio Collection seemed perfect for this angular folded card.
WorldWin Cardstock
Clearsnap Smooch Spritz
Clearsnap Color Box Wild Hare Pigment Ink
Spellbinders Labels Twenty-One
Cut card stock base 6" x 12". With the long side against the upper fence, score at 3", and 9". Turn a quarter turn and score at 2". Cut as shown below.
Score from the upper inside corner, to the lower outside corner on both sides.
Fold in, towards the center.
Fold the lower edge, back up towards the folded edge, so they line up , and fold using your Scor-pal tool.
Your card frame is now ready to embellish.
Ink all edges using grey ink. Cover all panels on the card base with coordinating patterned papers that are cut 1/4" smaller than the card base. For the center section of the card, cut a 6" x 6" piece of cardstock. Trace the shape of the Spellbinders label around the top, and handcut, just the top edge. Cut the patterned paper with the same die. and layer it onto the base. Layer other paperson the card as shown and decorate with the Pink Paislee embellishments.
When the card is folded and ready for the envelope, this is how it will look.
When the card is opened to display, the fancy folds will serve as a stand, to hold it up.
Sunday, November 18, 2012
You Shine Layout
Supplies:
WorldWin Papers Cardstock
Patterned Papers: Kaisercraft – Magnolia Grove Collection;
Pink Paislee – Mistables Collection
Heartfelt Creations Stamps: Botanical Floral 2 (HCPC 3407);
Bella Rose Leaves (HCPC 3390)
Heartfelt Creations/Spellbinders Dies: Bella Rose Die (HCD712) ;Decorative Butterfly Border (HCD702); Rose Creations
May Arts Ribbon: Mini Pom-Poms 419-10
Zva Creative Bling
Dusty Attic Chipboard Alphabet
Tattered Angels: Glimmer Mist – Olive Vine; Rum Punch;
Glimmer Glam’s – Tide Pool; Chalkboard – Strawberry Shortcake
Clearnsnap Ink: Mixd
Media Inkz – Leather; Color Box Pigment
Ink – Harbor; Color Box Chalk Ink – Gray Whale
Art Institute Glitter: Gala Glitz – Orange
McGill Paper Blossoms Paper Tool Kit and Mat
GlueArts Glue Glider Perma Tac, U Cut It Dimensional Foam
Adhesive
Glue Arts Dries Clear Adhesive
Other: Gesso,
Corrugated Cardboard, Sewing Machine, thread
Designer Notes:
1.
Cut
patterned papers to layer for base of layout as shown. Ink all of the edges with dark brown ink and
distress with water or distressing tool as desired.
2.
Add decorative machine stitching in black thread
around the main panels.
3.
Cut a circle from corrugated cardboard. Paint
with gesso. Allow to dry. Spray with Glimmer Mist, and paint areas with
thick layers of Glimmer Glam. Allow to dry.
4.
Paint chipboard letters with Glimmer Glam. Adhere to the corrugated circle.
5.
Stamp and die cut 6 layers of flower petals for
each flower. Spray with glimmer mist and allow to dry. Ink edges with brown ink. Shape with flower shaping tools and
assemble. Add small amount of Dries
Clear Adhesive and sprinkle with Gala Glitz.
6.
Stamp and cut two Leaf flourishes. Attach behind
the floral cluster.
Tuesday, August 14, 2012
Feminine and Frilly
I have a rather girly card to share with you today. Sometimes, it can be a little scary, figuring out how to use patterned papers with detailed scenes or graphics, but you just have to jump in and not worry too much about covering over some of the gorgeous designs. Although it is very layered, I still kept a light and airy feeling by using transparencies, vellum and sheer ribbon for my layers.
Here is a close-up, where you can see the layers a little better.
I used the new Spellbinders Marvelous Squares, and cut two layers from WorldWin Papers vellum. Next, I cut a layer using Scor-tape, and then attached one side of the sticky to my vellum, and then removed the backing paper and sprinkled it with Wow Embossing Powder (Opaque Bright White Regular). I heat set the powder, and it gives a nice distressed appearance, as the adhesive heats up, and crackles a bit.
I assembled my card, and added the cardstock lady from Pink Paislee's Vintage Vogue collection, a few flowers and a lovely May Arts Ribbon Bow (350 5/8"x50y SHEER/RUFFLE EDGE - 350-58-17). I inked the edges of the Webster's Pages background with Tattered Rose Distress ink.
Thanks for stopping by!
Friday, June 8, 2012
Beauty In All Things
It's a beautiful summer day, here in the mountains of North Carolina, and I thougt I would share a happy card with you. I've got lots of projects that I'm working on for the Summer CHA, but just wanted to sneak a fun card in for you today.
I hope you have a great weekend!
Patterned Papers: Pink Paislee
Cardstock: WorldWin Papers
Stamp: Unity Stamp - Kit of the Month June 2011
Cheery Lynn Designs Dies: Horizon Coved Rectangle Reflections Die, Border Carnivale
Wow Embossing Powder
Spellbinders Labels Five
Want2Scrap Nestabling
May Arts Ribbon
Challenges:
Friends With Flair - Friday Hop
Unity - KOTM Sketch Challenge
Simon Says: Diamond Jubilee
Unity Challenge: Stripes
Stamp and Show: Texture
Saturday, January 14, 2012
A Walk In the Park
My sister, Lori, and I are hosting the challenge this month at CottageCutz dies - and it's super easy! We just want to see you use your CottageCutz dies on a layout. The random winner will get a $25 gift certificate! To get you started with some inspiration, here's a layout that I made last night.


CottageCutz Dies: Blossom Branch, Scallop Three Edger, Floral Doily
Spring Awakening Papers from the ScrapCake
Epiphany Crafts Studio Tool Round 14
Epiphany Crafts Round 14 Bubblecap
Epiphany Crafts Vintage Settings
Unity Stamps - All Worth It
Wow! Embossing Powders: White
Wow! Embossing Powders, Suzy West Collections: Earthtone Pepper, Bay Area Blue
Pink Paislee Chipboard Letters
Worldwin Papers Cardstock
Jillibean Soup Alphabet Stickers
Want2Scrap Pearls
Ranger Distress Stain
Versamark Ink
Spring Awakening Papers from the ScrapCake
Epiphany Crafts Studio Tool Round 14
Epiphany Crafts Round 14 Bubblecap
Epiphany Crafts Vintage Settings
Unity Stamps - All Worth It
Wow! Embossing Powders: White
Wow! Embossing Powders, Suzy West Collections: Earthtone Pepper, Bay Area Blue
Pink Paislee Chipboard Letters
Worldwin Papers Cardstock
Jillibean Soup Alphabet Stickers
Want2Scrap Pearls
Ranger Distress Stain
Versamark Ink
Sunday, November 13, 2011
In the Limelight with Flourishes

I have been a huge fan of Flourishes stamps for a long time! So when I was asked to share a project that combined gorgeous Flourishes stamps and my Scor-Pal, I jumped at the chance.

I love making fancy fold cards, but today came back to my all-time favorite fold, an easel card. I wanted to use the Birthday Pennants stamp set, and thought that the easel card was a great choice. This set is so cool, because it coordinates with the Spellbinder's Nested Pennants and the Nested Lacey Pennants.
Another technique that I love to use with my Scor-pal is making a pleated embellishment. For this card, I cut a strip of paper an inch wide, and scored it every half an inch. I put Scor-tape down and used it to attach it to the card. This is a great way to add dimension to your projects.


I love making fancy fold cards, but today came back to my all-time favorite fold, an easel card. I wanted to use the Birthday Pennants stamp set, and thought that the easel card was a great choice. This set is so cool, because it coordinates with the Spellbinder's Nested Pennants and the Nested Lacey Pennants.
Another technique that I love to use with my Scor-pal is making a pleated embellishment. For this card, I cut a strip of paper an inch wide, and scored it every half an inch. I put Scor-tape down and used it to attach it to the card. This is a great way to add dimension to your projects.

Thanks for letting me share some Flourishes love with you today!
Labels:
Flourishes,
pink paislee,
Scor-pal,
Scor-tape,
Twinery
Saturday, October 15, 2011
Everything's coming up Poppies!
I love poppies! I have to say they are one of my favorite flowers, so I decided I needed to figure how to make one using my CottageCutz dies. I used the Pink Peony Flower for the petals and the stamen is from the Orchid Flower.
Step 1. Cut one base flower, 2 petal pieces and 3 stamens.

Step 2. Ink the petals. I used Distress Ink ( Spiced Marmalade, Barn Door and Black Soot).

Step 3. Cut into the base flower to form four separate petals (but don't cut all the way through). Cut the end off of the stamens, so you just have a tip with three balls.

Step 4. Shape the parts with a flower shaping tool or ball stylus.

Step 5. Assemble the flower. Add a little Flower Soft in Sage Green for the centers.

Here's a layout that I made using some of the poppies. This is a picture of my nephew at the Land of Oz festival with the Wicked Witch. The quote says, " And now my beauties, something with poison in it. Poppies...poppies. Poppies will put them to sleep." ~ Wicked Witch of the West

I added some Epiphany Crafts epoxies. I love the large bubble on the bottom left that I added mini letter stickers for the date, before I punched the epoxy out! I used my Helmar 450 Quick Dry Adhesive and Scrap Dots to put it all together.

Challenges:
Helmar: Sketch
Step 1. Cut one base flower, 2 petal pieces and 3 stamens.

Step 2. Ink the petals. I used Distress Ink ( Spiced Marmalade, Barn Door and Black Soot).

Step 3. Cut into the base flower to form four separate petals (but don't cut all the way through). Cut the end off of the stamens, so you just have a tip with three balls.

Step 4. Shape the parts with a flower shaping tool or ball stylus.

Step 5. Assemble the flower. Add a little Flower Soft in Sage Green for the centers.

Here's a layout that I made using some of the poppies. This is a picture of my nephew at the Land of Oz festival with the Wicked Witch. The quote says, " And now my beauties, something with poison in it. Poppies...poppies. Poppies will put them to sleep." ~ Wicked Witch of the West

I added some Epiphany Crafts epoxies. I love the large bubble on the bottom left that I added mini letter stickers for the date, before I punched the epoxy out! I used my Helmar 450 Quick Dry Adhesive and Scrap Dots to put it all together.

Challenges:
Helmar: Sketch
Labels:
CottageCutz,
Epiphany Crafts,
layout,
pink paislee,
tutorial
Subscribe to:
Posts (Atom)