Showing posts with label Words or Whatever - Wow. Show all posts

Wednesday, June 26, 2013

May Arts, and Xyron and LYB- Oh, My!

I am so lucky to work with such fabulous companies, and this week two of the teams that I'm on - May Arts Ribbon and Xyron have teamed up with Little Yellow Bicycle. How fun is that?  So today, I have on my May Arts DT hat, and have a layout to share.  Friday, I will be back with my Xyron hat on to share another project with you.  You know the Ribbon Lady is going to be giving away some ribbon this week - 3 spools to the lucky commenter.  So leave as many comments on the Ribbonistas blogs as you want - each comment gets you an entry to win.  And Friday, there will be a big giveaway package with May Arts, Xyron and LYB!

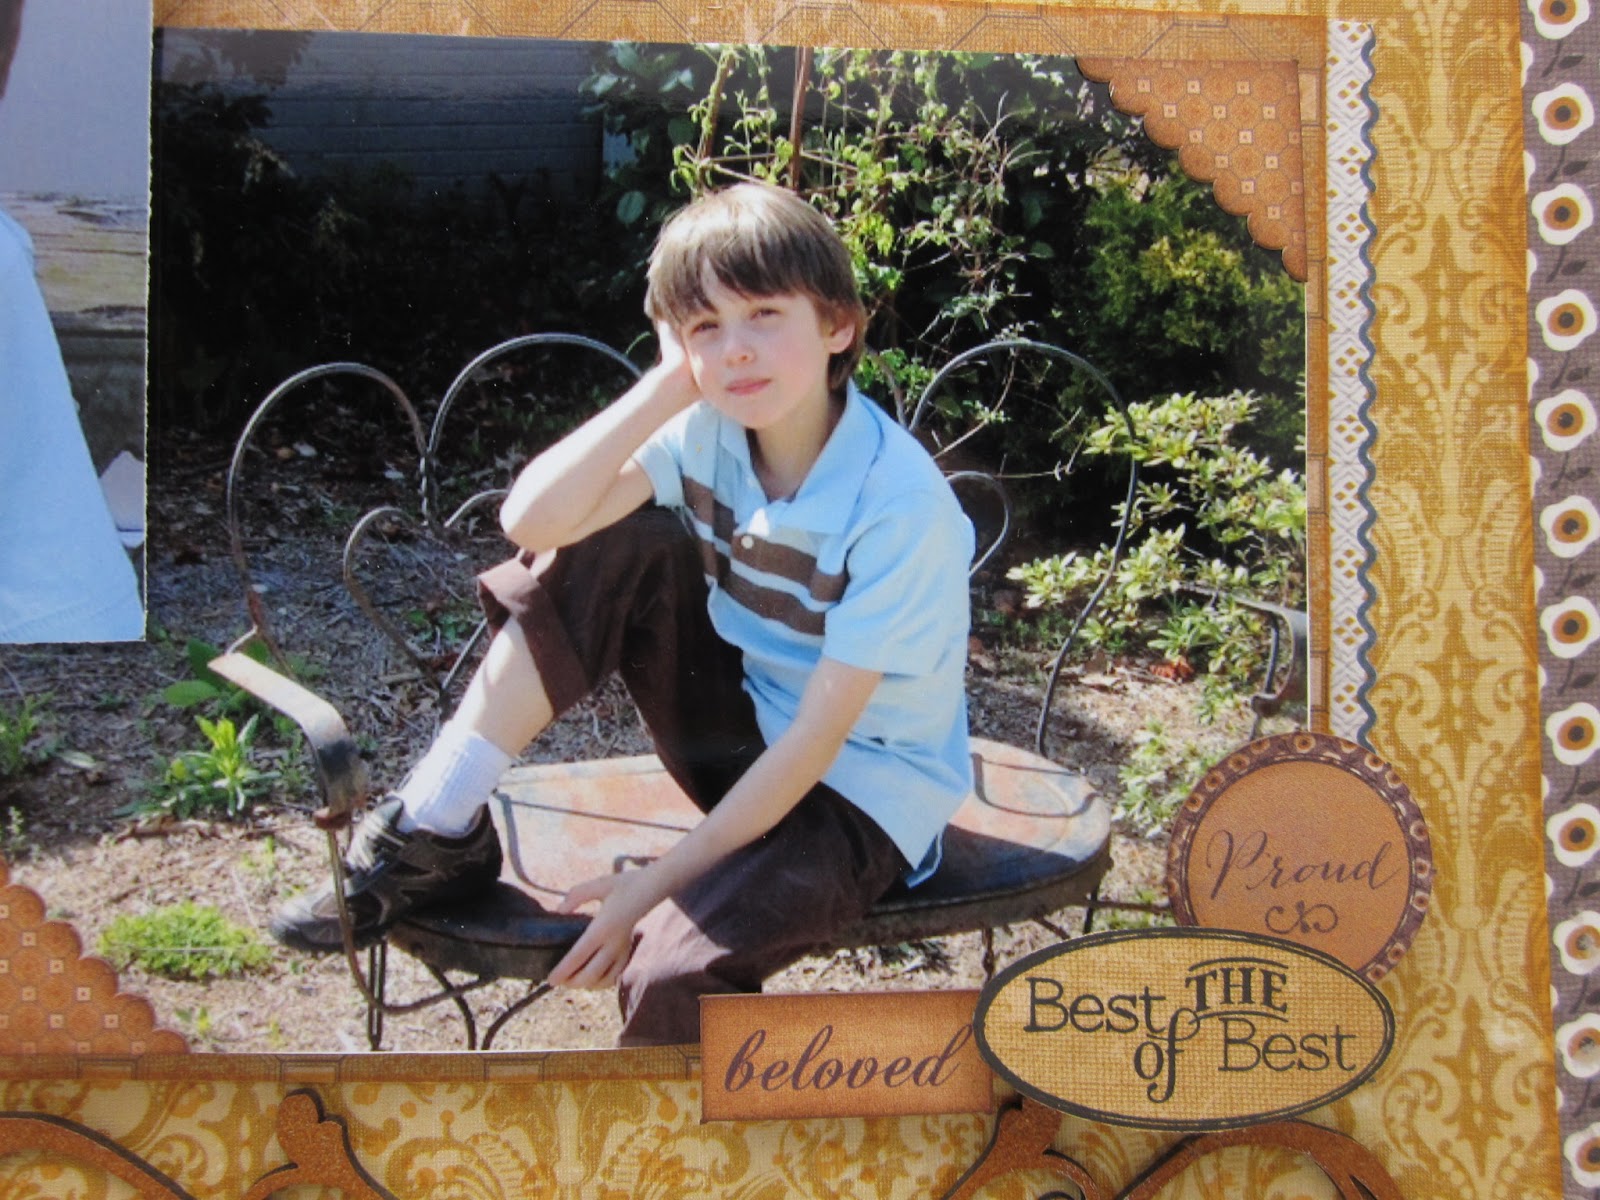
I love this picture of my nephew when he was a baby - couldn't you just eat him up!  I used a border sticker from the LYB Poppy line for my ribbon treatment on the bottom right corner.  I gathered the polka dot ribbon and adhered it to the sticker.  I used the new Xyron High Tack Tape to adhere the Chevron Stripe ribbon above it.  I had not noticed the checked ribbon I used beside my picture, until a sample came - and let me tell you -this is one of my new favorite ribbons.  I'll be adding some of those to my ribbon stash!

Another one of my favorite Xyron tricks is making my own dimensional adhesives.  I go through this stuff, so having an economical way to make my own has saved me so much money.  If you haven't tried this, all you have to do is buy a sheet of craft foam at your local craft store, and run it through your Creatopia or Creative Station Machine, and put permanent adhesive on both sides.  I used my DIY foam adhesives to layer the die cut flowers.

So here are all of the details that you need to know:
May Arts Ribbons:
Xyron
Little Yellow Bicycle
Other:

Words or Whatever Chipboard, Mask
Clearsnap Ink


And so you don't miss a thing, here is the schedule for when the Ribbonistas will be posting this week. Be sure to check the Xyron and LYB blogs for more inspiration from their designers.
Monday

Tuesday

Wednesday

Thursday

Friday
Follow my blog with Bloglovin

Saturday, May 18, 2013

Imagine

This week, I will be sharing some creations at the Words or Whatever Blog.  Up first is this mixed media card.
I used one of the WOW AltaMATZ templates (Doily).  I traced around the entire design using a Aquarelle pencil, and then inked around the outside.  I misted this with water, so that the pencil would disperse.
I took the chipboard gate - painted it with Gesso, then inked it with a dark brown pigment ink, and added some glitter.  The Imagine title was inked to color it, and then I rubbed a little bit of Metallic 3D paint over it.
Supplies
Words or Whatever: 6x6 AltaMatz Doily ALTA033; Imagine Dream Believe WOW1450; Ornamental Gate WOW991
Kaisercraft: Patterned Paper, flowers
Hampton Art background stamps
Clearsnap Ink
Xyron Mega Runner

Monday, May 13, 2013

A Moment to Treasure


Time goes by so quickly. It's hard to imagine that this little girl would grow up to be the beautiful woman that she is today.  I am always in awe of my sister- of her strong spirit, her fierce love for her family, her compassionate heart, her incredible sense of humor.  The list could go on and on, but I want her to know that every moment I have spent with her has been a moment that I  treasure.


So enough of my sappiness.  Here are details of the layout, showing these fun flowers.


Graphic 45 Patterned Papers ( A Place In Time, Nutcracker Sweet Collections)
Clearsnap Ink, Smooch
Robin's Nest Dew Drops

Tuesday, May 7, 2013

Dream with Hampton Art and Authentique

I was so excited to see Hampton Art pairing up with Authentique to bring you some fabulous stamps.  I found these were really easy to incorporate into a fun layout.


On the yellow panel, I added some texture stamping using the Art Warehouse PS0712 wooden stamp.  This just added a little bit more depth.


I stamped elements from the Authentique set – Keep Me Posted  IC0231, and fussy cut them and used to layer around the photos using foam adhesives.


Supply List
Stamps
Hampton Art Licensed Art W
Warehouse Wood Mounted Rubber Stamp set – Speckle Background PS0712

Inks
Clearsnap – Donna Salazar Chox Inx (Butternut)
Clearsnap – ColorBox Chalk Ink (Blackbird)

Other Supplies
Patterned Paper- Authentique (Grace)
Pearls: Want2Scrap
Chipboard: Words or Whatever

Wednesday, May 1, 2013

Heartfelt Creations Inspiration


I was so thrilled when I saw the Balmy Breeze collection from Heartfelt Creations, because I completely adore anything to do with the beach.  From the imagery in this set, to the sun-faded colors of the papers - I was completely in love!  I used one of my favorite pictures of my nephew at the beach, for this layout.


Heartfelt Creations Products:
Balmy Breeze Paper Collection HCDP1 232
Seascape PreCut Set HCPC 3531
High Seas PreCut Set HCPC 3527
Sand and Sea PreCut Set HCPC 3528
Surfs Up PreCut Set HCPC 3529
Antique Lantern PreCut Set HCPC 3512
Tattered Blossoms PreCut Set HCPC 3468
Tattered Blossoms Die HCD 722
Gala Glitz- Blue
Dries Clear Adhesive

Other:
Clearsnap Ink: ColorBox - Harbor Pigment Ink, Blackbird Chalk Ink; Chox - Sparrow
May Arts 5/8" Eyelet Ribbon
Words or Whatever chipboard
Wow Embossing Powder - gold
Faber Castell Gelatos
Xyron Mega Runner, Creatopia

Directions:  Distress the edges of the base paper.  Stamp the birds in the upper right corner using a white pigment ink. Cut the patterned papers to form the basic sketch shown.  Ink edges of papers and layer with foam adhesives. Stamp and fussy cut images from the Balmy Breeze sets ( anchor, palm tree, lighthouse, compass).  Layer these around the photos.  Stamp the sentiment from the Antique Lantern set in the center of the printed label. Fussy cut and adhere to the lower right corner of the photo. Stamp and cut with the corresponding die Tattered Blossoms flower.  Layer the flowers and add Gala Glitz to the centers.  Nestle around  the layered elements to finish the layout.

Wednesday, April 24, 2013

Heartfelt Inspirations

It's Wednesday - so it's time to share another Heartfelt Creations project using the Balmy Breeze collection.


Heartfelt Creations Supplies

Balmy Breeze Paper Collection HCDP1- 232
Decorative Lattice Swirl Die HCD 733
Decorative Flower Pot Die HCD 732
Tattered Blossoms Die HCD 722
Beautiful You PreCut Set HCPC3532
Waters Edge PreCut Set HCPC3530
Timeless Lace PreCut Set HCPC 3508
Tattered Blossoms PreCut Set HCPC3468

Other:
Words or Whatever Chipboard banner
WorldWin Papers - cardstock
Want2Scrap Pearls
May Arts 3/8" Ribbon - GC-8-16
Stickles
Clearsnap Chox Ink -
Wow Gold Embossing Powder
Xyron Mega Runner

Directions- Make a 6 x6 easel card. Ink and distress the base layers (5 3/4" x 5 3/4") Stamp greenery on the upper base page, using the Waters Edge stamp. Cut the flower pot from patterned papers using the HC die. Ink the edges. Use foam adhesive to attach to the card. Stamp and cut with the corresponding die the Tattered Blossoms. Shape the flowers and attach to the flower pot.Use pearls for the flower centers. Add a decorative lattice swirl behind the flowers. Stamp and cut the leaves. Nestle ribbon bows into the floral arrangement.  Use a chipboard banner to decorate the bottom layer of the card.  Color with ink, let dry and stamp the Timeless Lace stamp with Versamark ink onto the chipboard.  Heat emboss with gold powder. Add pearls and ribbons to finish decorating.

Sunday, April 14, 2013

Words or Whatever - Wow Chipboard Release


Are you ready for some yummy new chipboard from Words or Whatever? and maybe a few new AltaMatz templates as well?  Then pull up a chair, and have a look!  Be sure to go over to the Words or Whatever blog to see more of the new release and what the rest of the team came up with.


I used the Happy Days title for this layout.  I've layered lots of fussy cutting as well as banners and handmade flowers nestled in a velvet ribbon lattice.

For this Adorable Baby Layout, I inked around the new Birds on a Wire AltaMatz, and then traced around it with a metallic pen to give more definiation.


Finally, on This Boy layout, I used glitter, embossing powders and mists to create this vintage finish.

Thursday, April 4, 2013

Today's Beautiful Moments


Do you ever see a piece of paper, and just want to keep holding it, because it is so beautiful? That's how I feel about the WorldWin Petallics.  They are the most elegant papers ever!  The beautiful colors are so shimmery due to the mica-infused coating.  I wanted to create a card that really played up these characteristics, so I thought dry embossing would do the trick.

On this side view, you can see the shimmer a little better.  And look how gorgeous this paper accepts stamping and heat embossing. This  is a 5x 7" card - and the really great thing, is that WorldWin has matching envelopes in 5 different sizes in the Autumn Hay ( and  12 other Petallic colors).

WorldWin Papers
Metallic Foil Gold 
Hampton Art Stamps
Words or Whatever Chipboard
May Arts Ribbon
Wow Embossing Powder
Anna Griffin Embossing Folder
Poppy
Xyron

Friday, March 8, 2013

Words or Whatever - WOW March Release!

Today marks the new release at Words or Whatever - WOW Chipboard. I have a layout to share with you that uses some of my favorite chippies - but I have to admit - these aren't from the new release.  My package with the new  goodies will arrive later, but I didn't want to miss out on the fun, so I just created a layout with some of the pieces already in my stash.


Doesn't this Bamboo Tree look amazing with the Graphic 45 Bird Song Paper?  It was like they were made for each other!  I colored the tree with Smooch Inks - such an easy way to add color and sparkle.


The title, Sisters & Friends, was colored in the same way.  


This photo just shows a little of the depth on this layout.  I've been making my own foam adhesives using craft foam, and running it through my Xyron Creatopia with permanent adhesive.  It is such an easy and inexpensive way to build up those layers.

Please do have a look at the Words or Whatever - Wow blog, so you can actually see the new release! There are so many fun designs this time and the rest of the design team has done a marvelous job! While you are there check out the past  design team inspiration.  Every week, one of the designers floods the blog with amazing projects, fantastic tutorials and so much chippie goodness, you really don't want to miss it.  And remember, we also have a monthly challenge.  This time, it's super-duper easy - Just make a layout and use a little Wow on it.  You have until March 15th to link up.  We hope you will play along with us.

Supplies
Graphic 45 Bird Song Patterned Papers
Graphic 45 Staples: Metal Butterfly; Metal Buttons
Words or Whatever -WOW chipboard: Bamboo Tree; Sisters & Friends
Spellbinders dies: Labels 28; Enchanted Labels 28
May Arts Ribbon: Paper Cord 420-10
Wow Embossing Powder: Cotton Candy, Angel Wings

Wednesday, February 27, 2013

Heartfelt Creations Inspiration


Today I have another card to share with you that highlights the Sunny Day Collection from Heartfelt Creations.  While this card looks straight forward, you will find a nice surprise when you untie the ribbon bow.


The front is just a small die cut corner, and opens to reveal a full decorated panel.


Heartfelt Creations Products
Sunny Day Paper Collection HCDP1 230
Decorative Butterfly Corner HCD 730 
Posy Patch Die HCD 701
Botanical Oval PreCut Set HCPC 3520
Butterfly Medley PreCut Set HCPC 3519
Antique Essentials PreCut Set HCPC 3516
Posy Patch Flowers PreCut Set HCPC 3303
 Robins Nest Dew Drops Lily Pad

Other:
WorldWin Cardstock
Stickles
Copic Markers: Y19; E02; E35; BG32; BG35; YG93; YG95
Words of Whatever - WOW Chipboard
May Arts Ribbon - EA16
Clearsnap Ink- Archival Brown, Saphire Silk Pigment Ink, Blush Rose Chalk
Xyron Mega Runner
Score-Tape

Directions:
Cut a 6 x6 card base, and score the center.  Lay the Butterfly corner on the front left corner and trace around the outside.  Fussy cut around this leaving only the bottom left corner of cardstock. Cut a       5 3/4" square of patterned paper. Randomly stamp flower stems from the Antique Essentials set across the bottom of the panel using brown archival ink.  Color the flowers with glittery paints.  Stamp the sentiment as shown, and attach to the card base.  Cut the die using patterned paper, and glue to the front. Lay Scor-tape starting on the inside of the card, just to the right of the front panel, wrap around the back, and bring around to the front of the card, stopping at the right margin of the front flap.  Add ribbon to the Scor-tape, leaving tails at the intersection of the front flap and the inside panel. Tie in a bow to close the card.  Stamp the butterfly with the Brown Archival ink and color with Copics.  Fussy cut the image and add to the front flap.  Add Stickles over the butterfly and glue to the card with dimensional foam. Stamp and cut with the corresponding die, the Post Patch Flowers and nestle around the butterfly.  Add Dew Drops for the the centers of the flowers.  Tuck a small chipboard flourish behind the butterfly.


Saturday, February 23, 2013

The Eyes are the Windows to the Soul


How would you like a chance to win some Words or Whatever - WOW chipboard?  The challenge this month is easy - just show us a layout using some of your favorite WOW chippies.  If you live in the United States and would like to play along, I've noticed that Lindy's Stamp gang has a nice selection of our chipboard in stock.


This is a picture of my beautiful sister, Lori - who has the most amazing blue eyes, and yes, her sweet soul is even more lovely than her eyes.

Saturday, February 9, 2013

New Chipboard Release at Words or Whatever - Wow

Each month, Words or Whatever has a wonderful new product release.  This month, they are celebrating Back to School ( since it's an Australian company, their kiddos are heading off to school now).

So here are a couple of layouts that I created using a few of the new goodies.


I colored my chipboard with Clearsnap ink, and also added hightlights with Smooch.  My journaling was printed onto vellum and cut into strips and run through my Xyron 1.5" Sticker Maker - it works beautifully with the vellum, as it shows none of the adhesive through the paper.  I added a little text to the book in the lower right corner, by cutting apart Tim Holtz Tissue tape.


I found an image of an old school library card, and printed it out on cardstock and made a cute little library pocket for it.

The Little Kids border is not a new release, but it was perfect for this theme.

School Days:
AltaMATZ Chicken Wire Piece (Alta055) 
Graphic 45 Patterned Papers - An ABC Primer
WorldWin Papers Vellum
Xyron Mega Runner
Xyron 1.5" Sticker Maker 
Clearsnap Ink


I added some puff paint to my abacus beads to make them look rounded and then painted them with Smooch.


I cut apart one of the "2013" titles, and used it for my math equation, with the help of some simple embroidery.

"No Matter How You Count It"
Pink Paislee Patterned Paper - Old School
Epiphany Crafts Tools and Epoxies 

Be sure to check out the Words or Whatever Blog, for my inspiration from the rest of the team, and to see more of the new products!


Wednesday, January 30, 2013

Family Another Word for Love

Since it's Wednesday, that means I get to share another Heartfelt Creations Project with you!  Today I've got a layout that I made using a picture of my sister and sweet little nephew.  We took this at the local pumpkin patch this fall.

I love the detail that the matching stamps and dies give to these flowers.


The chipboard title (from Words or Whatever -Wow) was embossed using several colors of powder. 

Heartfelt Creations Supplies
Other Supplies:
Spellbinders Foliage Two
Words or Whatever - Wow Chipboard (Family Another Word for Love)
May Arts Ribbon  - 1.5" Crochet NP 10
Wow Embossing Powder  - Ultra High Gold, Earthtone Pepper, Cable Car Red
WorldWin Papers Cardstock
Clearsnap Ink - Color Box Chalk - Dark Peony, Chestnut Roan
Top Boss Embossing Ink
Xyron Mega Runner
Glimmer Mist - Rum Punch
Copics: R39, YG95, YG97, E74, E77
Directions for 12 x 12 layout:
Stamp the Burlap background directly onto your background page using embossing ink - and emboss with gold. This will be the mat for your photo. Line the Decorative Blossoms Corner die up, to cut two adjoining corners, that will make a lacey semi-circle, using a light colored patterned paper.  Glue this so that it slightly overlaps the bottom right corner of the embossed burlap. Add your photo over the burlap. Stamp and fussy cut the Weathered Fence and color with copics.  Layer this to the left of your picture.  Stamp the Vintage Floret flowers using the Dark Peony ink and cut with the coresponding die.  Mist with Glimmer Mist, shape and assemble.  Add foliage around the flowers and add to your layout.  Heat emboss the chipboard title and and to the layout to finish.


Tuesday, January 22, 2013

JustRite Stampers Thank You Card


JustRite Stampers has been on a break from their challenges - so this is the first one of the new year. So, you know I had to play along!  This was a sketch week, which is always fun.

I stamped and embossed my background using Elegant Fronds. I then cut it using Spellbinders Resplendent Rectangles.  The Thank You is from Grand Sentiments (although it is supposed to be all on one line - I cut the words apart so I could center them in a circle.)  I added the Fancy Round Frame from Wow - Words or Whatever Chipboard - Isn't it gorgeous?!! It was bare chipboard, and I painted it with sparkly paint from Creative Inspirations.  The ribbon embellishment was made using May Arts Silk Ribbon and my favorite - Paper Cord.


Thanks for stopping by! I hope your week is great.

Saturday, January 19, 2013

Words or Whatever Chipboard Debut!


I've been stalking my mailman for days, and finally my much anticipated box of chipboard from Wow -Words or Whatever  arrived.  I immediately sat down and started playing with all of the goodies.  If you are not familar with this line, you need to check it out! They have a wonderful selection of chippies - and an incredible line of heavy duty templates - AltaMATZ.  If you are looking for a source in the US - I noticed that Lindy's Stamp Gang has a nice selction!


This is a picture of me and my sister (about 40 years ago - yikes!) For the base, I misted the corners using the AltaMATZ 6 x6 Doily Corner .  The title was painted with gesso, and then spritzed and glazed with Glimmermist and Glimmer Glaze. My flourish was inked with Clearsnap Chalk ink, and then I stamped the background with a script stamp Hampton Arts/Graphic 45 Ladies Diary 1.


The flowers were stamped with the Hampton Art/ Doodlebug Sweet Background.

Be sure and check out the Wow - Words or Whatever Blog - for tons of lovely inspiration.  Our challenges will be starting back next month, so you might want to stock up now, so you will be ready to play along.

Supplies

Words or Whatever:
 Me and My Sister title; Flourish; , leaves, AltaMatz Doily Corner
Hampton Art:
Doodlebug Sweet Background; Graphic 45 Ladies Diary 1
Clearsnap Ink
 Mix'd Media Inkz - Leather;Color Box Fluid Chalk- Chestnut Roan; Olive Pastel
May Arts Ribbon
1.5" Crochet
Heartfelt Creations
 Clear cardstock
Other
Bo Bunny Patterned Papers - Little Miss
Want2Scrap Pearls
Tattered Angels: Glimmermist; Glimmer Glaze

Tuesday, January 1, 2013

A Great Way to Start the New Year!

I am so excited about what 2013 has in store for me! I've just decided this is going to be a great year.
And to start the year off with a bang - I get to share with you that I was asked to be the international designer for Words or Whatever (WOW) chipboard from the Central Coast of NSW.  They have an extensive collection of chipboard shapes, OTP, MDF, albums and a great range of AltaMATZ Stencils.  I can't wait to share more of this fabulous company with you!  You will be able to check out all of the inspiration on the blog.

 
Here is the line up of the rest of the team:
Sandra Staples (DT Coordinator)
Monique Follett
Kerryn Fry
Sue Smith
Tess Pretty
Melissa Heather
Anita Rodway
Kim Kendall
and me!