Thursday, August 29, 2013
Wednesday, August 28, 2013
Heartfelt Creations Inspiration
Heartfelt Creations Products
Christmas Card Collection HCDP1 236
Bright Christmas PreCut Set HCPC 3552
Holly Berry PreCut Set HCPC 3551
Ornamental Add On Die HCD 738
Other:
May Arts Ribbon 445-15-32
Versamark Watermark ink
Want2Scrap Pearls
Lindy's Stamp Gang Embossing Powder - Twilight Bronze
Worldwin Papers Cardstock
Xyron Mega Runner, Creatopia
Distress the edges of the 6 x 6 card front. Add burlap ribbon across the center. Cut the decorative panel from the patterned paper. Stamp and cut the holly branch with the coordinating die. Adhere to the left of the candle. Add red pearls over the stamped berries. Stamp the sentiment with watermark ink and heat emboss with bronze powder. Die cut with scalloped circle. Adhere to the card with foam adhesive.
Christmas Card Collection HCDP1 236
Bright Christmas PreCut Set HCPC 3552
Holly Berry PreCut Set HCPC 3551
Ornamental Add On Die HCD 738
Other:
May Arts Ribbon 445-15-32
Versamark Watermark ink
Want2Scrap Pearls
Lindy's Stamp Gang Embossing Powder - Twilight Bronze
Worldwin Papers Cardstock
Xyron Mega Runner, Creatopia
Distress the edges of the 6 x 6 card front. Add burlap ribbon across the center. Cut the decorative panel from the patterned paper. Stamp and cut the holly branch with the coordinating die. Adhere to the left of the candle. Add red pearls over the stamped berries. Stamp the sentiment with watermark ink and heat emboss with bronze powder. Die cut with scalloped circle. Adhere to the card with foam adhesive.
Monday, August 26, 2013
Beautiful Friend
School officially starts back today - so I thought it was a great time to start sharing more fall-themed cards. Just by adding some fall foliage to my flower cluster it really helped with the theme. After I cut my flowers, I painted them with Viva Decor 3D Metallic Stamp Paint, and then shaped them.
Hampton Art - stamps
May Arts Ribbon NQ33
Want2Scrap Pearls
WorldWin Papers Cardstock
Smooch Spritz
Viva Decor 3D Metallic Stamp Paint. Glitter Liner
Xyron Mega Runner
Labels:
dies,
Graphic 45,
Hampton Art,
May Arts Ribbon,
Viva Decor,
Worldwin Papers,
Xyron
Wednesday, August 21, 2013
Heartfelt Creations Inspiration
Heartfelt Creations Products
Christmas Card Collection HCDP1 236
Sweet Memories PreCut Set HCPC 3555
Christmas Song PreCut Set HCPC 3556
Ornamental Add On Die HCD 738
Other:
Want2Scrap Bling
CTMH ink
May Arts Ribbon QM16
Kraft Tag
Cover the bottom of the tag with patterned paper. Stamp pine boughs behind where the die cuts will be positioned. Stamp the sentiment a cut with a circle die. Ink the edges. Stamp the bird, color with ink and blender and fussy cut. Die cut the ornamental die and position at the bottom of the sentiment. Cut foliage and arrange at the top, and place the bird nestled in it. Add Want2Scrap bling around the sentiment. Finish with ribbon.
Labels:
Heartfelt Creations,
May Arts Ribbon,
Want2Scrap,
Xyron
Monday, August 19, 2013
May Arts Ribbon Cutting Blog Hop
The May Arts Ribbonistas are so excited - and we know you will be too...to celebrate the launching of the new and improved May Arts Ribbon Website. This celebration is so big that last year's design team has joined up with the new design team for one more hop. And big prizes? Oh yeah - over $1000 in goodies are up for grabs! Leave comments on any of the designers blogs for entries to win!
I interpreted "ribbon cutting" by cutting into a brand new roll of ribbon! And honestly, this ribbon is so yummy, I don't know how I have resisted using it, until now.
I created a pocket card, decked out with May Arts ribbons - and my tag, has a piece of ribbon with "Congratulations" stamped on it. Of course, this is congratulating May Arts Ribbon and Bethney, the Ribbon Lady, on such a fantastic new site!
The hop is only two days, but don't worry, you will see so many ribbon ideas to inspire you! Here is the line up for today:
May Arts Ribbons
Partners In Craft Supplies
Other Supplies:
Black Tag
WorldWin Papers Kraft Cardstock
CTMH Ink, Enameled Number Tag
Labels:
Graphic 45,
Hampton Art,
May Arts Ribbon,
Worldwin Papers,
Xyron
Steampunk Canvas
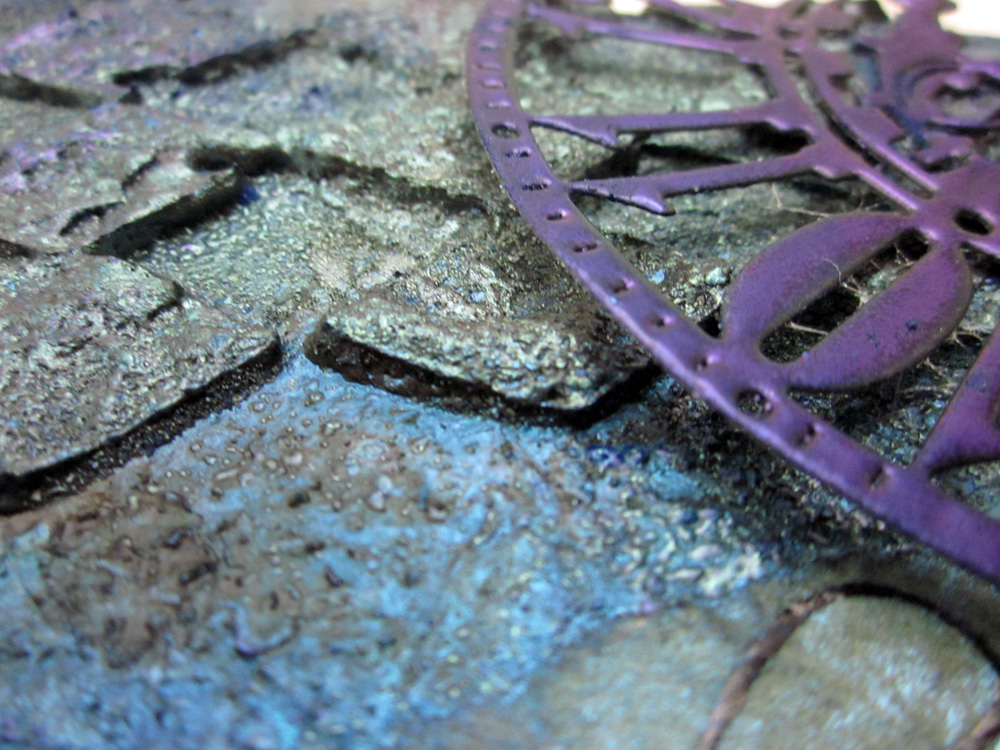
I love trying new techniques and creating mixed media
explorations. A week or so ago, I had
finished the base of this canvas – it
was covered with embossing powders, pastes and sprays, but had no final
decorations added to it. I decided to add some steampunk elements to finish it
out.
Supplies
Stamps
Hampton Art / 7gypsies
Time is Precious (PS0742), Distressed Clock (PS0679)
Ink
Clearsnap Top Boss –
Watermark ink
Other Supplies
WorldWin Cardstock
Lindy’s Stamp Gang Embossing Powder
Moon Shadow Mists
Starburst Mist
Dreamweaver Black Embossing Paste
TCW stencil
Gesso
Tissue Paper
Canvas
Xyron Mega Runner
Crumple tissue paper and run through Xyron 5” Creative
Station to apply adhesive to the surface.
Tear pieces of the paper and lay onto the canvas. Cover the entire canvas this way. Paint a layer of gesso over the tissue paper
and allow to dry. Rub the watermark ink over the high spots of the canvas and
heat emboss with the dark blue powder. Spritz with mists. Randomly stamp the
watermark ink across the canvas and sprinkle with the light blue powder and
heat emboss. Mist again. Use a stencil
template to apply embossing paste in a diamond pattern. While wet, sprinkle
with embossing powder, and heat set immediately. This will cause the embossing paste to bubble
some. Add another layer of mists and more random embossing powder. Stamp the sentiment and the clock onto
tissue paper with watermark ink, and heat emboss with a black powder. Glue onto the canvas and spray heavily with
the mists and allow to air dry. Die cut
the Steampunk elements and rub with the watermark ink, and heat emboss 3 layers
of powder. Apply to the canvas.
If you would like more explanation, please check out my video tutorial.
Labels:
dies,
Hampton Art,
Lindy's Stamp Gang,
Worldwin Papers,
Xyron
Friday, August 16, 2013
Don't Follow Your Dreams, Chase Them
I thought this hot air balloon stamp was so cool, when I saw it from Viva Las VegaStamps! and knew I had to have it.
This is a super easy fold card, but I think it's really nice for a more masculine type card.
Cut your paper 6 x 12 and score at 3" and 6". That's it!
Add a die cut frame to the front panel for your sentiment, and decorate how you like.
Stamps: VLVS
Scoring tool: Scor-Pal
Patterned Paper: CTMH
Ink: CTMH
Wednesday, August 14, 2013
Heartfelt Creations New Release - Christmas Card Collection
We are pleased to present the Christmas Card Collection. The Christmas Card paper pad has 76 card fronts that will enable you to create quick and easy Christmas cards that are embellished or simple- you pick! This paper pack is a fantastic solution for getting the most beautiful cards for the least amount of time. If you don’t need one side, flip it over and use the other side! The coloring is done for you. There are many panels for utmost variety and the best selection. The stamps and dies released with this collection are absolutely festive and ornamental. The gorgeous type and frames will help you create the most beautiful Christmas project your friends have ever seen!
Leave a comment on the Heartfelt Creations blog by August 20th to be eligible to win the entire collection.
Heartfelt Creations Products
Christmas Card Collection HCDP1
Love At Christmas PreCut Set HCPC 3554
Ornamental Add On Die
Other:
May Arts Ribbon QM16
WorldWin Cardstock
Want2Scrap Pearls
ColorBox Dye Ink - Raspberry
Xyron Mega Runner and Creatopia
Stamp the wreath flourish across the background paper using red ink. Attach to a card base. Cut a card front from the patterned paper, distress the edges, and wrap ribbon around the center. Tie a bow to the side. Cut three decorative accents with the die set. Use a matching card front to cut the circular sentiment. Attach with foam adhesive. Tuck the die cuts around the right side as shown. Finish with pearls on the corner of the card.
Leave a comment on the Heartfelt Creations blog by August 20th to be eligible to win the entire collection.
Heartfelt Creations Products
Christmas Card Collection HCDP1
Love At Christmas PreCut Set HCPC 3554
Ornamental Add On Die
Other:
May Arts Ribbon QM16
WorldWin Cardstock
Want2Scrap Pearls
ColorBox Dye Ink - Raspberry
Xyron Mega Runner and Creatopia
Stamp the wreath flourish across the background paper using red ink. Attach to a card base. Cut a card front from the patterned paper, distress the edges, and wrap ribbon around the center. Tie a bow to the side. Cut three decorative accents with the die set. Use a matching card front to cut the circular sentiment. Attach with foam adhesive. Tuck the die cuts around the right side as shown. Finish with pearls on the corner of the card.
Labels:
Heartfelt Creations,
May Arts Ribbon,
Worldwin Papers,
Xyron
Monday, August 12, 2013
Save the Date
I created a wedding dress - as the focal point for this Save the Date card. You could use this same idea for princess dresses, proms - all kinds of ways! I added Xyron Magnet tape to the back so this could go on a refrigerator.
WorldWin Paper
Labels:
dies,
May Arts Ribbon,
Want2Scrap,
Worldwin Papers,
Xyron
Wednesday, August 7, 2013
Heartfelt Creations Inspiration
I created a sturdy gift bag from cardstock, and decorated it with Heartfelt Creations products.
Heartfelt Creations Products:
Burst of Splendor Paper Pad HCDP1
Dahlia Bouquet PreCut Set HCPC 3550
Timeless Amour Die HCD
Other:
May Arts Ribbon
Art Institute Glitter
Xyron Mega Runner
WorldWin Papers Cardstock
Create a tall bag from cardstock, using basic box making techniques. Cover each side of the bag with patterned paper. Cut a decorative panel from the paper, and stamp the dahlia centers on each side of the flower. Trace the design with Dries Clear Adhesive, and sprinkle with glitter. Hand cut two printed dahlias and shape in the palm of your hand, using an embossing tool. Apply to the decorative panel with foam adhesive. Cut two of the fancy hearts from the Timeless Amour set and glue at the top and bottom of the panel. Add a cellophane bag to hold your goodies and tie off with a bow.
Heartfelt Creations Products:
Burst of Splendor Paper Pad HCDP1
Dahlia Bouquet PreCut Set HCPC 3550
Timeless Amour Die HCD
Other:
May Arts Ribbon
Art Institute Glitter
Xyron Mega Runner
WorldWin Papers Cardstock
Create a tall bag from cardstock, using basic box making techniques. Cover each side of the bag with patterned paper. Cut a decorative panel from the paper, and stamp the dahlia centers on each side of the flower. Trace the design with Dries Clear Adhesive, and sprinkle with glitter. Hand cut two printed dahlias and shape in the palm of your hand, using an embossing tool. Apply to the decorative panel with foam adhesive. Cut two of the fancy hearts from the Timeless Amour set and glue at the top and bottom of the panel. Add a cellophane bag to hold your goodies and tie off with a bow.
Subscribe to:
Posts (Atom)