Wednesday, March 20, 2013

Heartfelt Creations Inspiration


Other:
Smooch Glitz - Plum Spice
Clearsnap Ink: ColorBox Plum Berry Pigment Ink; Mix'd Media Chox: Pomegranate, Sparrow, Sage
Want2Scrap Pearls
American Crafts Thickers Alphabet Stickers
Xyron- Mega Runner; Creatopia
Directions:
Stamp the Butterfly in the upper left corner of the background page, using the Plum Berry Ink. Ink the edges with the brown chalk ink. Fussy cut the leaves from the hydrangeas on the right of the paper and set aside. Take a second piece of the hydrangea print paper, and fussy cut the hydrangeas.  Add three strips of sheer ribbon down the center of the page. Cut a large decorative circle from the Spellbinders set.  Use foam adhesives to attach to the background paper, so that part of the circle goes over the flowers on the right side.  Use foam adhesives to put the cut out hydrangeas over the  base image (this will sandwich the circle between the two layers of flowers).  Stamp, cut and shape the smallest Posy Patch flowers, and randomly glue over the flowers.  Add Smooch Glitz to the centers.  Take the leaves that you had set aside, shape them and add them over the top layer of leaves.   Stamp and cut the Decorative Leafy Frame with the corresponding die. Color with the chalk inks.  Create flowers with the Vintage Floret stamps and dies to go on the frame.  Add pearls to the centers.Place on the large decorative circle, so that a little bit of the frame goes under the circle and a little bit goes under the hydrangeas.  Cut a smaller decorative circle.  Stamp and fussy cut the flower flourish  and create a dimensional flower with the vintage florets.  Place this in the lower left corner.  Add journaling to the circle.  Finish with a chipboard title and fluffy bow.

Monday, March 18, 2013

Graphic 45 2013 Design Team Audition

Let me just warn you - this is one long post! I've been waiting all year for the Graphic 45 design team auditions- and now that they are here, I've chosen some of my favorite projects to share with you; some are old, some are new, but I hope you will enjoy them all.  

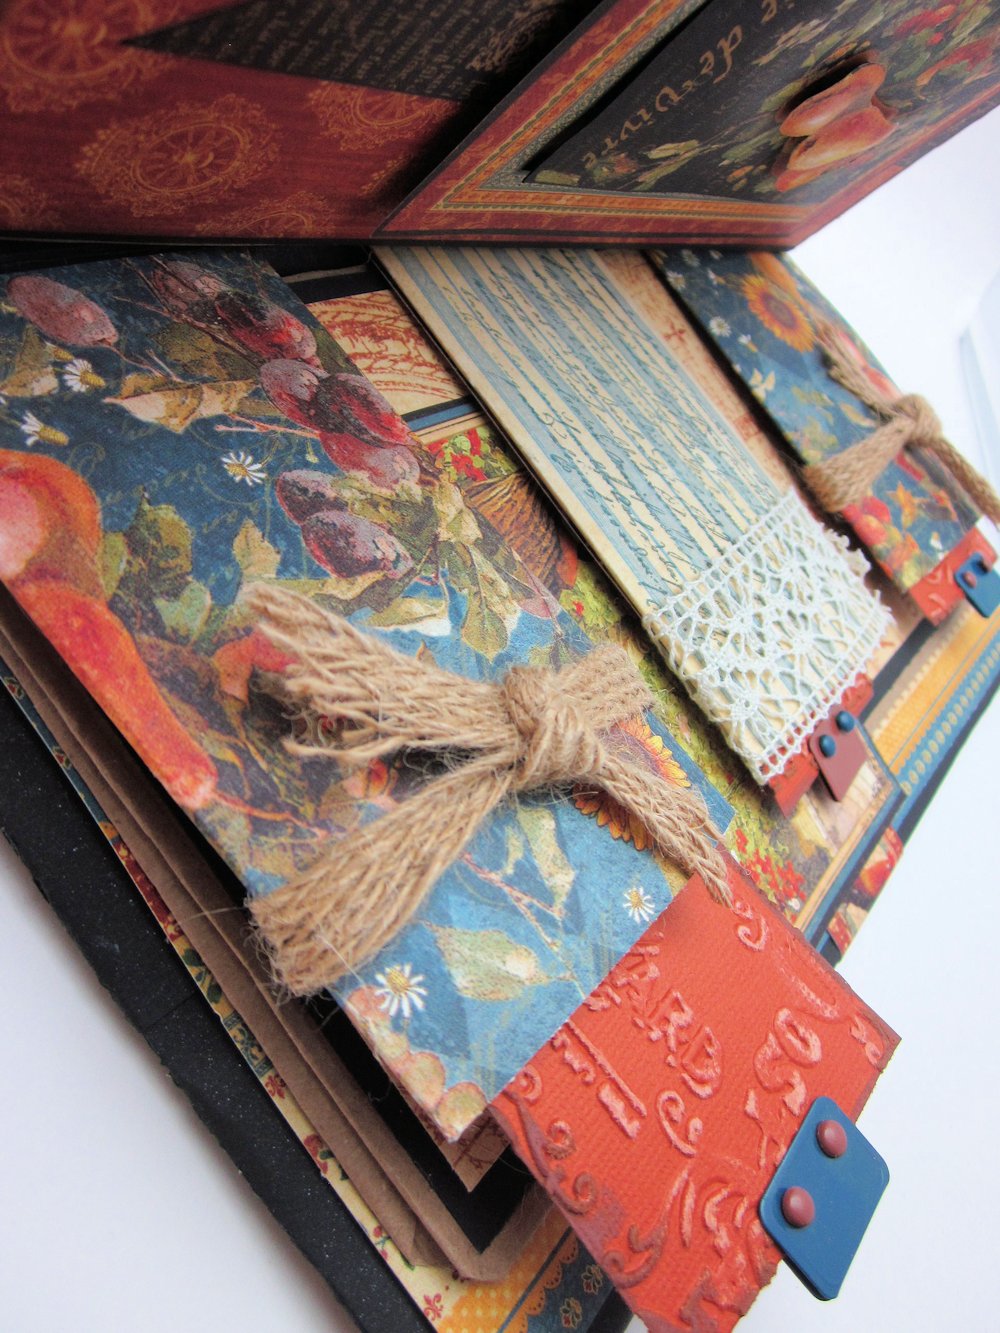
French Country Handmade Recipe Album  - This paper bag album has plenty of pockets for tucking in favorite recipes.

The altered wooden spoon on the front cover hints to the contents of the album.


(Waterfall feature)


A Ladies' Diary/ Hampton Art Stamps - Handmade Box tutorial here.


Le Cirque - Circus Tent box published in Score, Fold, Create  (Annie's Attic 2012)


Bird Song Layout


Bird Song Canvas


 A Ladies' Diary and Hampton Art/ Graphic 45 stamp. Tutorial for fancy fold card can be found here.


 Little Darlings and Hampton Art Stamps - Fancy Fold Card Tutorial is here.


Little Darlings


Tropical Travelogue Collection

.


 Graphic 45/Hampton Art Stamp - A Ladies Diary #2 Featured in the March 2013 Issue of Scrap and Stamp Arts Magazine


Bird Song - Tutorial for the handmade Alstroemeria Lily can be found here.

  A Ladies' Diary - Tutorial for handmade Buttercup flower can be found here.


Christmas Emporium and Hampton Art Stamps


An ABC Primer


 Thanks for sticking with me through this post! I hope I've inspired you to cut into those gorgeous Graphic 45 papers!


Hello Spring

 .  I am so ready for spring to really be here, I was happy to create this cheerful card. 


Graphic 45 Patterned Paper - Little Darlings
Core'Dinations Cardstock
JustRite Stampers lace Medallion Labels

Wednesday, March 13, 2013

Heartfelt Creations New Release - Sweet Serenity

We are pleased to present the Sweet Serenity Collection. This set includes a floral frame die, four new nature stamps, four animal stamps and some fun floral and typographical stamps. Leave a comment on the Heartfelt Creations blog by March 19th and you will be eligible to win the entire release valued at $113.94


Heartfelt Creations Products
Vintage Floret Frame PreCut Set  HCPC 3522
Tranquil Evening PreCut Seet HCPC 3525
Butterfly And Bunny PreCut Set HCPC 3524
Open Vintage Floret PreCut Set HCPC 3500
Mini Vintage Floret PreCut Set HCPC 3502
Decorative Leafy Frame HCD 731
Vintage Floret Die HCD 727
Decorative Lace Border Die HCD 713
Posy Patch Collection Patterned Paper HCDP1 231

 Other:
Spellbinders Timeless Rectangle
Want2Scrap Pearls
May Arts Ribbon - 1" Crochet/Velvet Center 372-1-17
Clearsnap Ink: Donna Salazar Chox - Pomegranate, Blue Jay, Sage, Petals, Sparrow;  Smooch Glitz -  Lime Twist, Firecracker
WorldWin Papers Cardstock: CutMates Springwater
Bruynzeel Aquarel Pencils
Xyron Mega Runner


Directions for 6 x 6 Card:
Stamp the Vintage Floret Frame and cut with the matching Decorative Leafy Frame die.  Stamp, cut and shape the Vintage Floret Flowers to correspond with the flowers on the frame.  Add color to the petals by sponging on pink chalk ink. Add Smooch Glitz sparkle accent ink, over the leaves and parts of the flowers.  Add a pearl to the center of the two smaller flowers. Stamp the scene onto light patterned paper, and color with Aquarel pencils.  Blend with a water brush. Cut a circle around the image to fit behind the round opening in the frame and glue into place. Add a portion of a cut from the Decorative Lace Border die on the right side.  Attach ribbon between the two die cuts.  Stamp the sentiment and cut with Timeless Rectangle die.  Leave in the die, and ink around the edges with the pink chalk in.  Add pearls at the top and bottom, and adhere to the ribbon.  Mount the card front on a 6 x6 base.

Monday, March 11, 2013

In Your Easter Bonnet


I've got a fun and different fancy fold card to share with you today! And the great part - it's super easy to make!  The outside looks like a normal card, but there's a surprise on the inside.
Supplies:
Graphic 45 Ladies Diary Paper
DCWV Cardstock
Hampton Art/Graphic 34 Ladies Diary Stamp Set 3
Spellbinders Dies: Labels 3
May Arts Ribbon 365-2-10
Clearsnap Ink
Copic Markers
To make the inside of the card, cut a base 10" x 6".  You are going to cut two slits in the paper, parallel with the long side of the paper.  Measure down and inch and over an inch, and cut an 8" cut.


I think you will understand the cuts and scores more if you look at my diagram.  The black lines indicate where to cut and and dotted red lines indicate where to score. 
As you can see, you are going to score all the way from top to bottom at the 5" mark.  At the 3" and 7" you are only going to score the one inch strips at the top and bottom.  The center portion will be scored at 1", 1 3/4", 8 1/4", and 9".  The small bands are going to pop out and the larger center section will fold in. Decorate this base as you desire.
Cut a card base slightly larger than the inside (10 1/2 x 6 1/2).  Score at 5 1/4.  Use Scor-tape to attach the folded paper to the card base, but make sure you only add the tape along the two outer sides, and horizontally along the 1" border just to the first fold on each side.  If you glue down any more, the card won't pop out like it is supposed to.
Add your card front, and you are all set!

Coming Up Soon - Happy Easter!


Easter is coming up in just a few short weeks, so I didn't want to miss the chance to share a card for the holiday.


I


Graphic 45 Patterned Paper -  Once Upon  a Spring
May Arts Ribbon - HA-5-17
Clearsanp Smooch Glitz:  Limetwist, Firecracker


Friday, March 8, 2013

Words or Whatever - WOW March Release!

Today marks the new release at Words or Whatever - WOW Chipboard. I have a layout to share with you that uses some of my favorite chippies - but I have to admit - these aren't from the new release.  My package with the new  goodies will arrive later, but I didn't want to miss out on the fun, so I just created a layout with some of the pieces already in my stash.


Doesn't this Bamboo Tree look amazing with the Graphic 45 Bird Song Paper?  It was like they were made for each other!  I colored the tree with Smooch Inks - such an easy way to add color and sparkle.


The title, Sisters & Friends, was colored in the same way.  


This photo just shows a little of the depth on this layout.  I've been making my own foam adhesives using craft foam, and running it through my Xyron Creatopia with permanent adhesive.  It is such an easy and inexpensive way to build up those layers.

Please do have a look at the Words or Whatever - Wow blog, so you can actually see the new release! There are so many fun designs this time and the rest of the design team has done a marvelous job! While you are there check out the past  design team inspiration.  Every week, one of the designers floods the blog with amazing projects, fantastic tutorials and so much chippie goodness, you really don't want to miss it.  And remember, we also have a monthly challenge.  This time, it's super-duper easy - Just make a layout and use a little Wow on it.  You have until March 15th to link up.  We hope you will play along with us.

Supplies
Graphic 45 Bird Song Patterned Papers
Graphic 45 Staples: Metal Butterfly; Metal Buttons
Words or Whatever -WOW chipboard: Bamboo Tree; Sisters & Friends
Spellbinders dies: Labels 28; Enchanted Labels 28
May Arts Ribbon: Paper Cord 420-10
Wow Embossing Powder: Cotton Candy, Angel Wings

Wednesday, March 6, 2013

Heartfelt Creations Inspiration


Heartfelt Creations Products
Antique Essentials PreCut Set HCPC 3516
Grand Portal PreCut Set HCPC 3442
Vintage Floret Bouquet HCPC 3503
Posy Patch Flowers PreCut Set HCPC 3303
Posy Patch Die HCD 701
Decorative Chateau Gate Die HCD 718
Classic Editions Paper Collection HCDP1 224

Other:
Spellbinders Mbossabilities Bricks and Bark
Copic Markers: YR23, E51, E53,E57, E59, YG91, YG93, YG95, W2, W5
Wow Embossing Powder: Primary Bark
Smooch Ink: Gold Lame
Liquid Pearls: Buttercup
Stickles: Holly
Clearsnap Ink
Core'Dinations Cardstock
Xyron Mega Runner

 Directions:
Run a 4 3/4" x 6 3/4" piece of cream cardstock through die cutting machine in the Bricks and Bark  embossing folder.  Use a sponge dauber to ink over the tops of the bricks, in various shades of brick red.  This will leave the cream to look like the mortar. Stamp vines and flowers along the right side of the brick wall. Color the leaves and flowers with Copics. Line the vine branches with glitter glue. Stamp the window image, onto patterned paper and heat emboss with dark brown powder. Cut with the coordinating die. Add metal accents to the hardware with gold ink.  Glue to brick background.  Stamp the water pump, color with Copics and fussy cut.  Use foam adhesives to mount to card. Stamp and cut Posy Patch flowers. Shape and add to the water pump and flowering vine.  Add Liquid Pearls to the flower centers. Mount to a 5 x 7" card base.