Saturday, May 4, 2013

Consider Yourself Vintage with Hampton Art


  A few days ago, I had a birthday – so I had to laugh out loud when I saw this Hampton Art/ Jillibean Soup stamp.  I would much rather think that I’m vintage (instead of just old!)
This card was easy to make, but would be perfect to have on hand for a last minute Birthday card.
I cut the fish-tailed paper banners from coordinating patterned papers, and inked all of the edges.  The center banner was adhered with foam adhesive, to pop it up a little.  Next, the ribbon was added (over the banners).
The sentiment was stamped on patterned paper, cut out, and adhered with the foam adhesives.
Super easy and super cute!

Supplies
Stamps
Hampton Art/ Jillibean Soup Irish Farm House Soup jb0012

Ink
Clearsnap:  Donna Salazar Chox (Sage)
Other Supplies
Authentique Patterned Papers (Grace Collection)
Bazzill Cardstock
May Arts Ribbon – Twill/ Chevron Stripe 382-34-17
Xyron Mega Runner
Xyron Creatopia

Wednesday, May 1, 2013

Heartfelt Creations Inspiration


I was so thrilled when I saw the Balmy Breeze collection from Heartfelt Creations, because I completely adore anything to do with the beach.  From the imagery in this set, to the sun-faded colors of the papers - I was completely in love!  I used one of my favorite pictures of my nephew at the beach, for this layout.


Heartfelt Creations Products:
Balmy Breeze Paper Collection HCDP1 232
Seascape PreCut Set HCPC 3531
High Seas PreCut Set HCPC 3527
Sand and Sea PreCut Set HCPC 3528
Surfs Up PreCut Set HCPC 3529
Antique Lantern PreCut Set HCPC 3512
Tattered Blossoms PreCut Set HCPC 3468
Tattered Blossoms Die HCD 722
Gala Glitz- Blue
Dries Clear Adhesive

Other:
Clearsnap Ink: ColorBox - Harbor Pigment Ink, Blackbird Chalk Ink; Chox - Sparrow
May Arts 5/8" Eyelet Ribbon
Words or Whatever chipboard
Wow Embossing Powder - gold
Faber Castell Gelatos
Xyron Mega Runner, Creatopia

Directions:  Distress the edges of the base paper.  Stamp the birds in the upper right corner using a white pigment ink. Cut the patterned papers to form the basic sketch shown.  Ink edges of papers and layer with foam adhesives. Stamp and fussy cut images from the Balmy Breeze sets ( anchor, palm tree, lighthouse, compass).  Layer these around the photos.  Stamp the sentiment from the Antique Lantern set in the center of the printed label. Fussy cut and adhere to the lower right corner of the photo. Stamp and cut with the corresponding die Tattered Blossoms flower.  Layer the flowers and add Gala Glitz to the centers.  Nestle around  the layered elements to finish the layout.

Monday, April 29, 2013

Expanding Box Tutorial


 I had seen this sliding box on Pinterest, from Wenche's blog, 
but I needed to convert it to inches rather than centimeters. 

 Cut a piece of cardstock 9 1/2 x 11 1/4".  With the long side against the top fence of your Scor-Pal, score at 2 1/4",     4  1/2", 6 3/4" and 9".  Turn the paper so the short side is against the top fence and score at 1/2",         2  3/4", 6 3/4", and 9"


Cut as shown.

Score diagonally, as marked with the dotted lines.

Measure 1/2" from the bottom of the diagonally scored flaps, and mark a notch.  Use something oval shaped to trace a cutting line to shape the paper like this:

Cut the rounded edges.


Cut two pieces of cardstock, 2 1/4", x 2 1/2".  With the longer side against the top fence, score at 2 1/4", so you have a 2 1/4" square.  Add Scor-tape to the folded lip of the center flap, and attach these pieces to extend the flap.  (The 1/4" flap of the small piece of cardstock will be adhered to the bottom of the box to form a pocket to slide the rounded flaps into).

Add your designer papers before assembling the box, and decorate as desired.


Supplies:

SEI Papers: Mia Bella Collection
WorldWin Papers: Cardstock
Want2Scrap Pearls

Friday, April 26, 2013

Xyron - Old to New

The Design Team for Xyron was challenged to take an older, well-loved project from our design archives and be inspired to make something new from it.  I chose a treat bag, because I always find these so handy to have for little gifts.  But since spring is here, I was inspired to give the gift of seeds, thus, I created a decorative seed packet.


And here was the original project I was inspired by - Treat Bag.


To make the seed packet, cut a piece of cardstock 10 1/2" x 8 1/2".  Score at 3 1/2" and 7" to divide the paper into thirds.  Turn the paper and score at 1" and 7".  Trim the paper as shown.


The center section is going to be the front of your packet, so fold the outer panels in towards the center.  Put adhesive on the far right panel, and adhere to the back of the far left panel to form the packet. 

At this point, ink all of the edges, and add decorative paper to the front and back of the packet.  Fold the bottom tab up to the front and adhere with the Xyron Mega Runner.  Punch holes on the upper tab and the packet below it to run a ribbon tie through it.  Add stamped designs to finish decorating.

Supplies

Wednesday, April 24, 2013

Heartfelt Inspirations

It's Wednesday - so it's time to share another Heartfelt Creations project using the Balmy Breeze collection.


Heartfelt Creations Supplies

Balmy Breeze Paper Collection HCDP1- 232
Decorative Lattice Swirl Die HCD 733
Decorative Flower Pot Die HCD 732
Tattered Blossoms Die HCD 722
Beautiful You PreCut Set HCPC3532
Waters Edge PreCut Set HCPC3530
Timeless Lace PreCut Set HCPC 3508
Tattered Blossoms PreCut Set HCPC3468

Other:
Words or Whatever Chipboard banner
WorldWin Papers - cardstock
Want2Scrap Pearls
May Arts 3/8" Ribbon - GC-8-16
Stickles
Clearsnap Chox Ink -
Wow Gold Embossing Powder
Xyron Mega Runner

Directions- Make a 6 x6 easel card. Ink and distress the base layers (5 3/4" x 5 3/4") Stamp greenery on the upper base page, using the Waters Edge stamp. Cut the flower pot from patterned papers using the HC die. Ink the edges. Use foam adhesive to attach to the card. Stamp and cut with the corresponding die the Tattered Blossoms. Shape the flowers and attach to the flower pot.Use pearls for the flower centers. Add a decorative lattice swirl behind the flowers. Stamp and cut the leaves. Nestle ribbon bows into the floral arrangement.  Use a chipboard banner to decorate the bottom layer of the card.  Color with ink, let dry and stamp the Timeless Lace stamp with Versamark ink onto the chipboard.  Heat emboss with gold powder. Add pearls and ribbons to finish decorating.

Monday, April 22, 2013

Hampton Art and Echo Park Team Up!

 Just thought I would let you know that Hampton Art and Echo Park have teamed up to show off their new joint venture stamps!  If you head over to the Hampton Art and Echo Park Blogs and leave a comment, you can enter to win one of several prize packages.

 
Giveaway: For a chance to win either a stamp prize from Hampton Art or one of three collection kits from Echo Park Paper, please continue on the blog hop leaving a comment on each blog. Winners will be selected and announced both on the Echo Park Paper and Hampton Art blogs on Monday, April 29th. All comments are due by Sunday, April 28th at midnight EDT to qualify.


Here is my card that is up over at the Hampton Art Blog -


I used the All About a Boy stamp set, and the Off the Record 2 paper collection from Echo Park.   Be sure to check out the rest of the creations on the company blogs.

May Arts Ribbonistas Earth Day Hop

 Welcome to the May Arts Ribbonista's Earth Day Blog Hop!  We hope that you will find lots of inspiring ideas to help you celebrate today.


I wanted my Earth Day project to be something that showcased recycling - and also something that was created using some of our natural fibers.  I chose to make a decorative bottle (hence the re-purposed), wrapped with green jute.

I made yo-yo flowers from fabric to add to my bow. and finished everything off with a tag.

May Arts Ribbons Used
SP16 Cord/Burlap


Faux Burlap  445-15-32


Partners in Craft Supplies Used
 Basic Grey - Fabric
Core'Dinations: Cardstock and tag
Dreamweaver Stencils: Brass stencil, Embossing Paste, Metallic F/X

Other Supplies Used
 Cheery Lynn Designs: dies
Fabri-tac Glue
Clearsnap Ink

You know our ribbon hops always have awesome prizes - and today is no exception.  Leave as many comments as you would like along the hop for your chance to win this prize package -


Now for the rest of the Hop:
Lalo Ik

Sisters and Friends Card

Anyone who knows me, knows that my sister is my best friend - so I really had fun putting this card together.  


Papers:
Graphic 45 - The Secret Garden Collection
WorldWin Papers - Cardstock
Xyron Mega Runner, Xyron Creatopia
Art Institute Dries Clear Adhesive

Thursday, April 18, 2013

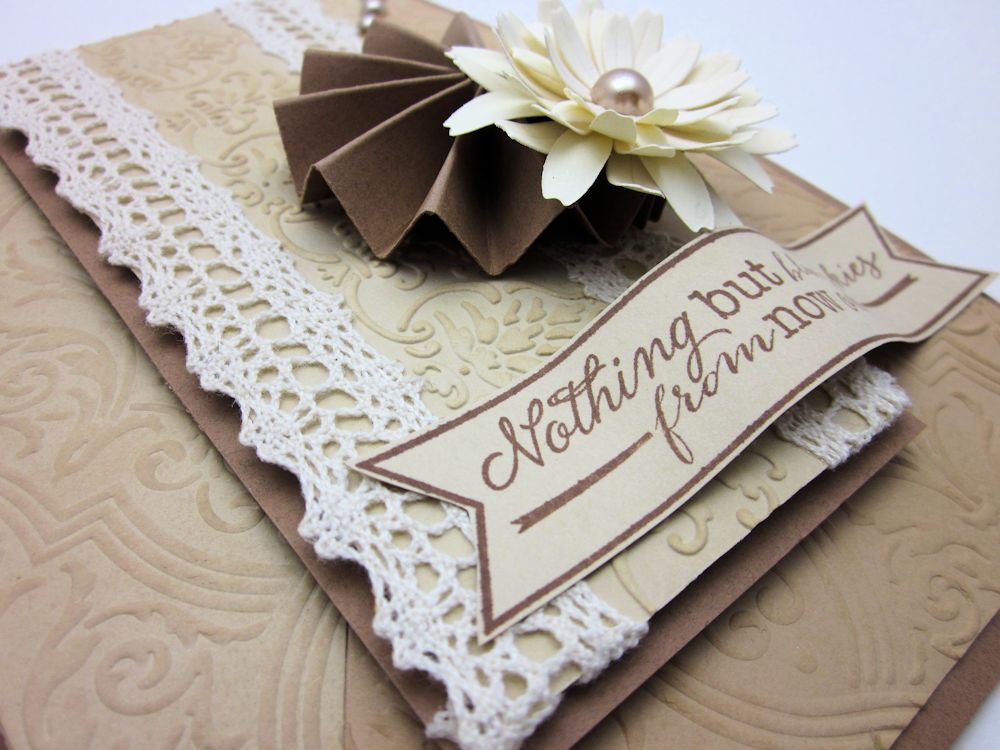
Nothing But Blue Skies


I love creating monotone cards with lots of texture - there is just something quite elegant about the look.  This card really shows off the great color gradation that is available with WorldWin Cardstock.  I used four different neutral shades, and they blend so well.


WorldWin Cardstock:
Anna Griffin/ProvoCraft Embossing Folder
Want2Scrap Pearls

Wednesday, April 17, 2013

May Arts Ribbon Organization Blog Hop & Giveaway


Welcome to the second day of the May Arts Organization blog hop!  The Ribbonistas are sharing ways to store all of that gorgeous ribbon that we love.  I have to tell you, this hop kind of sent me into panic mode, because I was afraid if I shared pictures of my studio, a camerman might show up from Hoarders, and want to shoot an episode!  But, luckily, I've been motivated to work on some storage solutions -  and I can tell you, I will be stalking the rest of the team's blogs to see what great ideas they came up with!  Also, be sure to leave plenty of comments along the way, for a chance to win 3 spools of your choice of May Arts ribbon.


I like to organize my ribbons by color (mostly) - because, I am generally looking for a specific color to go with a project.  My exception for this is my silk ribbon.  I keep it all grouped together, because I will generally work with it together.


I have CD storage boxes arranged on a wooden book shelf that the shelved are sloped towards the middle (like a V).  I can see into the boxes of ribbon while they are on the shelf.  My silk ribbon is just in it's own little box.
 For shorter lengths of ribbon, not on the spool, I use a large safety pin, and group similar types of ribbon together, and hang this from my baker's rack, that is right beside my ribbon shelf.  This seems to work better for me than having them all stuffed in a big box (which is how it was before the idea of this hop!)


Here is the rest of the hop line-up.  I hope you will be inspired to organize your ribbon stash.


Monday
Candy Rosenberg
Charlene Driggs 
DeeDee Catron
Emily Lanham
Erika Taylor


Wednesday
Erin Thiem
Gini Williams Cagle
Jen Shears
Jenifer Cowles
Karen Baker


Friday

Lalo IK
Leah Farrar-White
Sandy Allnock
Virginia Fynes