Showing posts with label Simple Stories. Show all posts

Thursday, July 17, 2014

May Arts, Simple Stories and Xyron - Blog Hop Day Four

Welcome to fourth day of the May Arts Ribbon, Xyron and Simple Stories Blog Week. So far, the design teams from these three companies have had some incredible projects!  This is my second post of the hop for May Arts, but if you missed my Xyron post, you can see it here.. Be sure to check all of the blogs to see the daily line-ups and for more details on yummy prize packages.

I took an inexpensive craft frame and used the Story of Us paper line from Simple Stories to give it a makeover.  I ran the frame through my Xyron Creatopia, and covered it with the patterned paper.

The doily was printed on the paper, but I added the May Arts metallic trim and glued it down using the Xyron/Teresa Collins Clear Hold Adhesive.


Supplies
May Arts Ribbon
Xyron
Simple Stories

Monday, July 14, 2014

May Arts, Xyron and Simple Stories - Day One Blog Hop


Welcome to day one of the May Arts Ribbon, Xyron and Simple Stories Blog Week. The next few days promise to inspire you with fantastic ideas from all three design teams.  This is my first post of the hop for Xyron, but I will be back on Thursday with another project for May Arts. Be sure to check the blogs to see the daily line-ups and for more details on yummy prize packages.


Today's project is a faux canvas - and I'm going to show you how I created it.  I've found that sometimes if you add much media to a scrapbook layout, the page warps or curls - so this simple trick not only gives you more of a canvas look, it also solves this pesky problem.

1.  Begin with a textured cardstock (WorldWin ColorMates Textured Denim - Aqua Denim).  Use a household sponge to brush on a thin layer of gesso.


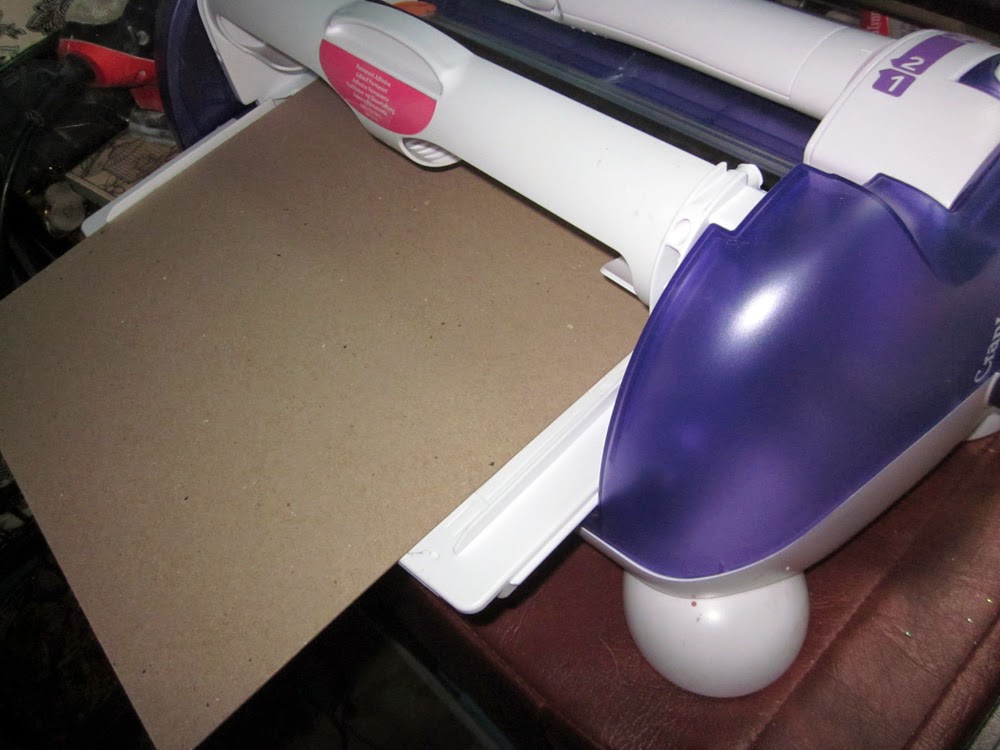
2.  Run a piece of 12 x 12 chipboard (WorldWin Heavy Chipboard) through the Xyron Creatopia to apply an edge to edge layer of adhesive.


3.  Carefully line up the edges, and  lay the cardstock  down on the chipboard.

4.  Stamp background images (Creative Embellishments) using watermark ink, and heat emboss with white powder.


5.  Arrange the elements of the layout as desired, using the Xyron/Teresa Collins foam adhesives when dimension is needed.

6. Use the Xyron Double Sided Tape to adhere the ribbon elements.

7.  Cut 3 chevrons from the printed paper ( Simple Stories - Hello Baby) Score the center of each.


8.  Use a scrap piece of plastic cross stitch canvas as a guide to pierce evenly spaced holes for stitching.
9.  Use twine to handstitch the chevrons.  Cut a plain cardstock chevron, and apply adhesive using the Xyron 5" Creative Station.  Place this on the backside of the chevrons, for a place for hidden journaling.
10.  Use double sided tape, down the spine of the chevrons to add to the layout.

11.  Fussy cut the title from the patterned paper, ink the edges and use foam adhesives to apply.

12.  Paint over the May Arts Sequin Heart with gesso to tone down the color and add to the center border.
I hope you have enjoyed my project - and remember to check out the rest of the inspiration this week!

Supplies:
Xyron:
May Arts Ribbon
Simple Stories
Zva Creative
CR-05CA-133
WorldWin Papers
Creative Embellishments


Challenges
Once Upon A Sketch - July- (Journaling theme - numbers - Mine is behind the chevrons)

Scrap Around the World - July Mood Board ( Colors, Pom-pom trim on the lampshade)
Mixed Media Monthly Challenge #2 - Around the House (sponge, plastic canvas)


Sunday, January 27, 2013

Scor-pal and Simple Stories Week

This week the Scor-pal Design Team had the privilege to work with products from Simple Stories.  I know everyone was so excited when we got our goodie packages.  I recieved the Take A Hike Collection - and as soon as I saw it, I knew I wanted to create a paper backpack box that I had seen awhile back on Splitcoast Stampers.

 
May Arts Ribbon Paper Twine 420-33
Epiphany Crafts Round Epoxy
CTMH Velcro Dots
 
 
I used a tutorial designed by Mary Arima - and it's very clear and easy to understand, so I will just let you refer to her original post on Splitcoast Stampers.
 
 
When you are working with printed templates, such as the one used for this project, I would suggest using small metal clips to attach your template to the designer paper.  This will keep anything from slipping and will provide a much more accurate cut.


As soon as I finished this project, my nephew took off with it, and promptly put it on the back of one of his stuffed animals!
 
 
I used the printed bingo card from this collection to make a small tag that fit perfectly into the backpack.  Just the perfect little note to tuck inside.
 
 
The other little tip that I can share with you, is that I used small adhesive velcro dots for my closure on the box.  It also works great to keep fancy fold cards shut.
 
I hope you had a chance to see all of the other projects that the design team created this week - if not be sure to head over to the Scor-Pal blog and take a look.  As always, there is blog candy involved - so don't miss out!

Monday, June 11, 2012

Masculine Birthday Card


My boss' s birthday is coming up in a few weeks, and I didn't want to wait until the last minute to get his card made.  So, when I saw that the JustRite Stampers challenge this week was masculine cards, I thought this would be the perfect prompter for me.


He is going to be 36, so I took some Tim Holtz Ruler Ribbon, folded it, so that the 3 and 6 were beside each other, and stapled it in place.  I took the postage stamp die from Spellbinder's/ Becky Fleck's Office  Supplies, and cut away the embossed center rectangle and used this to frame my "36".  The Happy Birthday sentiment is from JustRite's Always and Forever Medallion Labels set. My patterned papers are from Simple Stories, and my kraft cardstock from Worldwin Papers.


The main image is from JustRite's Oceanside Oval Medallion Labels set.  it was cut and framed using the Spellbinders/ JustRite Oval Medallion Label die. The image was colored with Copics. I also cut a tattered page border from the Office Supplies set, to go under my paper tag layer.  I inked the edges of all of my papers with Distress Ink, and finished the card off with a manly jute ribbon bow.

Challenges:
Mojo Monday: Sketch
JustRite Friday Challenge: Vintage Masculine

Tuesday, April 17, 2012

The Craft's Meow Guest Designer Preview Day One

Welcome to the first day of previews for the Craft's Meow Stamp Release!  I am thrilled to be guest designing for them this month, and have lots of goodies to show you this week! I can't  
share with you the entire stamp sets until Saturday...so if you want to see more, you may want to check out the projects on the design team's blogs!  Also, if you want a chance to win one of these sets, be sure to leave a comment on the Craft's Meow Store blog by 9:00pm PST each night of the preview.


the craft's meow.
 
 
The first stamp set that is being previewed today is Nature's Beauty.


I bet I've got your attention now,  huh?  This is a gorgeous set that just makes me smile! 


Craft's Meow Nature's Beauty Stamp Set
Cheery Lynn Designs Dies
DCWV Coral Couture Paper
The Twinery Baker's Twine
Wow Embossing Powder


Next up, is a glimpse from the Travel Time Set.  This is such an adorable set, that I'm sure I will use over and over again!


Craft's Meow Travel Time Stamp Set
Simple Stories Patterned Paper
Wow Embossing Powder

This party is going on all week long! We will have previews through Friday, and then Saturday, we will show off all of the new sets in their entirety with a blog hop, where you could win every stamp in this release!

Thanks for stopping by!

Sunday, March 4, 2012

That Is Not a Phone


I was looking through my attic and found an antique phone, that actually still works (well sort of!) I took it downstairs to let my nephew try it out. He of course had no idea what that silly thing was, he certainly didn't think it was a phone! It also gave me the perfect opportunity for a cool layout.

I made a mold of the telephone dial using Amazing Mold Putty and cast it with the Amazing Casting Resin. I painted it using Creative Inspirations Paints. What was really cool, was that I had a Unity Stamp set that had the telephone numbers, that fit perfectly under my dial. Talk about serendipity!

So don't be afraid to come up with your own "out of the box" embellishments. Who knew a telephone dial would grace the pages of a layout?!

Friday, February 24, 2012

Friends With Flair Friday Hop

It's Friday, so that must mean it's time for another Friends With Flair hop for all of the Unity Stamp lovers out there!

This sweet layout is of my nephew- who is now six years old. I can't believe how quickly he is growing up. When I saw this paper pack, Baby Steps from Simple Stories, I had to do a baby layout! I think it so awesome that Unity has stamps that coordinate with the motifs from the paper. I stamped and embossed the doilies under my clusters, so they just peak out. I was also able to add a stamped hot air balloon, so that it gives the appearance of another balloon in the distance.

Epiphany Crafts Bubble Cap Round 25
Epiphany Crafts Bubble Cap Round 14
Epiphany Crafts Studio Tool Round 25
Epiphany Crafts Studio Tool Round 14
Simple Stories Patterned Paper, stickers, acetate
Wow Embossing Powder
Unity Stamps
Close To My Heart Rub-ons
Glue Arts Perma- Tac

Challenges
Unity: Friends With Flair

Tuesday, February 14, 2012

Home Is Where the Heart Is


Happy Valentine's Day! I hope you will be spending the day with those that you love! I really haven't gotten tired of making Valentine's cards this year, but I guess this will be my last one for awhile.
Link
I have so much fun building up layers on my projects - and this one started out with the bingo card from Simple Stories. I wanted to use the Unity stamp in my center, but needed a pop of color to help it stand out. I used a Tattered Angels embossed chipboard frame and painted it lightly with Creative Inspirations Paint in Autumn Wheat. Then I added just a tiny bit of Burgundy paint on a paper towel, and lightly rubbed over the frame. This really brought out the embossed design quite nicely.

The heart on the stamp has a polka-dot design, so I decided to add a tiny pearl over each of the dots to finish it up.

Challenges
Ippity: L.O.V.E. challenge

Friday, February 3, 2012

Friends With Flair Friday Hop

Link
I absolutely love the new release of Spellbinders dies - and since I design for Scrap-Mart, I'm one of those very lucky girls who ends up with some of these brand new releases early! So today, I thought I would show off some of the dies from the Damask Accents and my Unity Stamps from the Simple Stories line ( the patterned paper is also Simple Stories - Baby Steps).

I stamped the flower/doily from Unity's Generations set, using Wow! Embossing powders in Honey and Paprika. I fussy cut these out, but wrapped parts of my Damask cuts around the flower. The leaves and border are also dies in this set. I have to tell you, the Damask Motifs and Accents were my very favorite sets this go round (although, I have a list a mile long of all of the sets I have to have!) Scrap-Mart is accepting pre-orders now, and the dies are expected to ship the end of this month. So what are you waiting for? Head over there now!

Challenges:
Unity: Friends With Flair Hop
The Craft's Meow: sketch