Friday, June 8, 2012

Beauty In All Things


It's a beautiful summer day, here in the mountains of North Carolina, and I thougt I would share a happy card with you.  I've got lots of projects that I'm working on for the Summer CHA, but just wanted to sneak a fun card in for you today.

I hope you have a great weekend!

Patterned Papers: Pink Paislee
Cardstock: WorldWin Papers
Stamp: Unity Stamp - Kit of the Month June 2011
Cheery Lynn Designs Dies: Horizon Coved Rectangle Reflections Die, Border Carnivale
Wow Embossing Powder
Spellbinders Labels Five
Want2Scrap Nestabling
May Arts Ribbon

Challenges:
Friends With Flair - Friday Hop
Unity - KOTM Sketch Challenge
Simon Says: Diamond Jubilee
Unity Challenge: Stripes
Stamp and Show: Texture

Thursday, June 7, 2012

Wow! What a Cute Gift


Recently, I saw the cutest altered mason jars on Pinterest.  Someone had glued real doilys on the outside of them.  This got me thinking of a way to create something similar, without having the bulk of a real doily. 


So, I die cut a doily using my Cheery Lynn Nautical Wheeler Doily die and adhesive vinyl.  I stuck this to my jar, to use as a mask.  Next, I took my Versamark pad, and inked over the doily.  I sprinkled Wow Opaque Bright White Embossing Powder liberally over this, and heat set it. 

Now, there are a couple of things to be aware of when trying this technique...First - the glass will get very hot. So make sure, you have it sitting on a surface - don't try to hold it.  Also, areas if the vinyl will curl up. Don't worry, your embossing powder will stay stay exactly where you want it to.


After all of the embossing powder is melted, just peel off the stencil, and decorate with ribbons and flowers. 

Wednesday, June 6, 2012

Vintage Chocolate Doily Card


I hope your week is going great! Today, I've got a card to share with you that is made with Kaisercraft's Sweet Nothings line.  To me, this card looks like it needs a yummy box of chocolates to go with it, but the good thing is, the card doesn't have any calories.  I really enjoy using different textures togther, and the show-stopping bow is made with lace, crinkle ribbon, organza, and twine - topped with a vintage button.  I added French Knots around the holes on the Cheery Lynn Designs doily, made with the same twine, to help tie it all together (pun intended!)


Kaisercraft Patterned Paper:  Sweet Nothings
Kaisercraft Rub Ons: Madame Boutique (RB949)
Worldwin Cardstock:  Ivory ColorMates
Cheery Lynn Designs Dies:  French Pastry Doily, Lace Corner Deco I
Epiphany Crafts Shape Studio Accessories Bubble Caps Round 25
May Arts Ribbon
Madeira Thread
Ranger Distress Ink: Vintage Photo
Other: Linen thread, vintage button
Tools: Grand Callibur, Basic Grey Rub-On Roller Stylus Tool, Sewing Machine, Epiphany Crafts Shape Studio Tool Round 25
GlueArts Glue Glider Pro – Perma Tac; U Cut It Dimensional Adhesive; Extreme Tac Adhesive Squares

Challenges:
Sweet Stamps: For Dad

Tuesday, June 5, 2012

Me at 45


The challenge this month at Once Upon a Sketch has to do with birthdays, and many of their DT chose to highlight their current age - and I thought that was a great idea.  I wrote about who I am at 45 on a tag, that slides into a pocket underneath my Horizon Coved Rectangle die cut.  You can see the journaling card pulled out in the picture below.


Creative Inspirations Paint – Beige

Art Institute Glitter – Ruddy Red
Art Institute Dries Clear Adhesive and Ultrafine Metal Tip Applicator

Kaisercraft Rhinestones
Ranger Distress Ink: Barn Door, Vintage Photo, Black Soot

Bo Bunny Patterned Paper, stickers:  Serenity
Worldwin Cardstock:  Kraft

Madeira Metallic Thread

Tools: Grand Callibur, X-acto Tool, Sewing Machine

1/8 Scor-Tape
GlueArts Glue Glider Pro – Perma Tac; U Cut It Dimensional Adhesive; Extreme Tac Adhesive Squares

Challenges:
Once Upon a Sketch: Birthday Sketch
Simon Says: Anything Goes
Stamp and Show: Show Some Texture

Monday, June 4, 2012

Vintage Card with Hampton Art and Cheery Lynn


I love everything vintage - so I was really pleased with the results of this card. The stamps, dies and papers all worked so great together.  


Cheery Lynn Designs Dies
Hampton Art Stamps
  Butterflies Are Free IC0153
Clearsnap
Donna Salazar:  Honey Mix’d Media Ink
Colorbox Chalk Ink: Dark Moss, Warm Red, Blackberry, Dark Brown
Colorbox Pigment Ink: Curry
Colorbox Archival Dye: Mudslide
Smooch: Log Cabin
Simple Stories papers: Generations
Worldwin Cardstock: Kraft
Want2Scrap Pearls
 GlueArts
 Glue Glider Pro – Perma Tac
 U Cut It Dimensional Adhesive


Designer Notes:

1.      Stamp the image twice using the archival ink.

2.      Shade the background of one of the images using Honey  (center) and Dark Moss (edges).

3.      Color the flowers with sponge daubers and Warm Red, Blackberry and Curry.

4.      Ink the edges with Dark Brown.

5.      Spritz with Log Cabin Smooch.

6.      Using the second stamped image, cut out the area to highlight.

7.      Ink the background with the Honey.

8.      Color the flowers as before.

9.      Use U Cut It foam adhesives to raise the round cut-out shape.

10.  Add pearls.

11.  Ink all pieces of patterned paper using the Dark Brown.

Challenges:
Simon Says: Anything Goes
Great Impressions: Die Cuts
Pan Pastel UK: Something Vintage
Hotshot Craft Blog: Die Cuts

Sunday, June 3, 2012

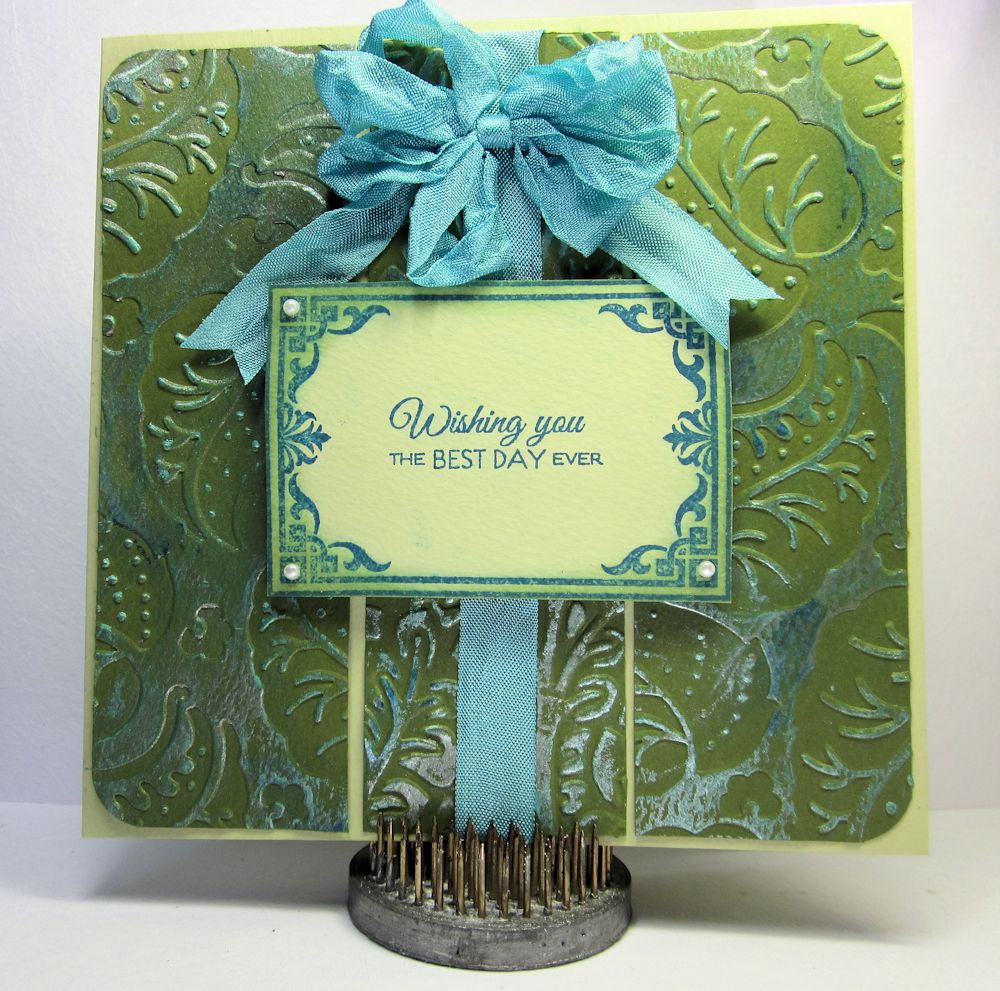
Wishing You the Best Day Ever


I love embossing! and I have a really easy card to share with you today...but it just goes to show how some beautifully detailed embossing, really dresses a project up.  I started with CutMates Cardstock from Worldwin Papers, and embossed it with the Flora M-Bossabilities folder from Spellbinders.  I then took several shades of Faber-Castell's Gelatos, and rubbed over the raised areas.  This added some subtle shading and interest. The Stamp is from Verve, and I added Distress ink around the edges to finish it off.  As my card says, I wish you the best day ever!

Challenges:
Creative Inspirations Paint: CAS
Simon Says: Anything Goes

Saturday, June 2, 2012

Using Ribbons In Mixed Media Pieces


I love using ribbons - in fact, most of my projects are going to have ribbon somewhere on them. But, today, I've got a fun new way to add ribbons to your mixed media projects.

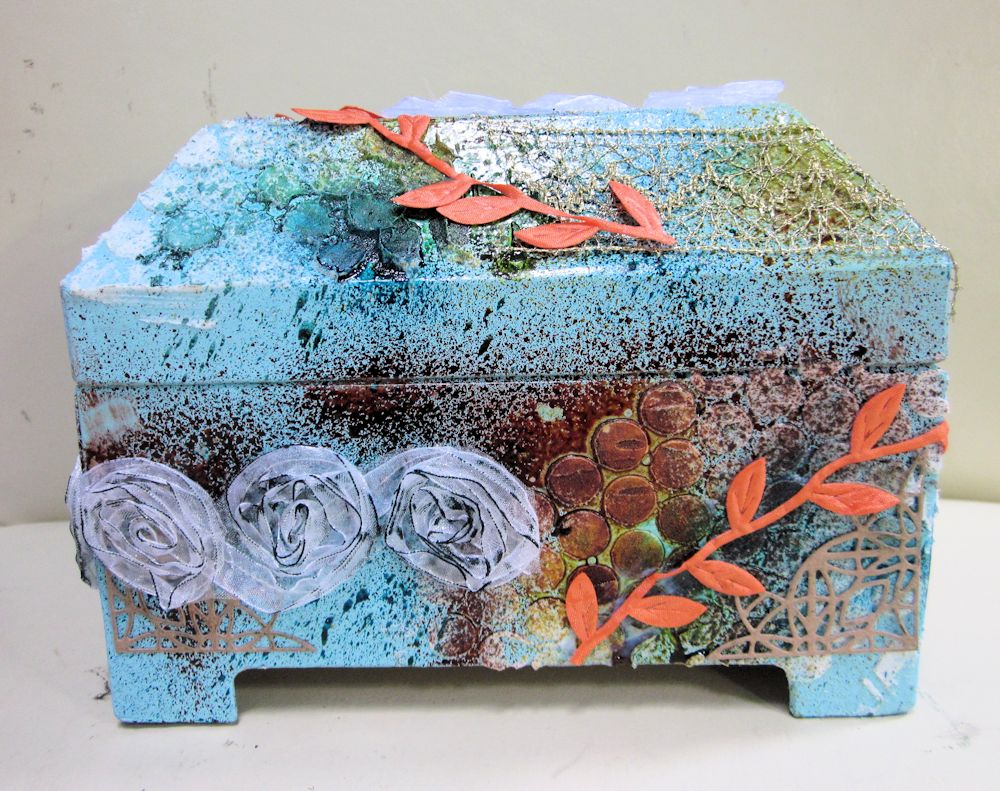
I found this paper mache box at a local craft store and loved the shape of it.  I spray painted it a pretty turqouise blue, but it was way too shiny, and just not the right base for what I had in mind. So, I decided it was time to pull out all of my mixed media goodies and go to work.

I went through my ribbon stash and found some very textured ribbons.  It doesn't matter that they clash with each other, because they are going to be covered over. I used May Arts Leaves, May Arts Sheer Woven Rosettes, and May Arts Metallic Crochet.


I used Modeling Paste and stencils, and added the first layer of texture.  After this, I added some die cuts as well. I spritzed the whole box with Smooch Spray, to give my color depth and added my ribbons.


Looks pretty scary right now, huh?


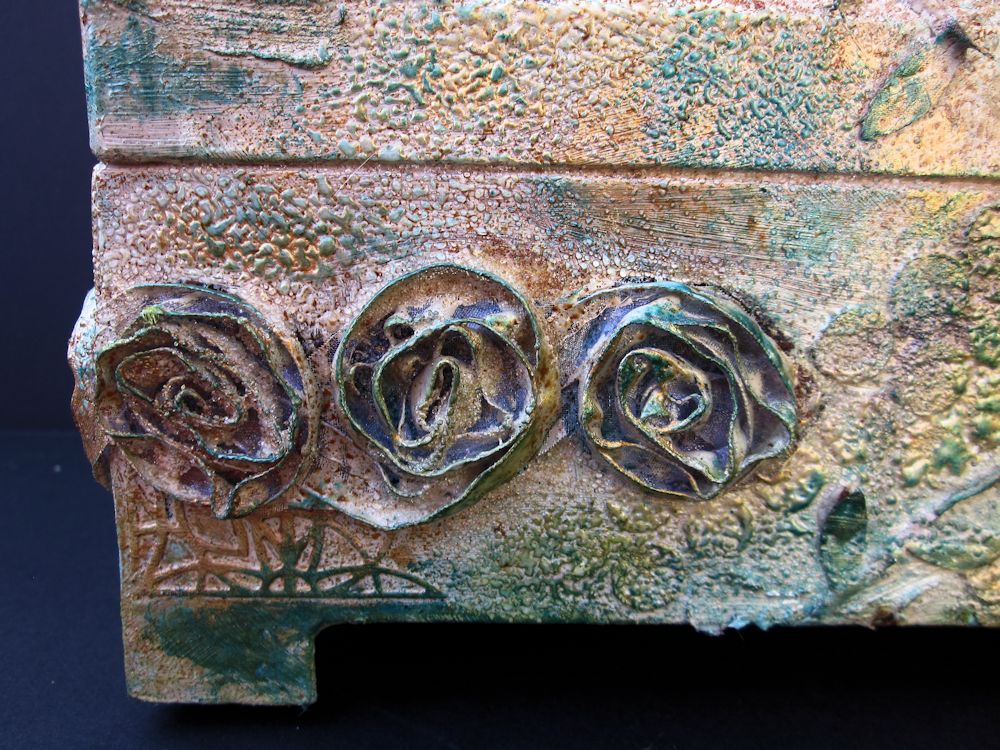
I painted over the entire thing with some inexpensive acrylic paint, letting little bits of my colors show through.  While the paint was wet, I sprinkled Wow Clear Gloss Ultra High embossing powder over it, and heat embossed. It added so much wonderful texture! Some of the ribbons (especially the organza flowers), reacted to the heat gun.  This just added more interest to the piece.


I rubbed Viva Decor Gold over some of the raised areas, sponged on more Smooch Spritz, and ended up with a very layered piece.


Challenges:
Simon Says: Anything Goes

Tuesday, May 29, 2012

Tropical Travelogue Card with Hampton Art


Did Memorial Day Weekend get you in the mood for summer? I know I am - so my card that I have to share with you today has a perfect tropical mood too! Hampton Art makes the most wonderful stamps that coordinate with Graphic 45 papers - and this is one of the latest...Tropical Travelogue.  Now, I just need to find my tropical getaway!


Hampton Art Stamps:  Graphic 45 Tropical Travelogue 2  IC0134

Clearsnap:

Donna Salazar Mix’d Media Ink: Honey, Jasmine

Colorbox Pigment Ink: Aqua

Colorbox Archival Dye: Pinkolicious, Tree Frog

Smooch: Pearlized Top Coat
Graphic 45 papers: Tropical Travelogue

Worldwin Cardstock

Spellbinders Dies: Creative Book Pages 2

Robin’s Nest Dew Drops

Tools: Spellbinder’s Grand Calibur

Adhesives: GlueArts Glue Glider Pro – Perma Tac; U Cut It Dimensional Adhesive


Designer Notes:

1.      Stamp the Flamingo image using the Pinkolicious and heat set.

2.      Shade the background with a sponge dauber using Aqua. Tone it down by adding a bit of Honey and Jasmine.

3.      Color the bird with Copic markers and then add the Smooch Pearlized Top Coat to highlight.

4.      Ink the edges with Tree Frog.

5.      Stamp the Postmark image using the Pinkolicious and cut it out.

6.      Use the Pinkolicious to ink the edges of lighter colored patterned papers.

7.      Ink all pieces of patterned paper using the Dark Brown.


Monday, May 28, 2012

Felt Flowers Tutorial with Cheery Lynn Designs Dies


You know making flowers is one of my favorite techniques - but they don't always have to be made from paper.  Today I have a tutorial to share with you to use your Cheery Lynn Designs Dies and felt to create gorgeous blooms.  And, these flowers don't have to stay just on your paper projects.  Imagine these on your favorite sweater, a cute summer straw hat or purse.  The ideas are endless!

So, let's get started!

Grab some felt (I used  wool felt, but feel free to use the acrylic felt found at any craft store). In order to get a nice clean cut, place a piece of cardstock, then your fabric, then your die.  Having the paper under the felt gives the die a little more "tooth" to cut.  I used the Large, Medium and Miniature Rose dies for my flower.  I also placed my die to the far left of my cutting plates, because I've found on my machine, this is the area with the most pressure.


Cut 2 Large, 2 Medium, and 1 Miniature Rose for each flower.


Instead of stitching through the whole flower stack at a time, add one layer at a time, and stitch with a cross stitch, to secure the petals adjacent to each other.


Continue adding layers, one at a time, until the stack is complete.  I sewed seed beads, one at a time for my center, but you could also add French knots, or other decorative embroidery stitches. 


For the bud, I just took one of the large roses, and stitched the petals together, and then added a green felt calyx around the petals.

I'd love to see your projects that you create using these techniques!  The new challenge is also up - For the Grad - so get those projects in for your chance to win a $20 gift certificate!

Cheery Lynn Designs Dies
Patterned Paper, Crate
Cardstock, Worldwin Papers
Ink, Ranger - Distress

Challenges:
Catered Crop: Felt

Friday, May 25, 2012

So Blessed


Welcome to the weekend! I have an elegant card to share with you today.  I love the elegant look of black and cream together - and thought this October Afternoon paper, would make a lovely statement.


Challenges:
The Craft's Meow:  Sketch